2025 - I've just completed a WEBSITE REVAMP! Everything is still here but may be in a slightly different place where than you left it and there's also lots of new sections, so if you're having trouble finding something in particular or you spot something that's not working as it should, please do get in touch and I'll do my best to help!

Family Tree SVG Template
Make a Shadow Box
- Home
- SVG files
- Shadow Box SVGs
- Family Tree Shadow Box
Beautiful family tree SVG template to make a shadow box with your Cricut (or similar cutting machine) - celebrate family ties and create a heartfelt artwork to cherish in your own home or to gift to a loved one...
I'll show you how to make it from layered cardstock using my hand-drawn family tree design.
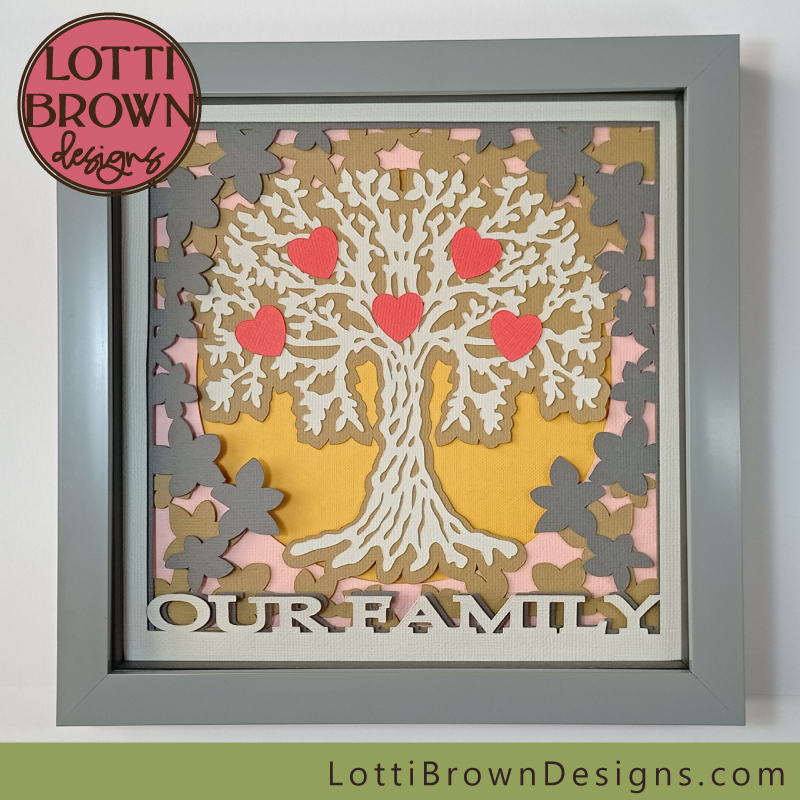 Family tree shadow box template
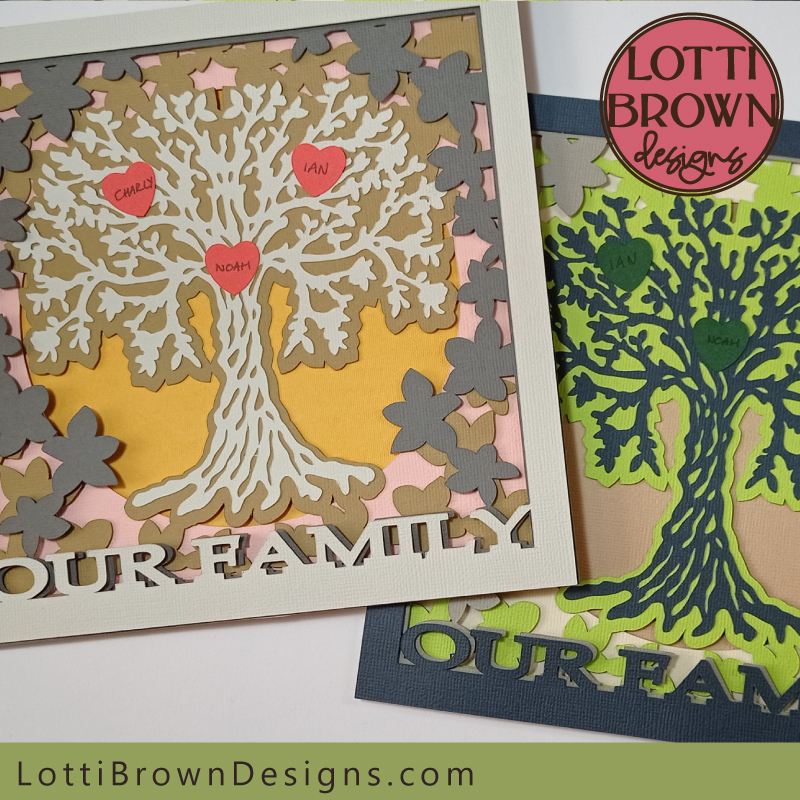 Personalize your family tree shadow box with your own family's names
Get the family tree SVG template in my store here...
SVG, DXF, EPS & PNG file formats are included
For personal & small-business commercial use
Physical (craft) products only - no digital products or sharing
Make a Family Tree Shadow Box
My family tree SVG shadow box template is perfect for making a thoughtful gift for a happy family - or make it for your own family so that you can fill your home with love...
It's easy to make, too, made up of layers of card stuck together with double-sided sticky tabs to make up the shadow box effect that gives a lovely 3D look to your creation.
I've made it, here, in two different colour versions, so you can opt for either when you make it (the template is the cream, pink & yellow version) - or you can also choose to go with your own custom colours - and I'll give you some hints for this too.
You can also personalize the projects using the hearts - I've given you five to use but you can easily make more if your family is larger. They are completely separate from the rest of the shadow box template, so that you can use as many as you want - or choose to resize them if you need them larger or smaller. You can position them anywhere you'd like, too.
I've written on mine by hand, with pen, but you could use your Cricut to write on them if you have a Cricut pen.
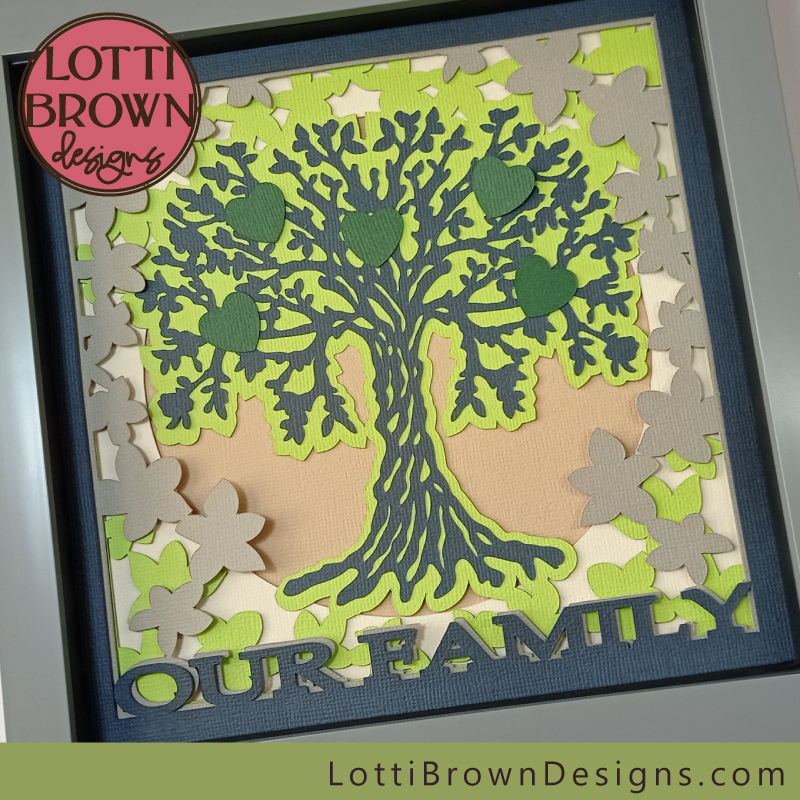 Gorgeous greens! Family tree shadow box project
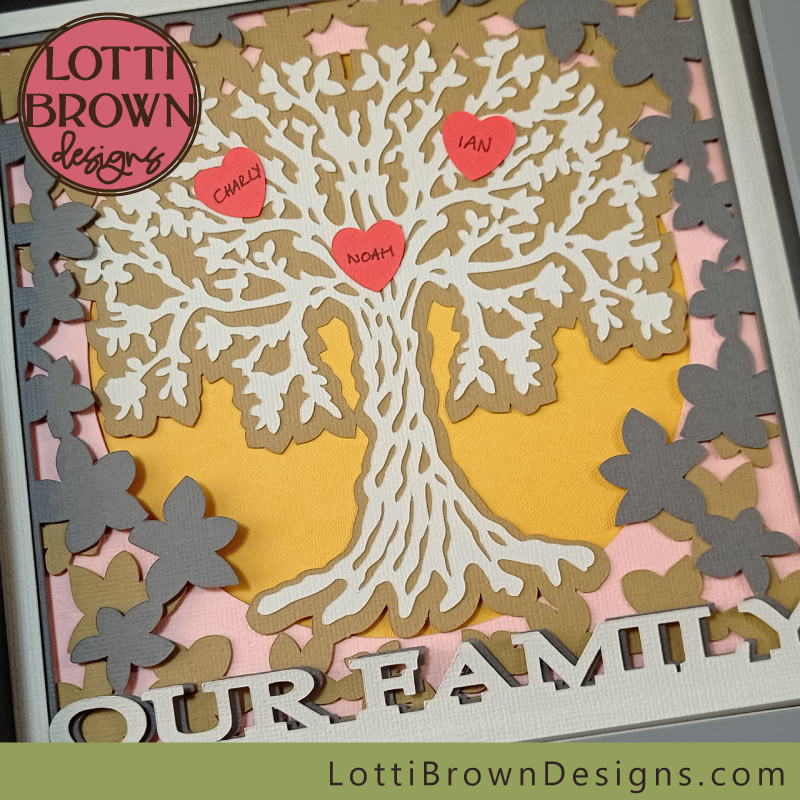 I've written on the hearts by hand on my family tree!
To make the family tree project, you will need:
- Cardstock - in 6 (or 7) different colours. I've used Sizzix textured cardstock for all layers except the background yellow layer which is Cricut cardstock. Sizzix do do a yellow very similar to this, but I'd run out (clearly, I'm due a card restock!). I'll share some more ideas for colour choices in a minute.
- Double-sided sticky pads - (the ones with a bit of foam) these stick the layers together and separate them a little to give a nice shadow effect.
- Glue stick or paper glue - recommended for gluing the tree to the background
- Double-sided tape - recommended for attaching the hearts (only a tiny amount is needed - you can use another sticking or gluing method if you don't have it)
- Frame - a box frame that's a little bit deeper is ideal for your shadow box project. The frame I used measures 8 x 8 inches (20 x 20cm) and the template is set to this size. Please measure your own frame size and resize the template to suit.
- A method of cutting your cardstock layers - I used my Cricut Maker cutting machine. You can also use a different make of cutting machine or you can cut by hand using the PNG files if you prefer.
- My family tree SVG template - available via my store
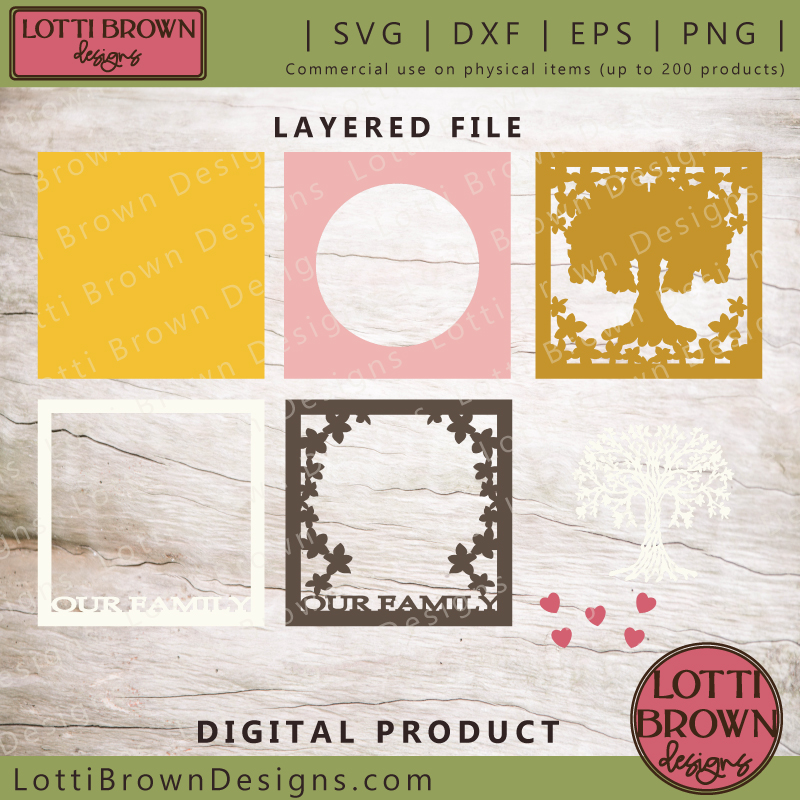 Showing all the layers in your family tree SVG cut file
Family Tree Shadow Box Tutorial
- First, resize the family tree SVG template to fit your own frame. My frame is 8 x 8 inches (20 x 20 cm), and I made the template to fit this size. Please measure the internal measurements of your own frame and resize the template to fit, if necessary, in your own design program. If you need any help using the cut file, you can look here for basic help.
- Choose your cardstock colours - I've used six different colours of cardstock for the family tree shadow box project. I think it looks best to have the tree and top frame with 'Our Family' in the same colour (you might think differently - and that's ok!) so you'll need two sheets of card in this colour, if you want to do this. As you'll see, the top two layers create a 3D effect lettering and frame, so it's a good idea to choose a good contrast between these two colours. I also like to choose a good contrast between the intricate tree layer and the background tree layer (that means, don't have the colours of those two layers too similar). You can choose to make the hearts blend in our stand out - it's up to you!
- Cut your layers - use your own cutting machine and cutting program to cut your layers. I used a Cricut Maker using intricate cardstock setting. If you need any help with using your files, click here. I also have additional help for Cricut users here... (general help).
- When your layers are cut and ready, come back here and I'll guide you through how to assemble the layers of the family tree SVG file, to make your shadow box...
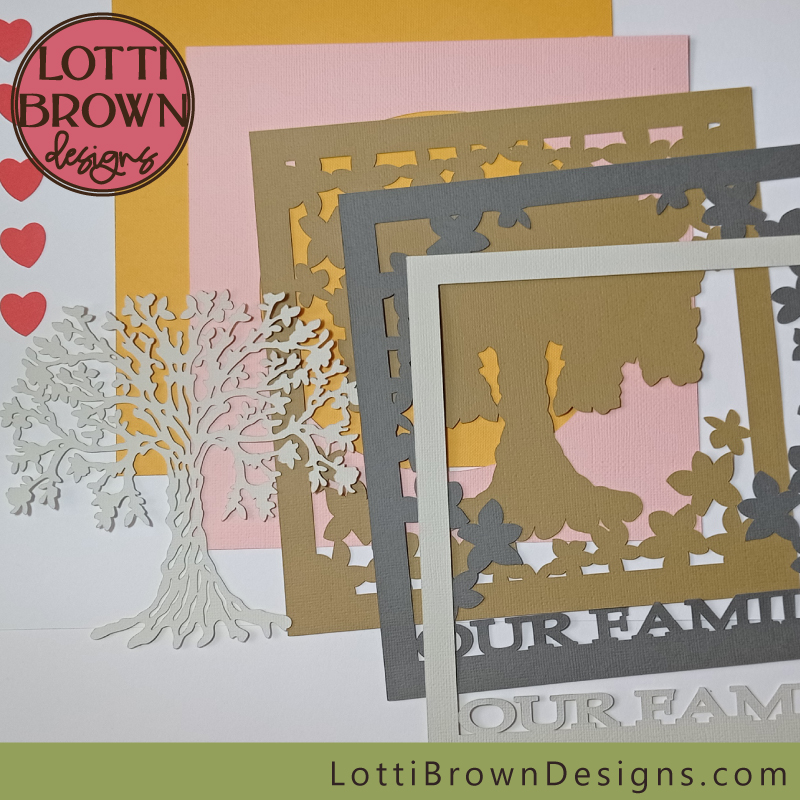 Cardstock layers cut and ready to assemble...
We're going to work from the back of the shadow box, towards the top, to create the project. It's not as complicated as it looks, and I'll guide you through every step in this tutorial...
So are you ready to get started..?
Let's start with the back two layers - that's the bright yellow one and the pink one in this example.
We'll add double-sided sticky tabs around the back of the pink layer - we use double-sided sticky tabs to get a bit of distance between each layer. This gives a nice 3D effect and creates the 'shadows' of the shadow box. If you want to make a 2D version, just glue with ordinary paper glue...
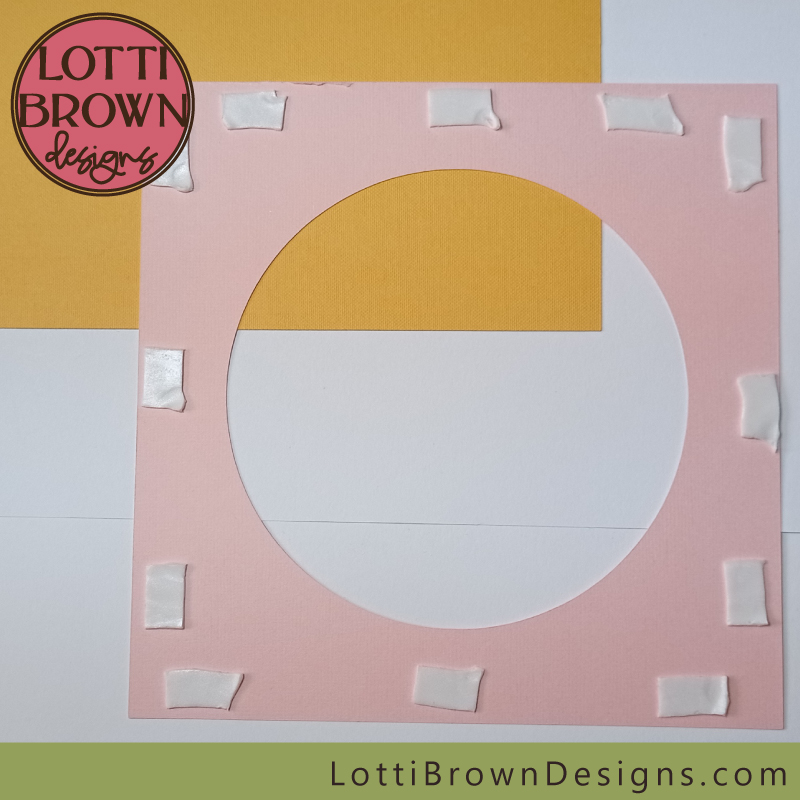 Add double-sided sticky tabs around the BACK of the pink layer
I've used three sticky tabs per side (see above) - you can use 2 or 4 quite easily. The main thing is to try and be careful to position them in roughly the same position each time - this means your shadow box will build up evenly without sagging! No-one likes sagging!
Then, just stick down your pink layer on top of the yellow layer (see below). Try to align the top edges to get it down straight, then just lower gently, and when you're happy it's in the right position, press down to stick down. It should look something like the image below...
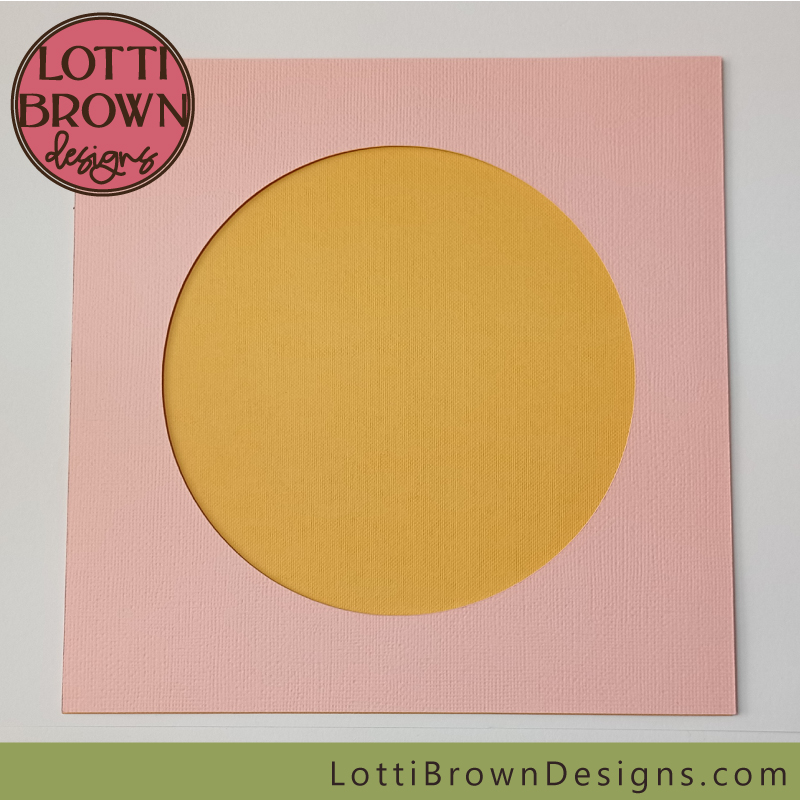 The first two layers are done and stuck together
This is the basic method that we'll use to build up the layers of your family tree shadow box. So just stick your double-sided sticky tabs around the back of the next layer, which is the mustard/tan layer here with the tree background design on it (see below). Try and get them in a similar position as the first time - but no need to be exact!
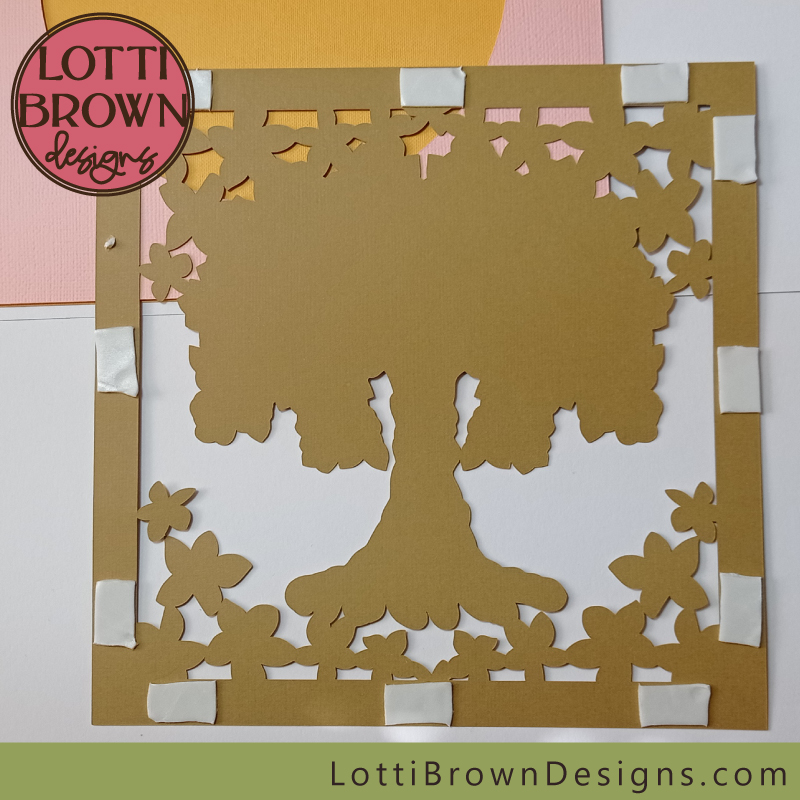 Add double-sided sticky tabs around the mustard/tan layer
Again, line the mustard/tan layer up over the base layers carefully, before lowering it down and sticking it - it should now look like the image below...
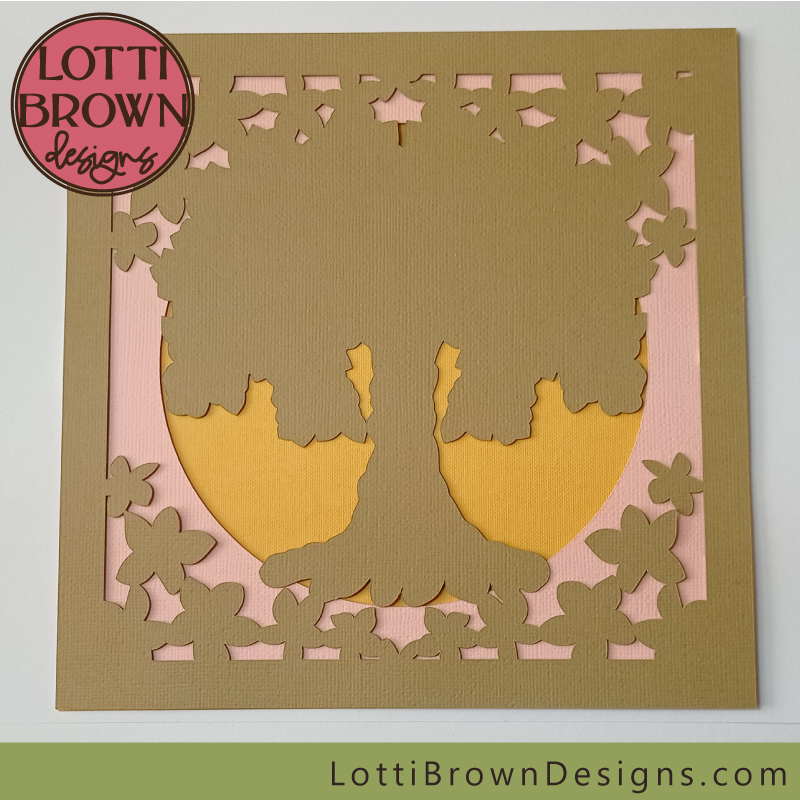 The tree background layer is now on, and the family tree shadow box is starting to take shape!
The next layer is slightly different - it's the intricate tree design - and it will just be glued on top of this mustard/tan layer. I decided not to use double-sided sticky tabs for this, for the difficulty of sticking them onto the intricate cut, but also just to make it as if it's one textured layer with the mustard layer.
So I'm using paper glue (a glue stick) to cover the whole of the back of the intricate tree shape - and I'll just stick it straight down onto the tree outline...
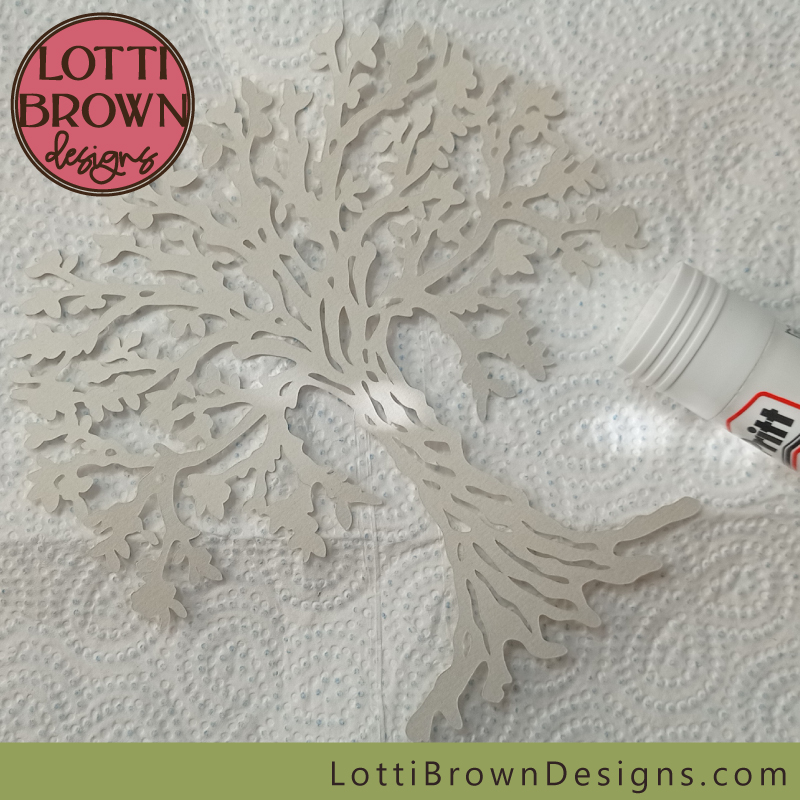 I've used glue stick to apply to the whole of the back of the intricate tree shape. Make sure you get glue on all those edges!
Little tip - try lining up and positioning the tree trunks together, trying to get your intricate cut tree central and straight. Once you've got the trunks in line, the rest of the tree will just follow nicely. Press down to make sure all the little edges are well stuck down (and re-apply glue to edges if necessary).
It should look something like the image below...
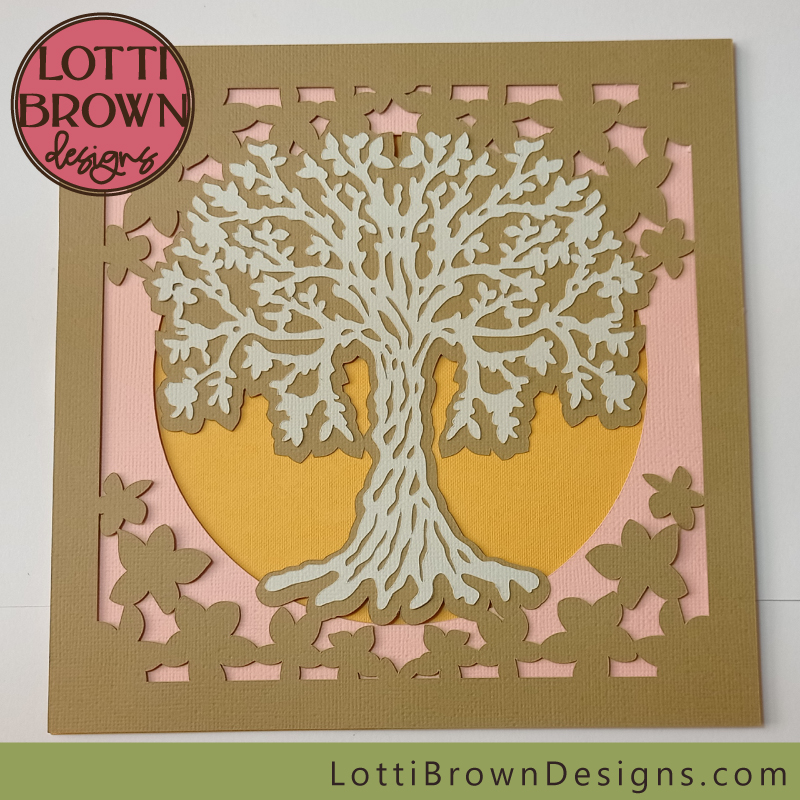 Line up the trunks to position the trees nicely - and press to stick down
Next, we move onto the two top layers - and we're back to the double-sided sticky tabs - remembering to try and position them similarly to the previous layers...
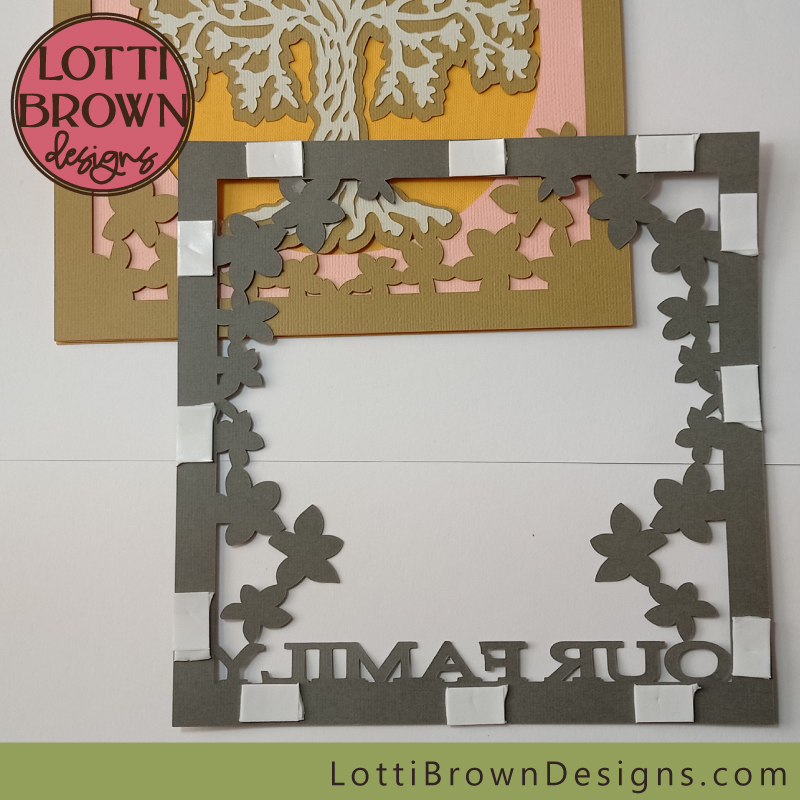 Add sticky tabs around the edge of the first 'Our Family' frame - if the fit's a bit close, like here, try and keep your sticky tabs closer to the outer edge where they'll be hidden by the frame if they stick out a bit!
And once again, line up the layers, and stick them down - here's what mine looks like (below)...
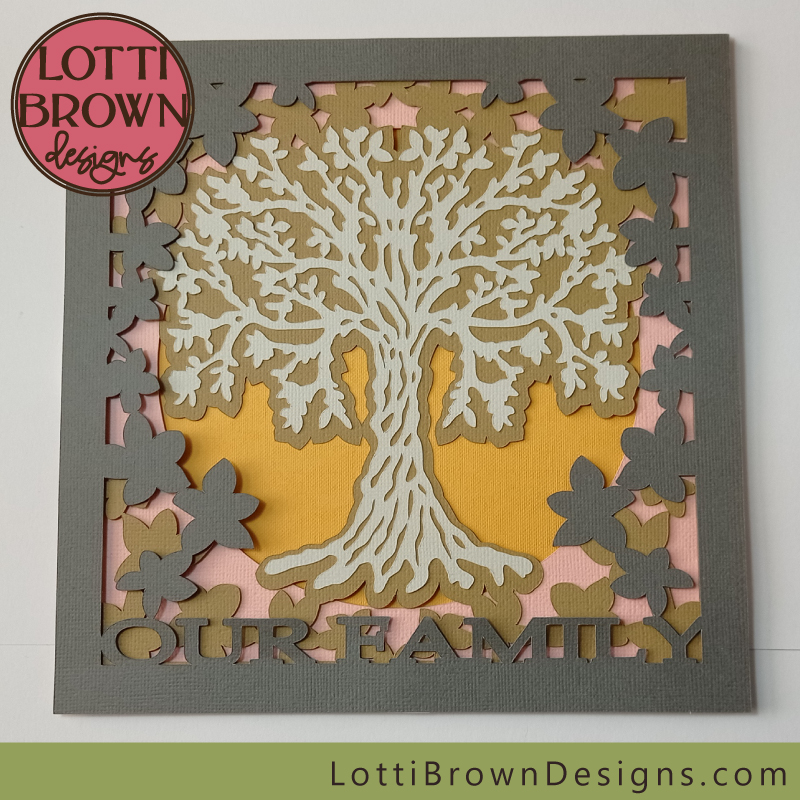 The first 'Our Family' layer is stuck down
So now, it's the top layer - this is a slightly thinner frame, with the 'Our Family' text at the bottom. Once again, we're going to stick the double-sided sticky tabs around the back of the layer. But this time, because the frame is narrower (which gives the frame a 3D look, too, with the colour of the lower frame showing around the edge) I've cut the double-sided sticky tabs with scissors to make them narrower for a better fit - you can see this below...
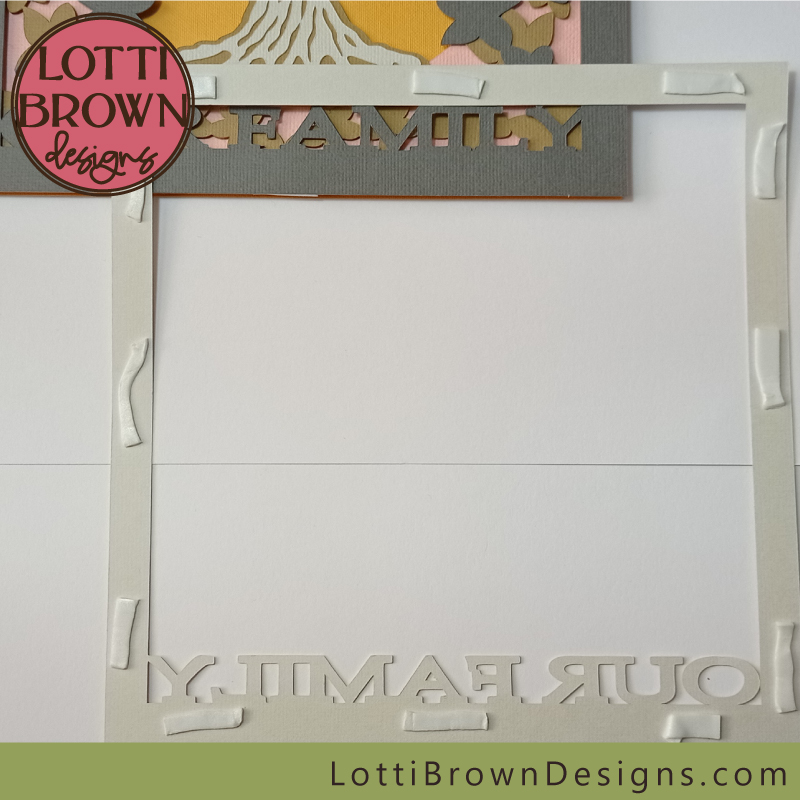 I've just snipped the double-sided sticky tabs in half lengthways to make them narrower for a better fit around this edge - still try and keep the positioning the same!
You can still try and keep the positioning of the sticky tabs the same or similar to the previous layers - and then line up your layers together, and stick them down in just the same way as we've been doing...
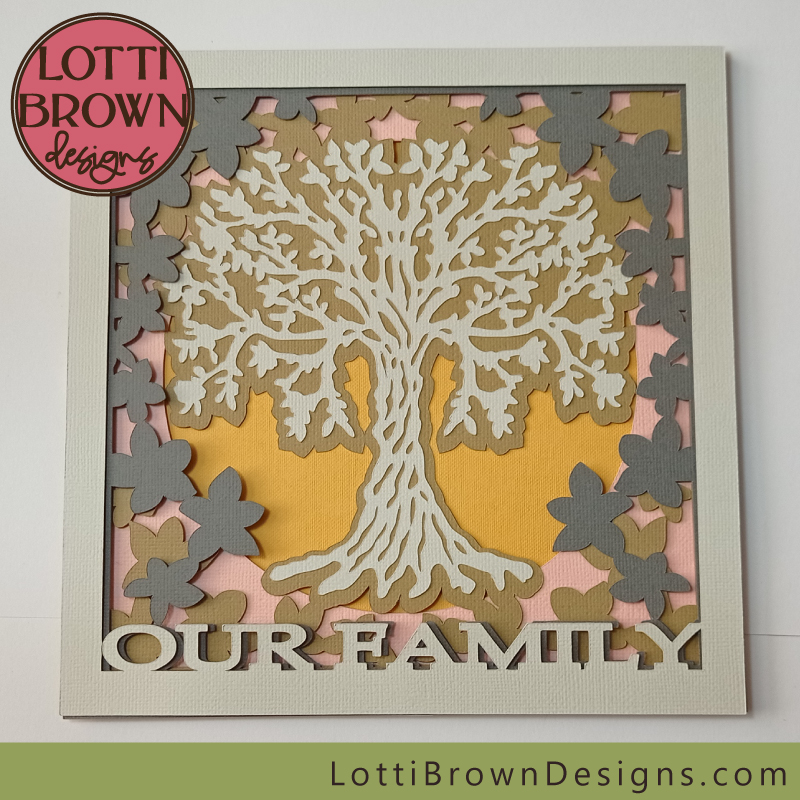 The final layer is stuck down to give the 'Our Family' 3D lettering and frame effect
Nearly finished now! It's just the hearts to add! And this is mostly up to you...
You can cut as many heart shapes as you need for your own family - and you can resize them if you want, too.
I've just written on the hearts myself, with a pen - if you do writing on your Cricut with a Cricut pen, you could do this if you wanted.
I've used double-sided sticky tape on the back of my hearts so that they'll stick nicely to the tree but I should be able to reposition them quite easily, too, hopefully without damaging the tree underneath, if I want to play about with positioning, which I will do...
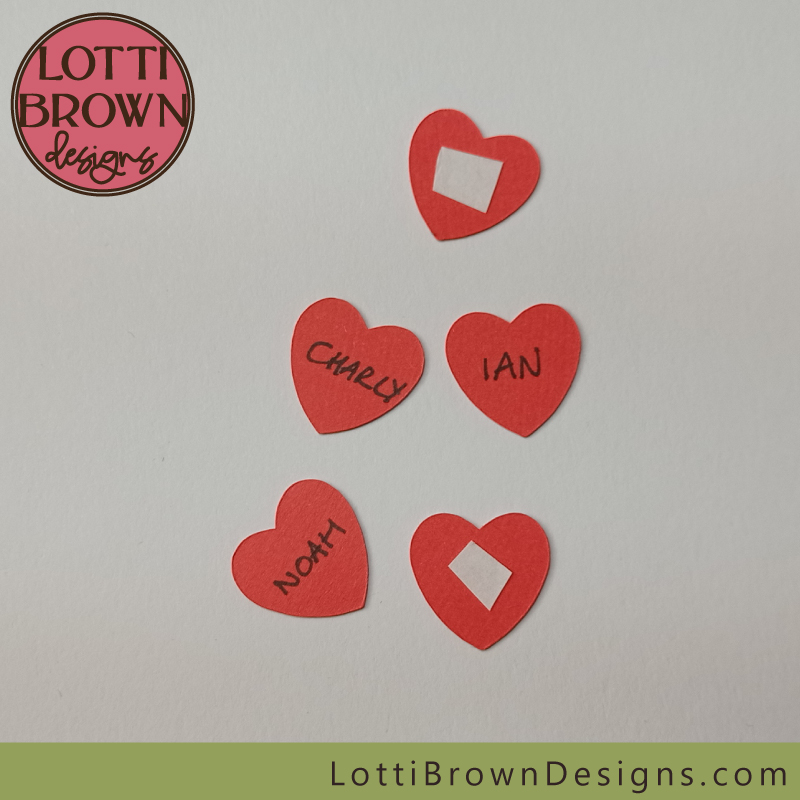 Hearts ready to add to the tree
So simply stick on your hearts when you're ready - play about with positioning a bit - it will change depending on how many are in your family - so do try a few options. If you've used the double-sided tape for the back of the hearts, repositioning should be fairly easy. If you want to use something a bit stickier once you've got the positioning sure in your head, you can do so...
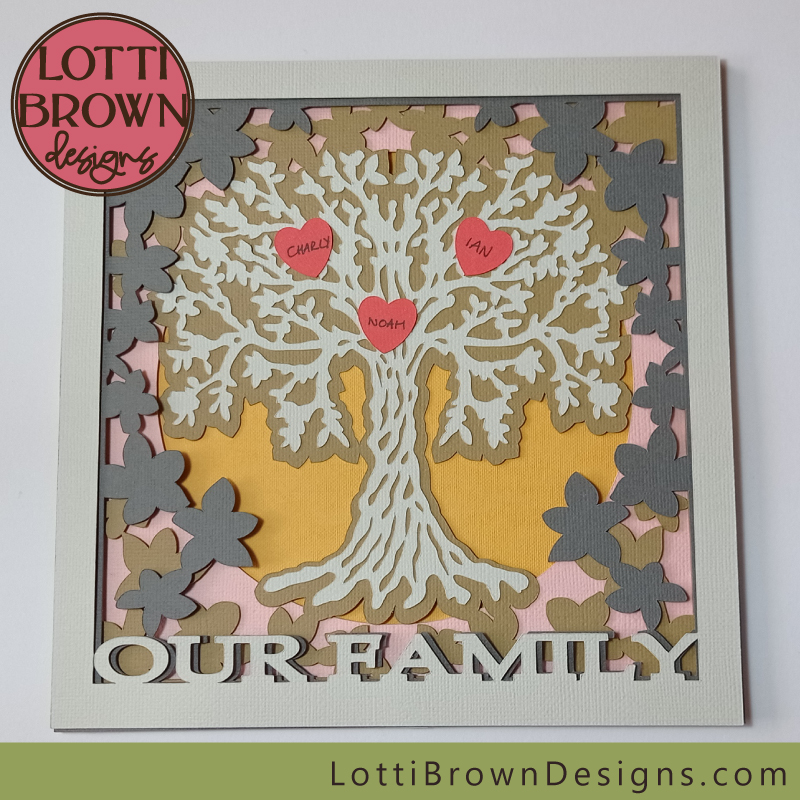 Add your own family hearts to the tree - the positioning is up to you!
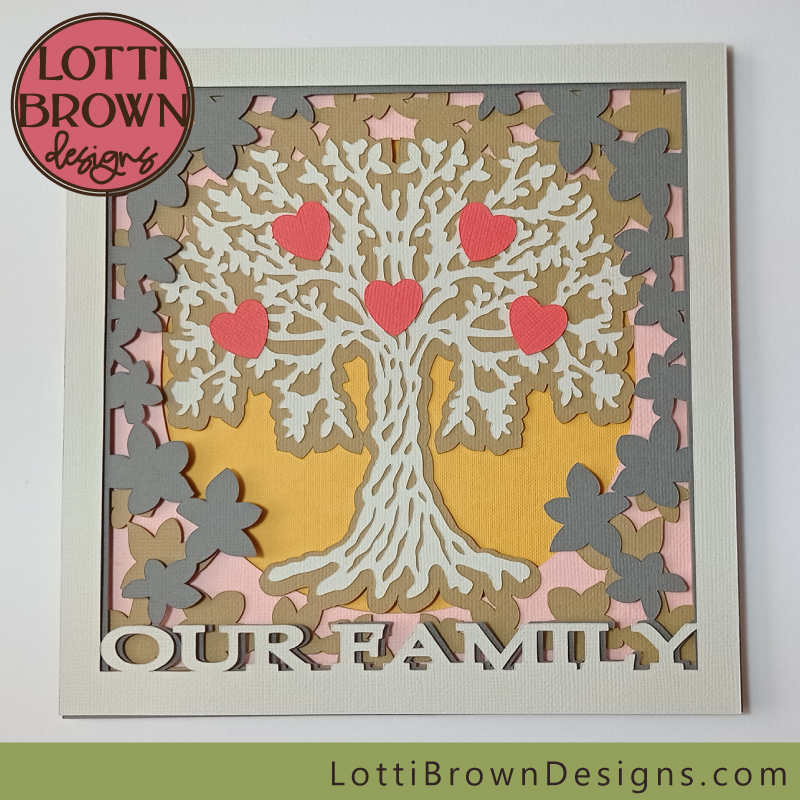 I provided five hearts for you to add to your family tree, with suggested positioning - cut more or leave some out to suit your own family - and play about with positioning
There is, of course, just one final step - that's just to put your family tree cardstock project in a frame...
 Add a frame to complete your family tree shadow box project
 Family tree with three hearts - shadow box
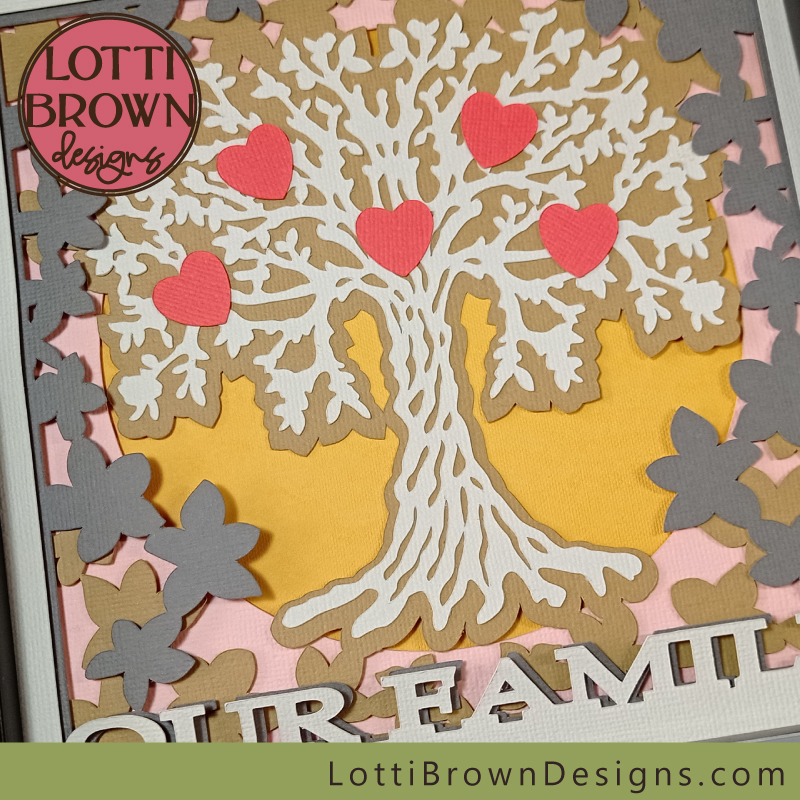 A close up look at the five-hearts family tree
Get the family tree SVG template from my store here...
More Colour Inspiration for your Family Tree SVG Template
I also made my family tree SVG shadow box template in tones of green for a different look to inspire you - here's what it looks like...
All the cardstock colours are from Sizzix.
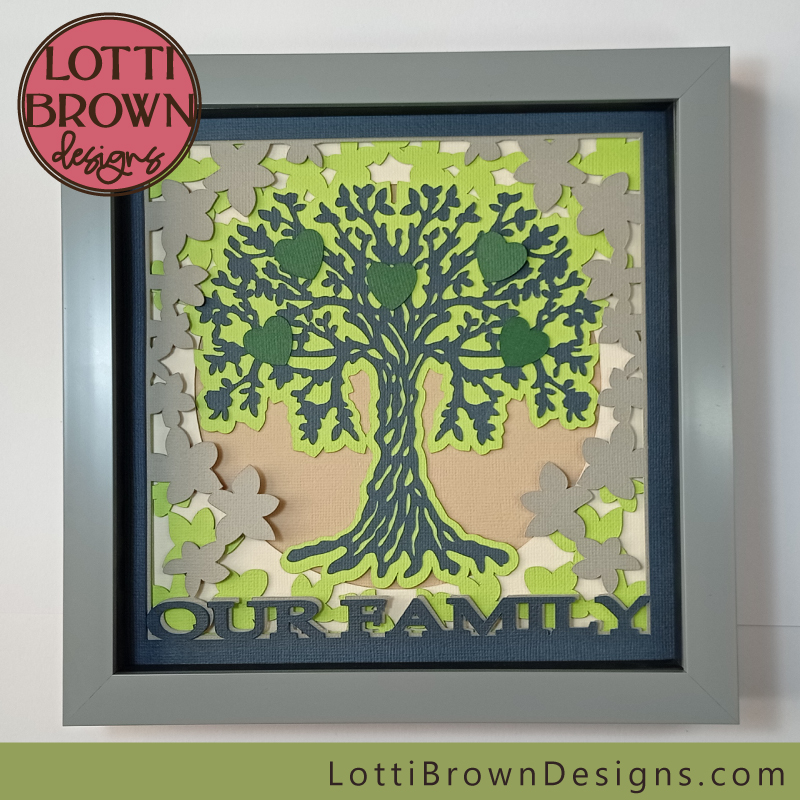 Gorgeous greens - 'Our Family Tree' SVG shadow box template
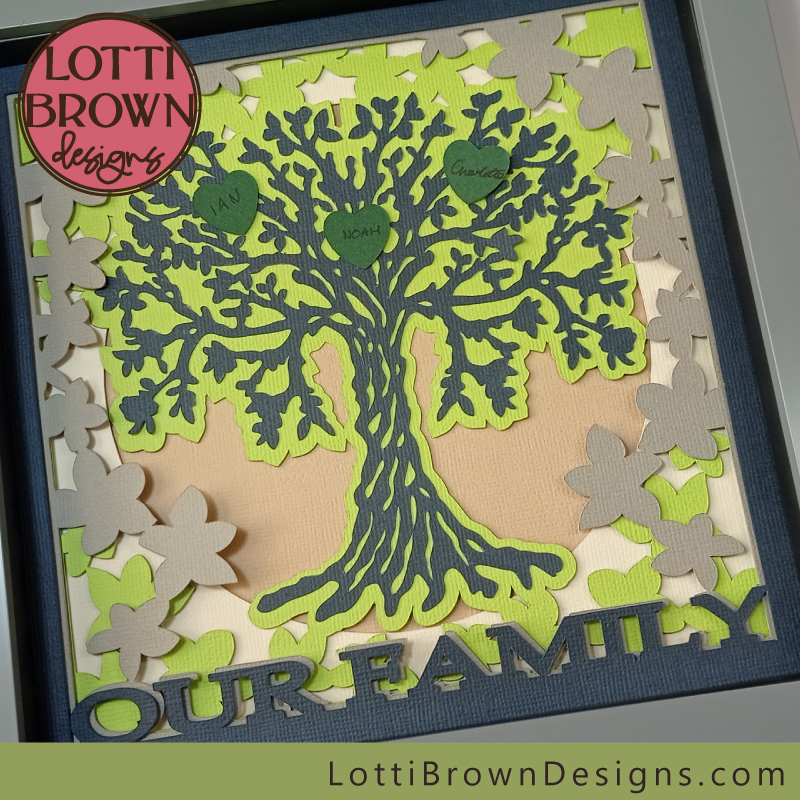 Three hearts family tree template - shades of green
 Five hearts family tree - green, grey and tan
Maybe you feel inspired to create your own colour combinations for your family tree SVG shadow box template?
 Family tree shadow box template - SVG/EPS/DXF/PNG
Get your family tree SVG file from my store here...
SVG/DXF/EPS/PNG formats
Personal craft use or small-business commercial use
Physical (craft) products only - no digital products or sharing
If you like making shadow boxes, take a look at some of my other shadow box making projects here...
You Might Also Like:
Lotti Brown's Designs & Templates
How-tos...
- How to use SVG cut files for Cricut (also other cut file formats & machines)
Want to keep in touch?
Sign up below for my free email newsletter...
My newsletter is usually sent out once a month (at the end of one month or the start of the following month) and you can unsubscribe any time...
Sign up below...!
Recent Articles
-
Celtic Symbolism of Ash Tree
Feb 18, 25 04:03 AM
Learn about the Celtic symbolism of the ash tree and its myths and meanings - part of my Celtic Tree Calendar Art project... -
What is the Celtic Tree Calendar?
Feb 18, 25 03:53 AM
Learn about the Celtic Tree Calendar - what is it? - how did it come about? - what does it mean? -
Wildlife Birthday Card Printable PDF Files
Feb 06, 25 08:53 AM
Sweet floral wildlife birthday card printable PDF files to print and make birthday cards at home...
Follow me:
Share this page:


