SPRING 2025 - I've just completed a WEBSITE REVAMP! Everything is still here but may be in a slightly different place where than you left it and there's also lots of new sections, so if you're having trouble finding something in particular or you spot something that's not working as it should, please do get in touch and I'll do my best to help!

How to Add a Stem to your Paper Flower
- Home
- SVG files
- Floral SVGs
- Adding a Stem
Learn how to add a stem to your paper flower - no hot glue gun required!
This tutorial is for you if you're following my easy paper flower template instructions and you've decided that you'd like to add a stem to your flower (you can also use it flat-backed, with or without leaves, without the stem)...
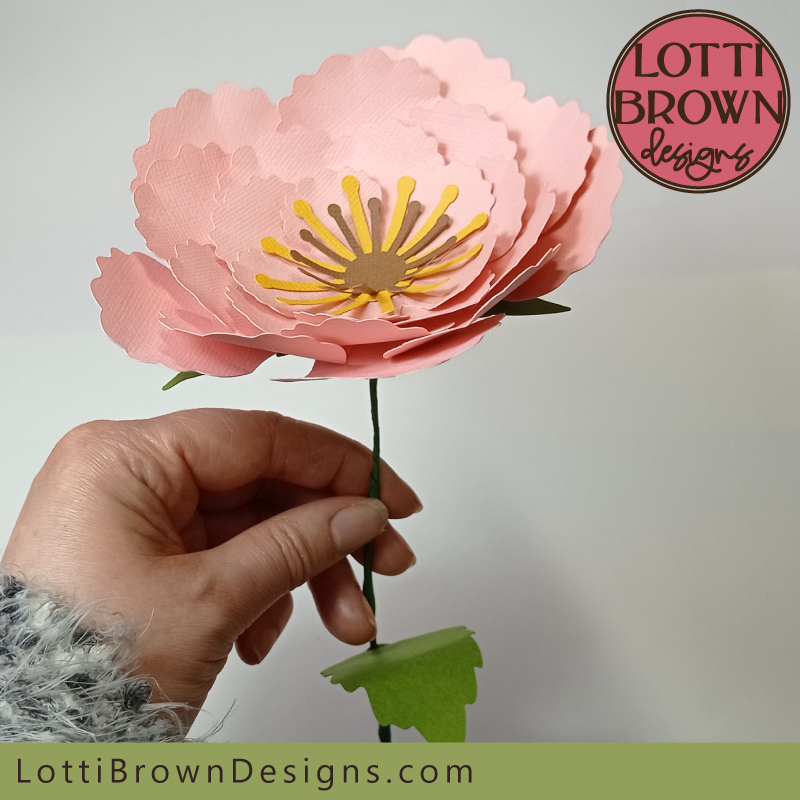 Add a stem to your paper flower so you can display it in a vase
If your making my easy papercraft flower, the template for the stem and leaves is included, but you will need a couple more supplies to create the stem...
I've got a full list of everything you'll need at the start of the main tutorial for making the paper flower - but, briefly, you'll also need florists wire and floral wrap/florists tape to make the actual stem.
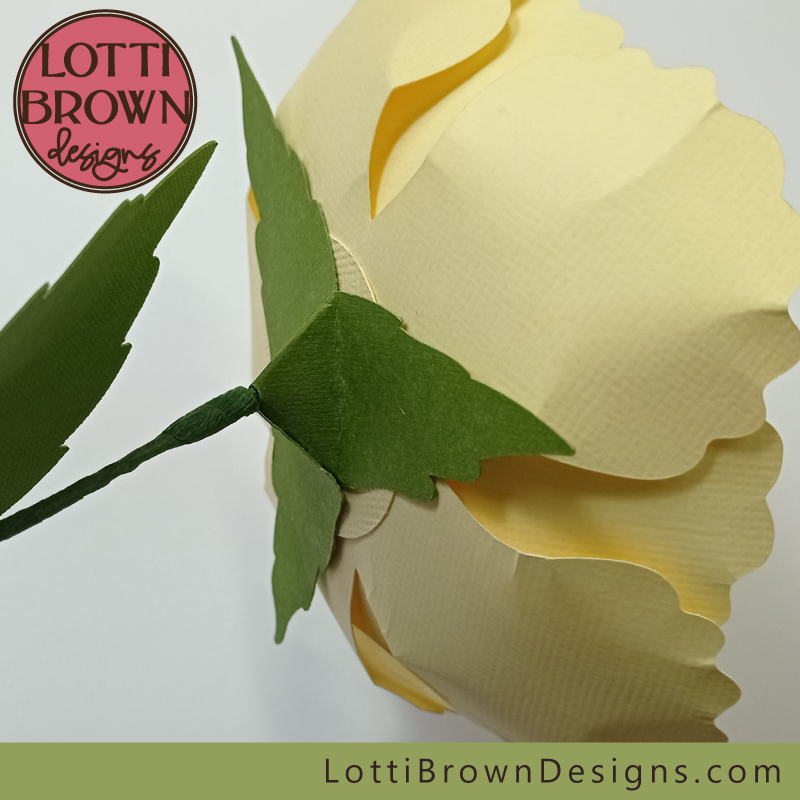 We'll add this attractive sepal piece to the back of the flower head, and add a stem - you can also add as many leaves as you want
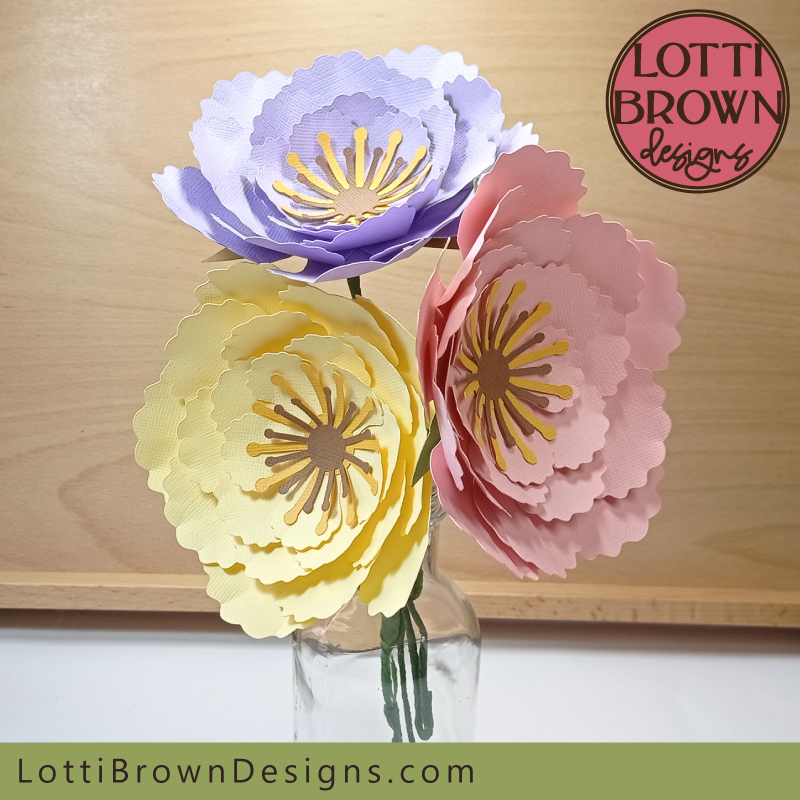 Adding a stem means you can easily display your paper flowers in a vase
How to Add Your Stem
If you would like to print these stem instructions, please use the 'Print' buttons on the page (top right of the page and at the bottom of the content).
This will create a print-friendly version for you and you can also deselect any parts of the page that you don't need to print.
We're going to be using parts from this paper flower SVG template for Cricut and other cutting machines, so please make sure that you have that - and follow the instructions on this page to get what you'll need ready and make the main part of the flower.
The flower can be used with or without the stem, depending on your project, so this is an optional part of the instructions, for when you want to add the stem to the paper flower...
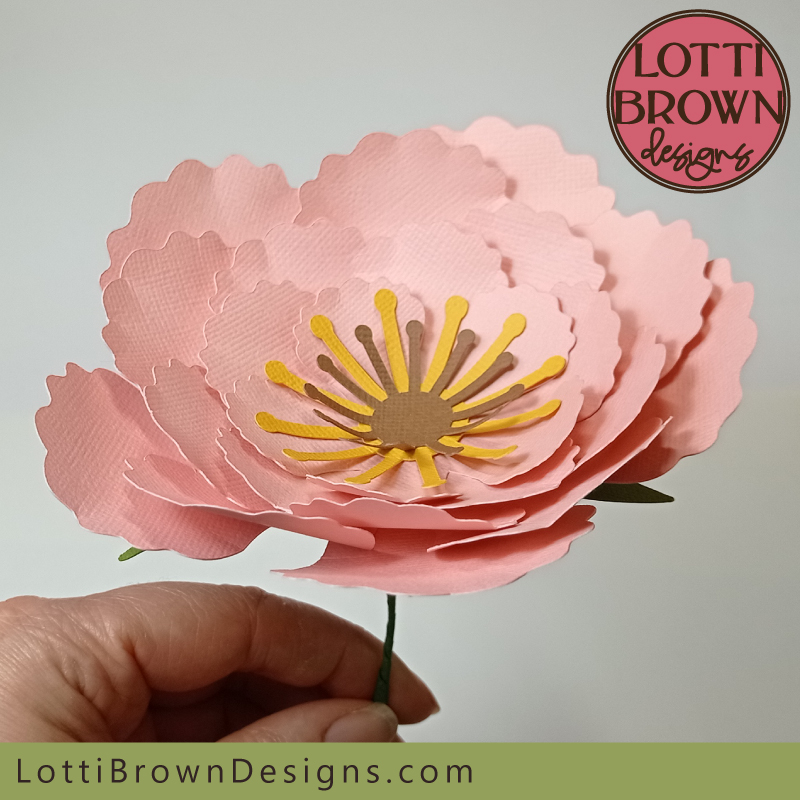 Easy paper flower template with stem
You can put your main flower head to one side for the moment - what you'll need right now, are:
- the florist wires - I've used two - if you want your stem to be sturdier, you can use more wires
- the floral wrap (florists tape) - we'll wrap this around the wires to create the stem
- the three pointed sepal shape
- any leaves you want to add to the stem - I recommend the smaller ones from the template, but you choose the look you want (I'll be just using one here)
- the circle that's the same colour as your flower's petals
- sharp craft scissors for cutting the florists tape
- you might also find glue handy (optional)
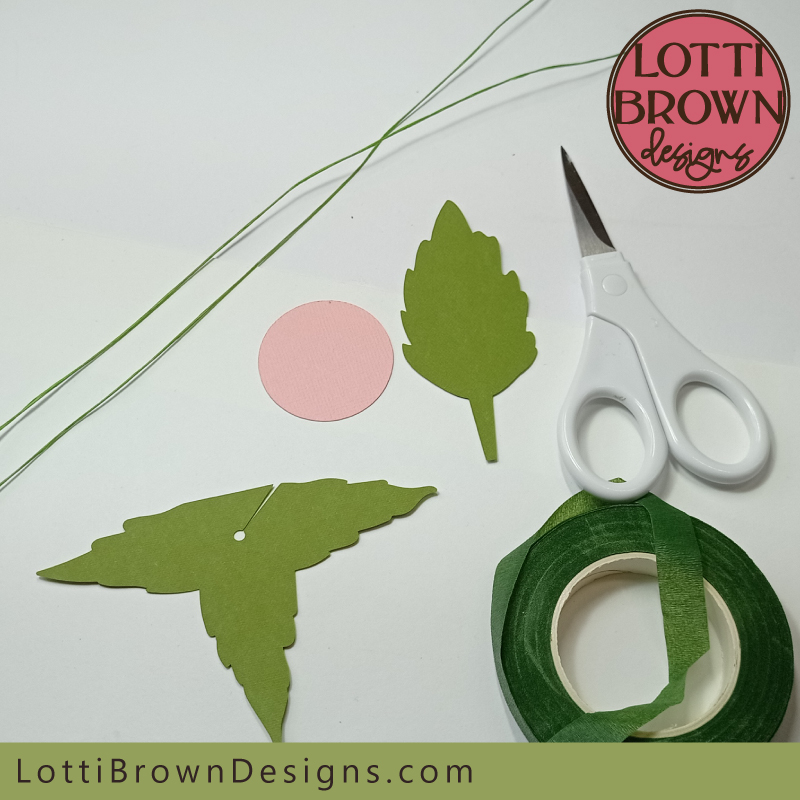 Everything you'll need to add the stem to your paper flower
- Let's start with the three-pointed sepal shape - see the image below...
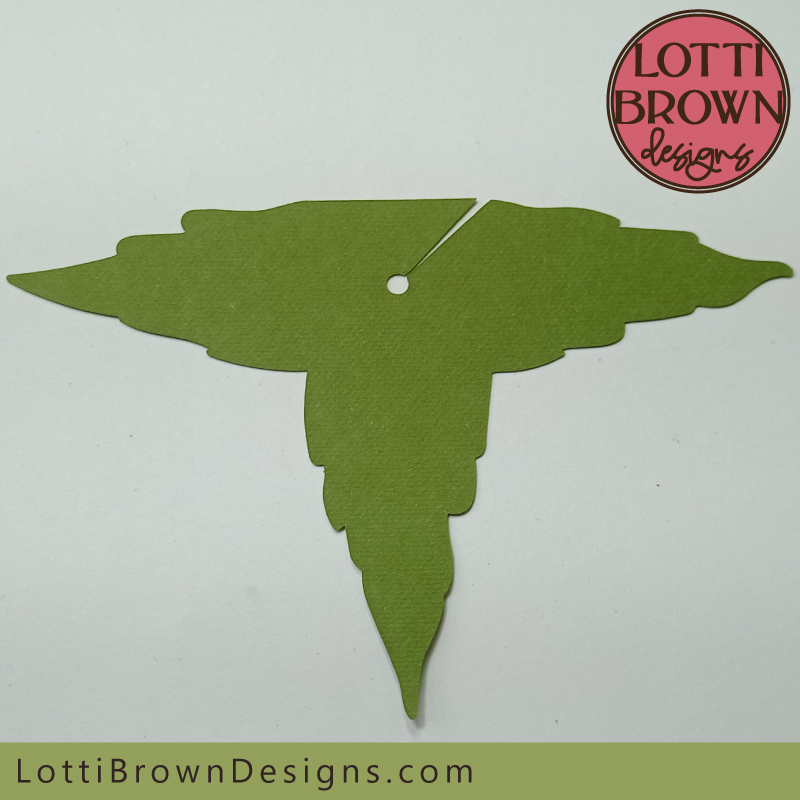 Sepal shape for the paper flower
Making the Sepals
- We'll start by making some folds, across the top of each of the leafy parts of the sepal element. Make a fold straight across the top of each of the three pointed ends, like you can see me doing in the image below...
- You can use the tips of your fingers to make a line to fold against, by pressing down the tips of your fingers along the fold line and then folding the leafy part up against your finger tips (no need to be super precise) - you can see this in the image below...
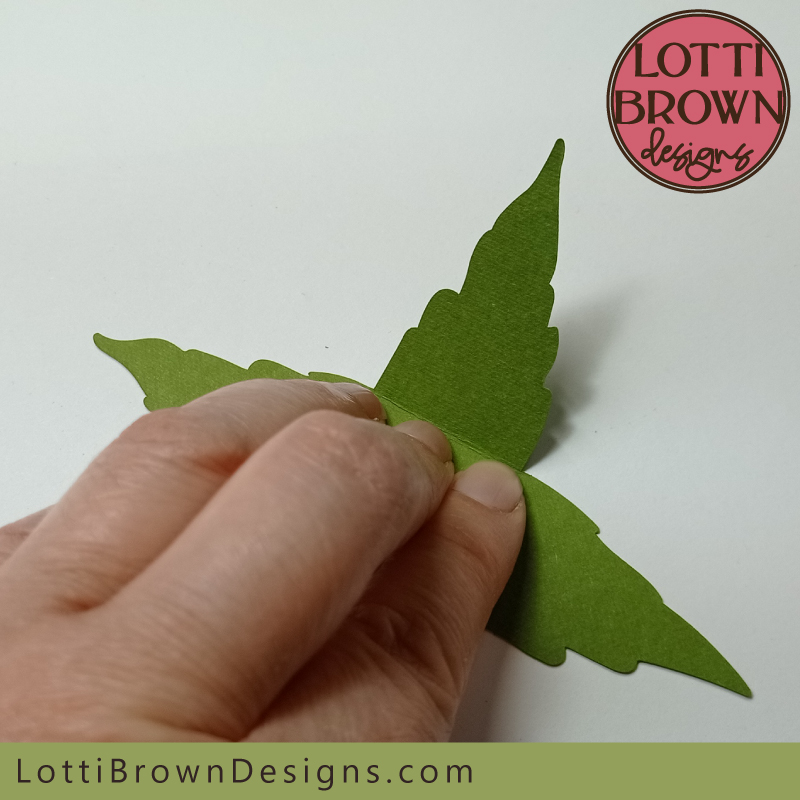 Make your first fold like this
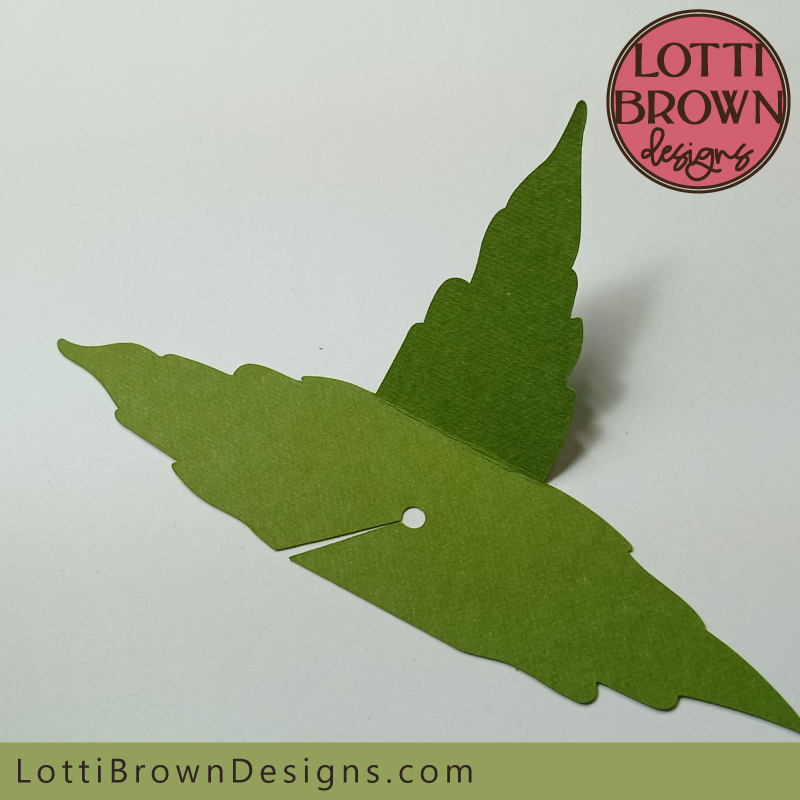 Your fold should look like this
- Repeat this fold across the other two sides, until your piece now looks like this - see the image below...
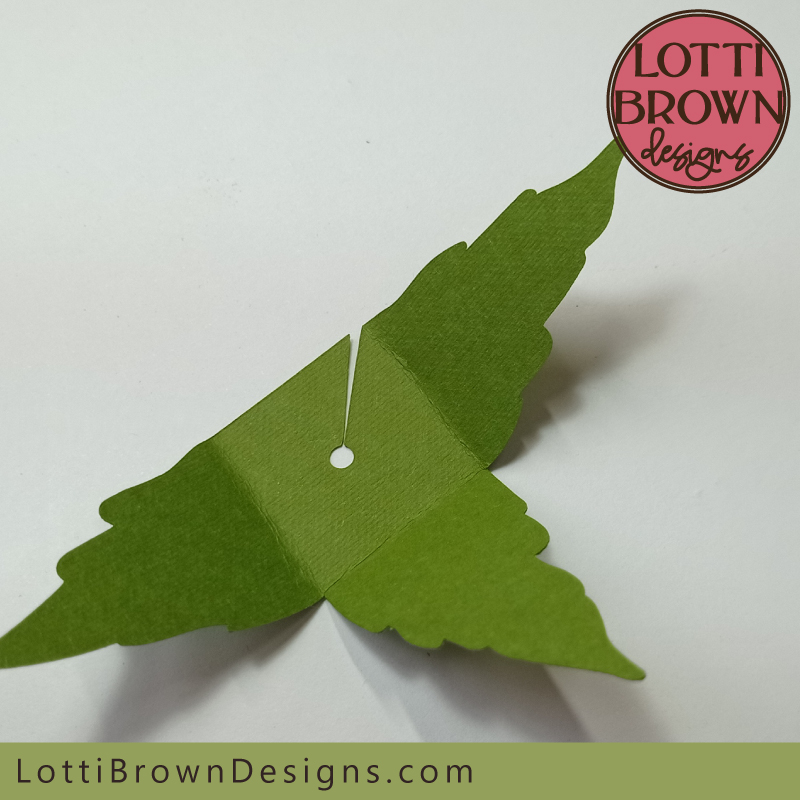 Make three folds like this in this sepal piece
- Next, we're going to make diagonal folds from the centre hole in the piece to each of the corners where you've folded - so imagine the cut from the centre hole is the first line, you'll repeat that towards the other three corners, but as folds (don't cut it!) - see me making these folds in the images below....
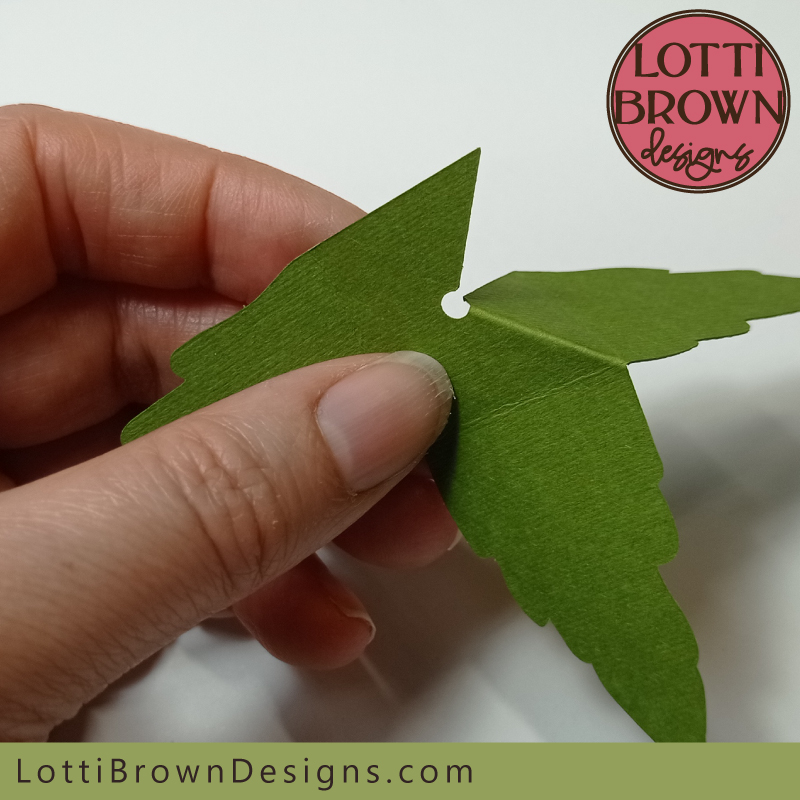 Make a diagonal fold
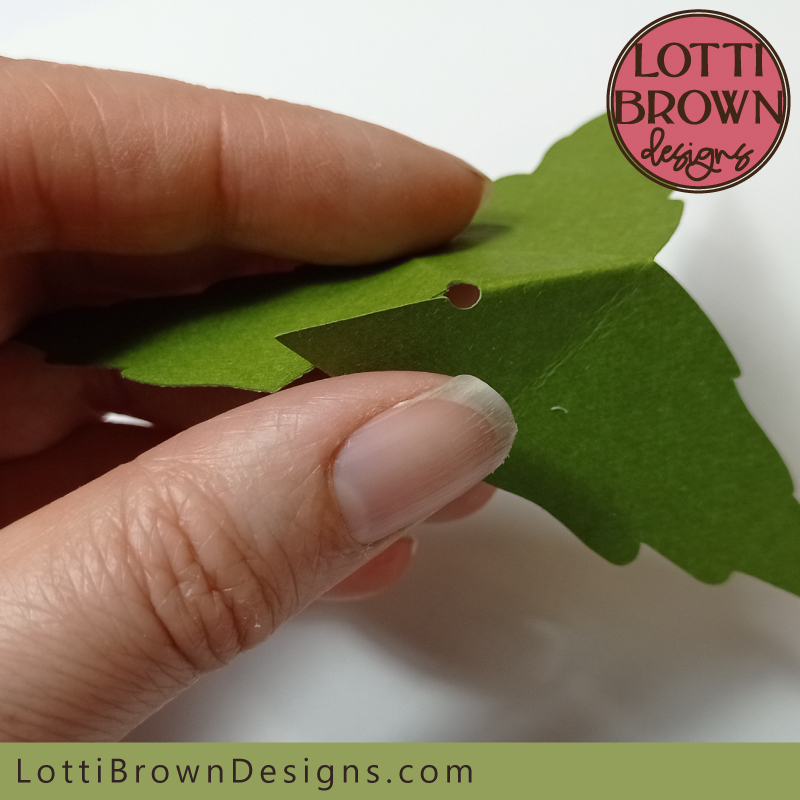 Make a second diagonal fold
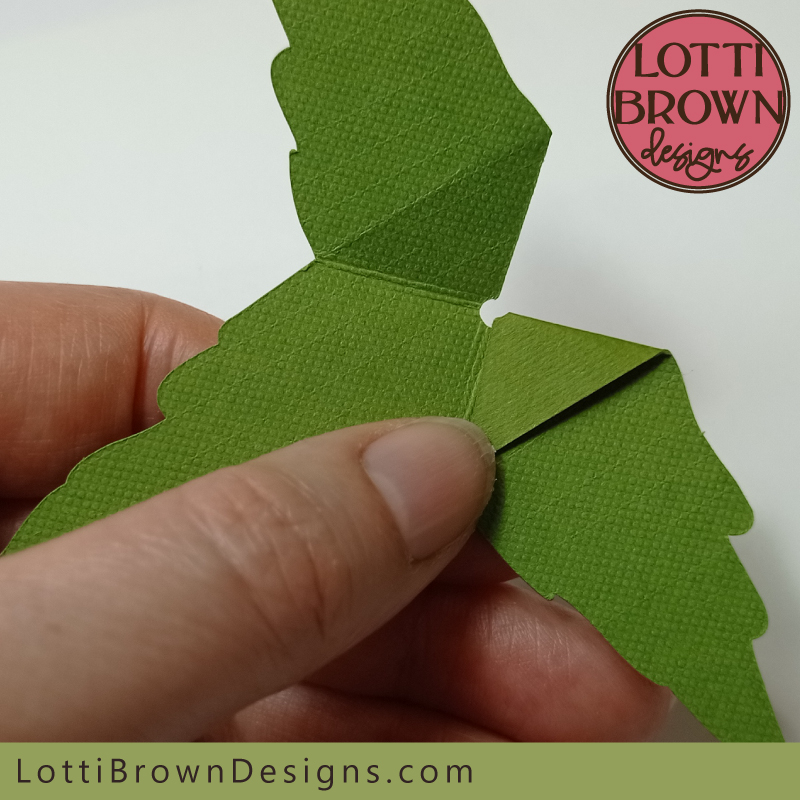 Make the third and final fold like this
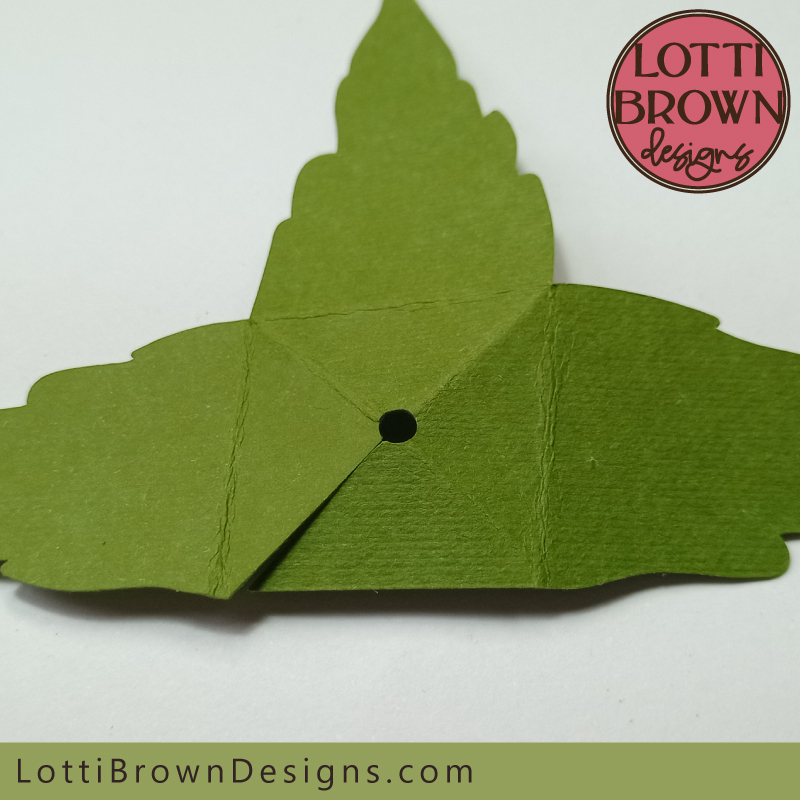 Your folds in this piece should end up looking something like this
- Your sepal piece should end up looking something like mine in the image above. What we're going to do next is to fold the side without a leafy part in under the one next to it - forming a three-sided shape - see the image below...
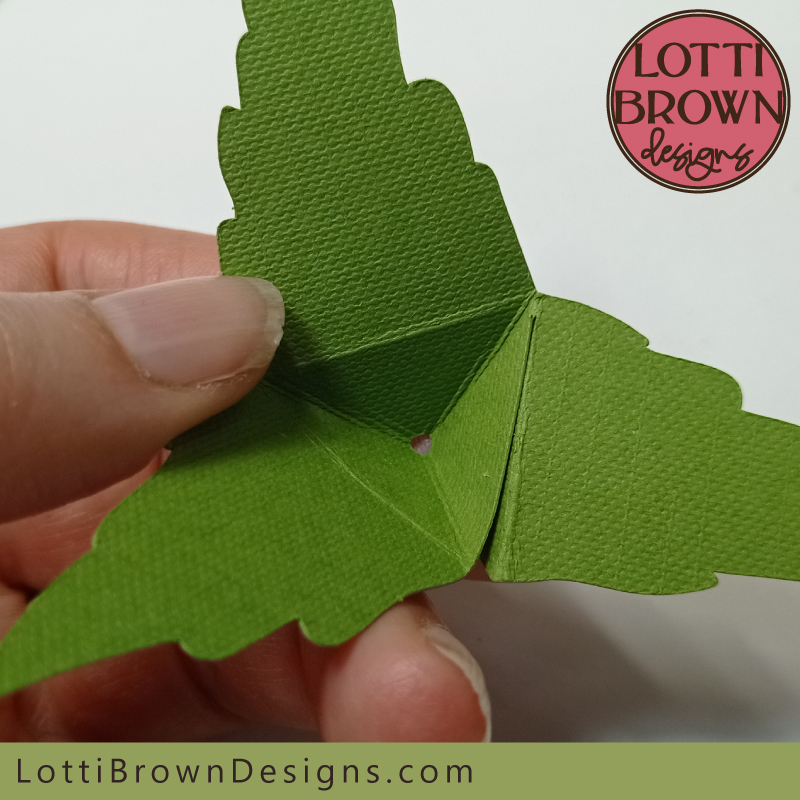 We're going to fold this small flap under like this to make a three-sided shape
- Once you've identified how the piece is going to fold, add some glue onto the little flap that we'll tuck under - see the image below...
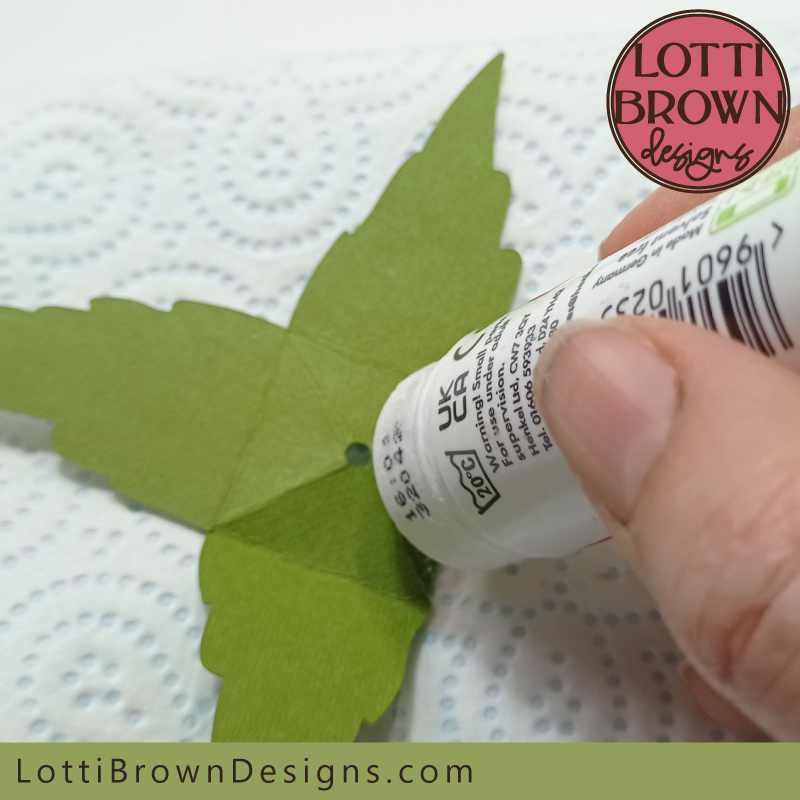 Add some glue to this small triangular flap
- Then stick the pieces together and hold them in place for a minute or two until they're well stuck - see the image below...
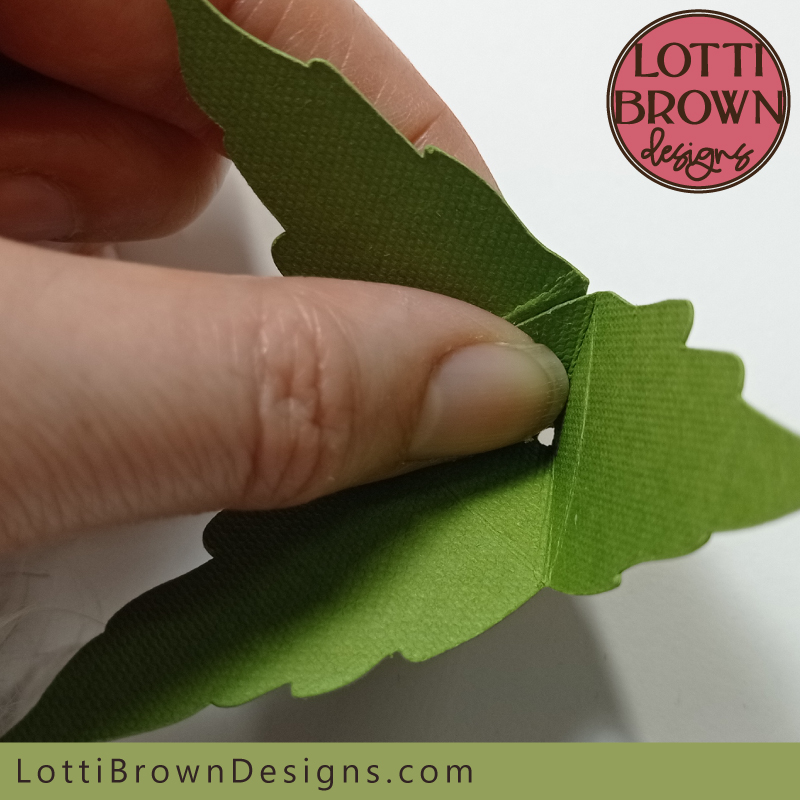 Stick it together and hold in place
- Your sepal piece should now be looking something like mine in the image below...
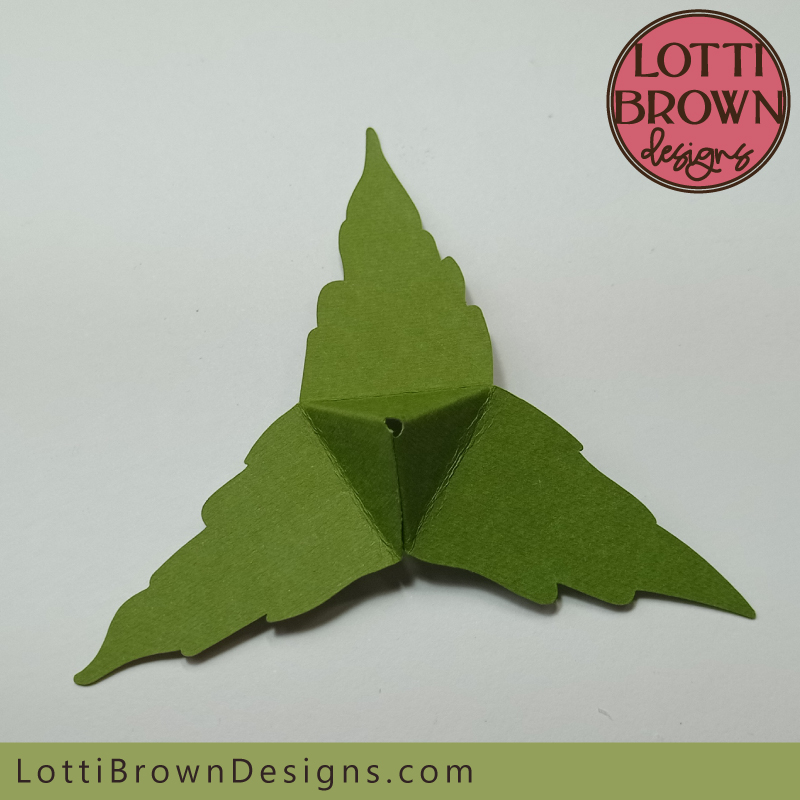 Your sepal piece is now finished - and is hopefully looking something a bit like this
Adding a Wire Stem
- Next, take your wires, however many you want to use - I recommend at least two wires, and make a little knot of bent over wires at the end (don't make the knot too large, you'll see why in a minute) - see mine in the image below...
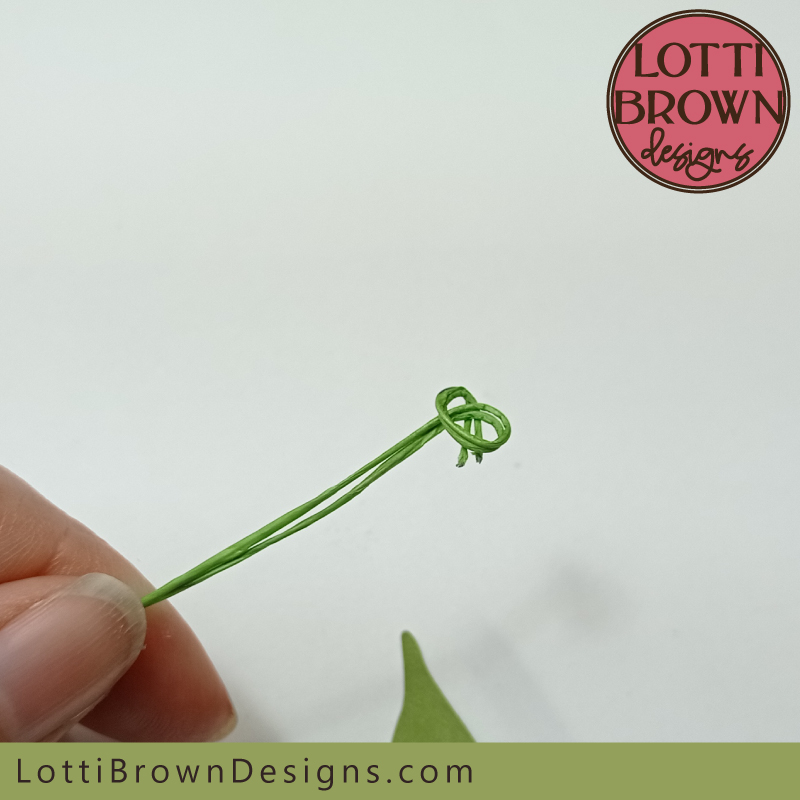 Bend the wires to make a knot-like shape at the end of the florists wires
- Next, we'll thread the wires through the hole in the sepal shape (see the image below), so that the knotted end comes to rest in the little pocket we created. If your knot is coming over the top of this little pocket area, squish it down so it doesn't.
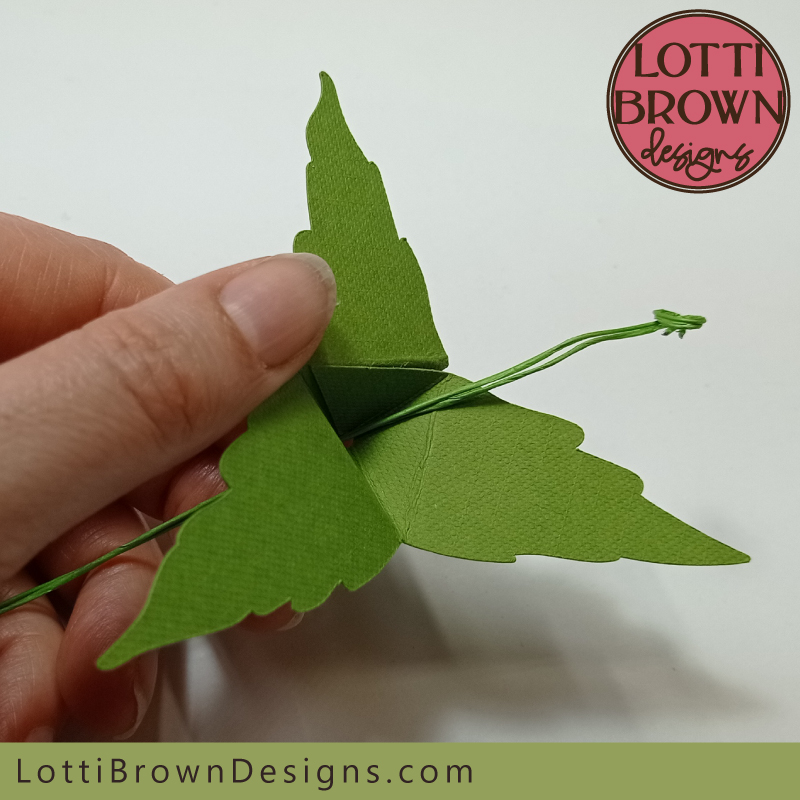 Thread the wires into the sepal shape like this
- Next, we're going to glue the circle onto the sepal shape, like you can see below - I'll show you how in the next step...
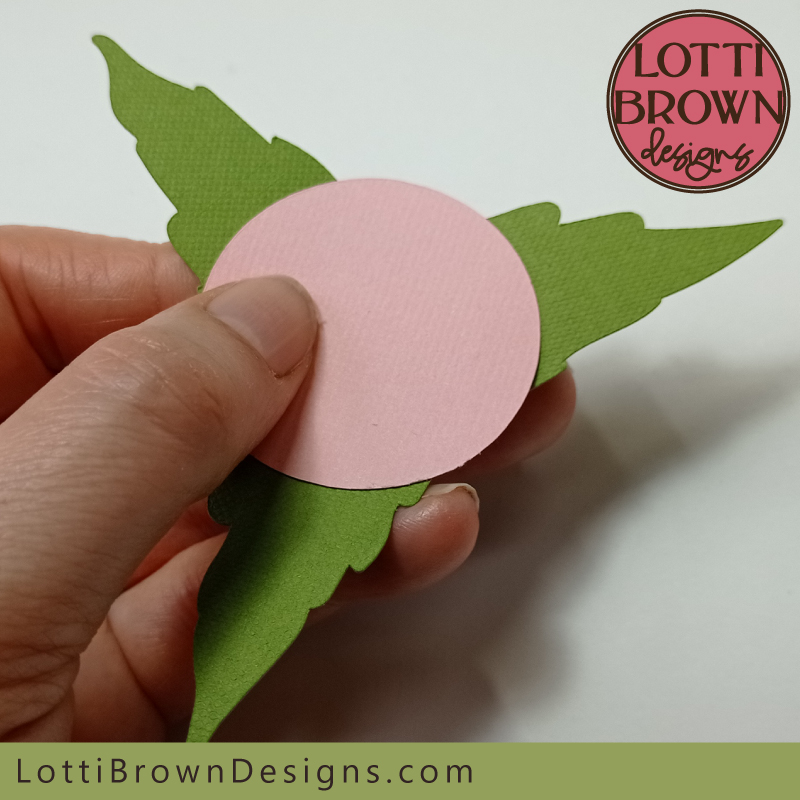 We're going to glue the circle here - I'll show you how in the images below...
- So add your glue to the sepal shapes, just the first half-inch or so like you see in the two images below - this is why we hold up the circle to the sepal shape first, so we can estimate the area we need to glue...
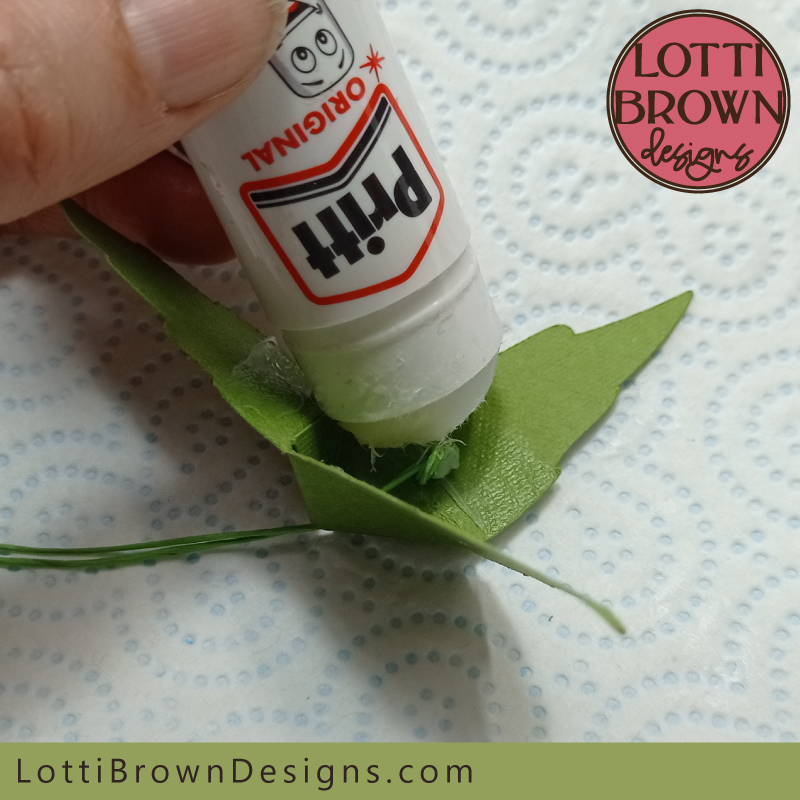 Just add your glue to the first part of each of the sepal leaves
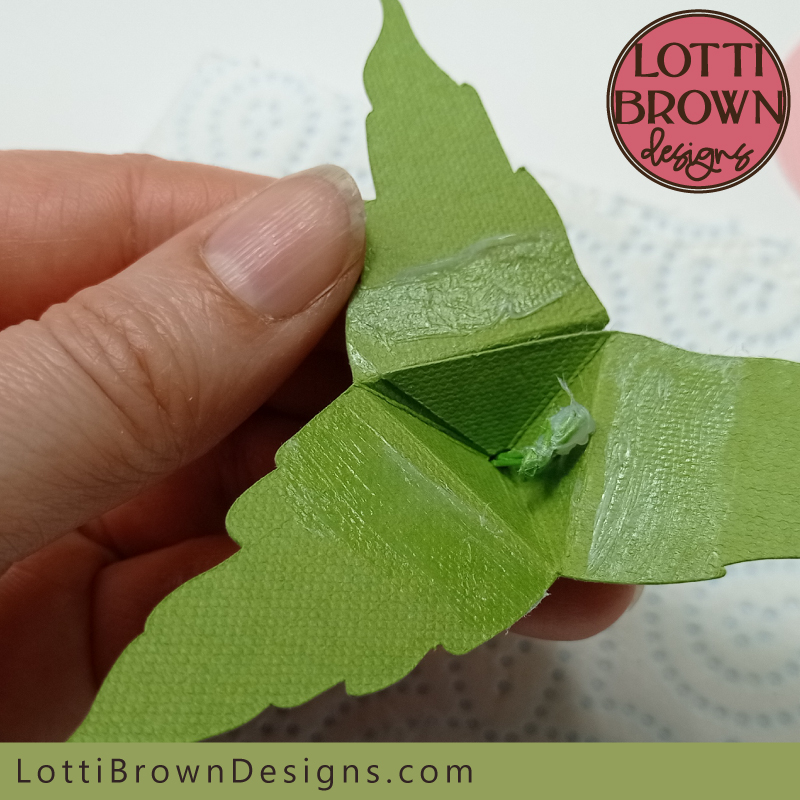 I just added glue to the first parts of the sepal leaves, like this
- Then glue your circle down like this (see the two images below) and hold in place for a minute for the glue to attach...
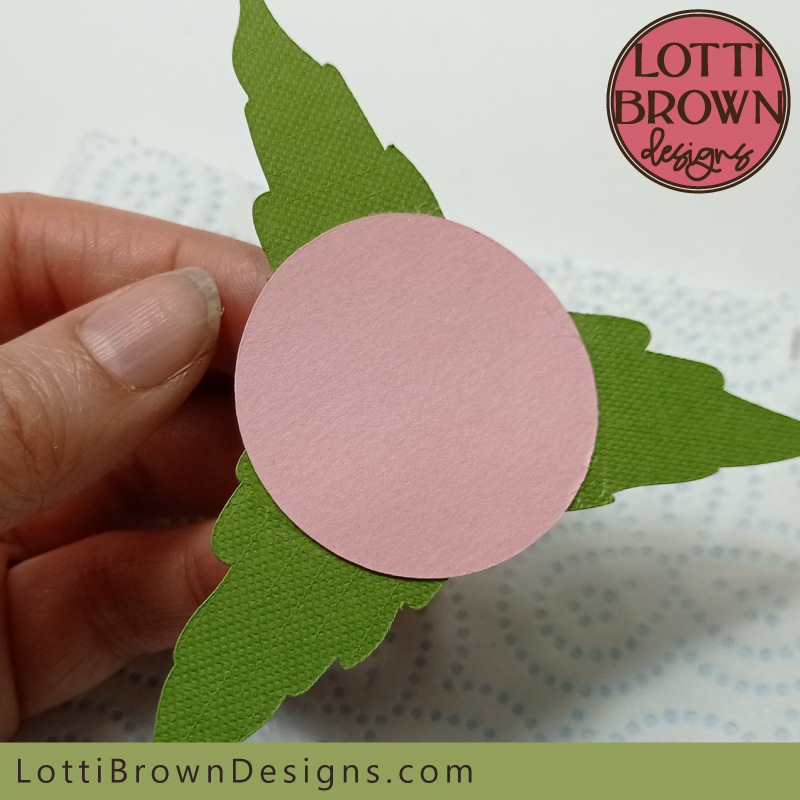 Glue your circle like this
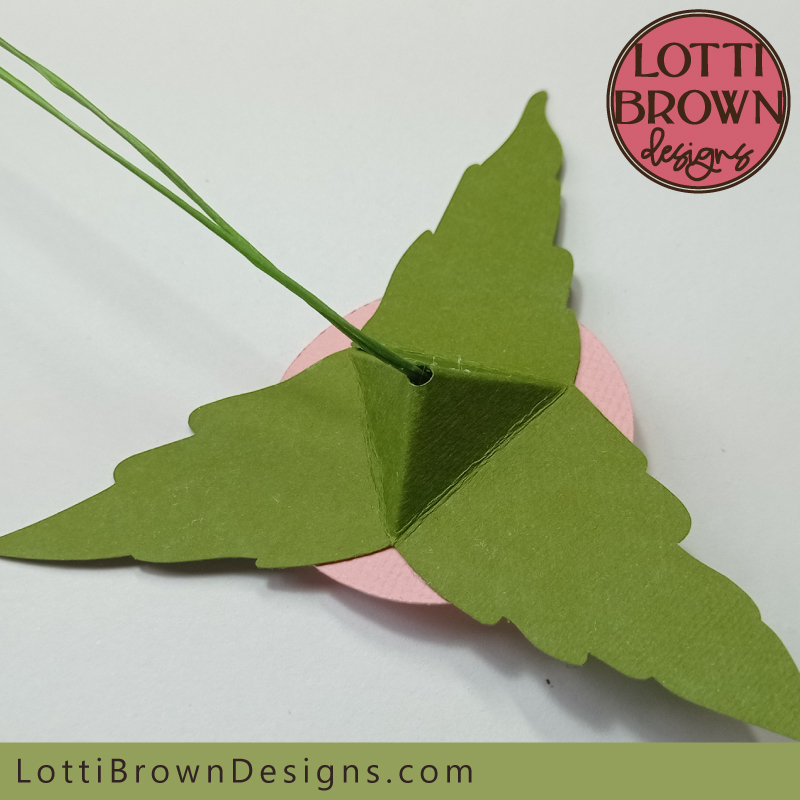 Seen from behind
Wrapping the Stem
- Next we're going to wrap the stem with the floral wrap (florists tape) before we attach the stem to the flower - it's much easier to wrap the stem like this without the heavy flower head.
- So cut a length of your floral wrap - don't go too long to start with, else it becomes a little tangly and difficult to manage, so just a shortish length is great to start with, that you feel you can manage with comfortably...
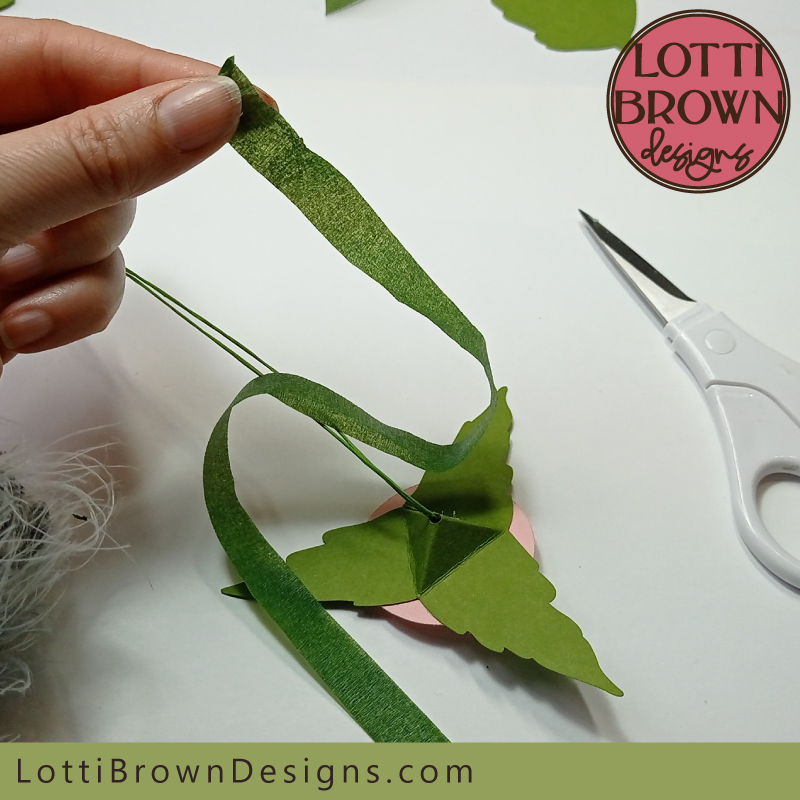 Cut a length of floral wrap for the stem - cut enough, but don't make it too long else it will tangle more easily
- Start wrapping around the stem at the top of the wires - wrap around lots of times at the top as this will help the transition between the flower head and the stem. You can add a dab of glue to the end to start you off if you prefer, but this isn't essential - hold the wrap taut and press the layers down as you go and you should find the waxy surfaces stick together - see the 2 images below...
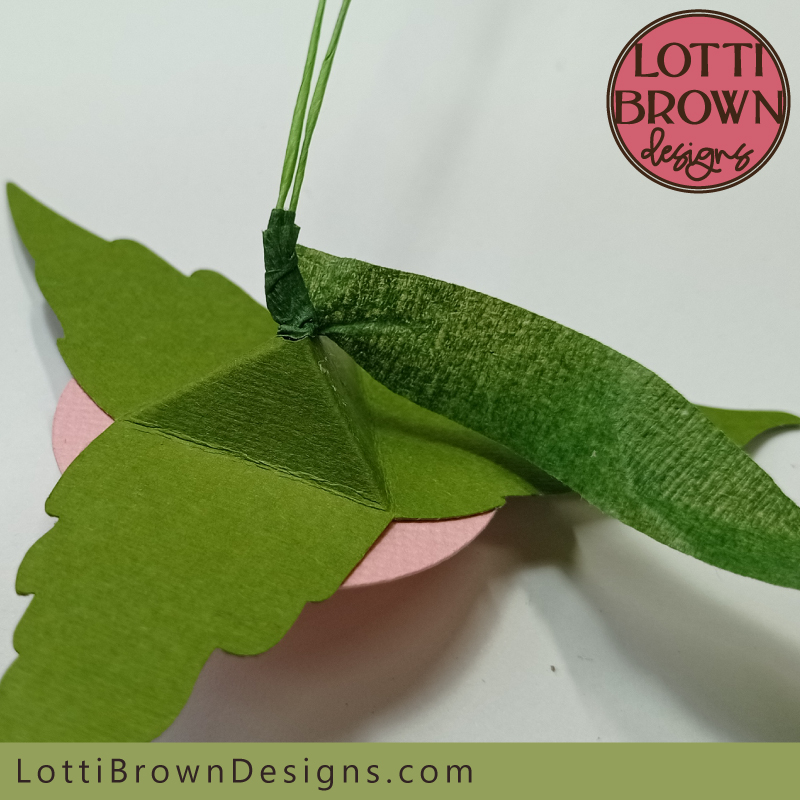 Wrap the tape around the top of the stem lots of times to get started...
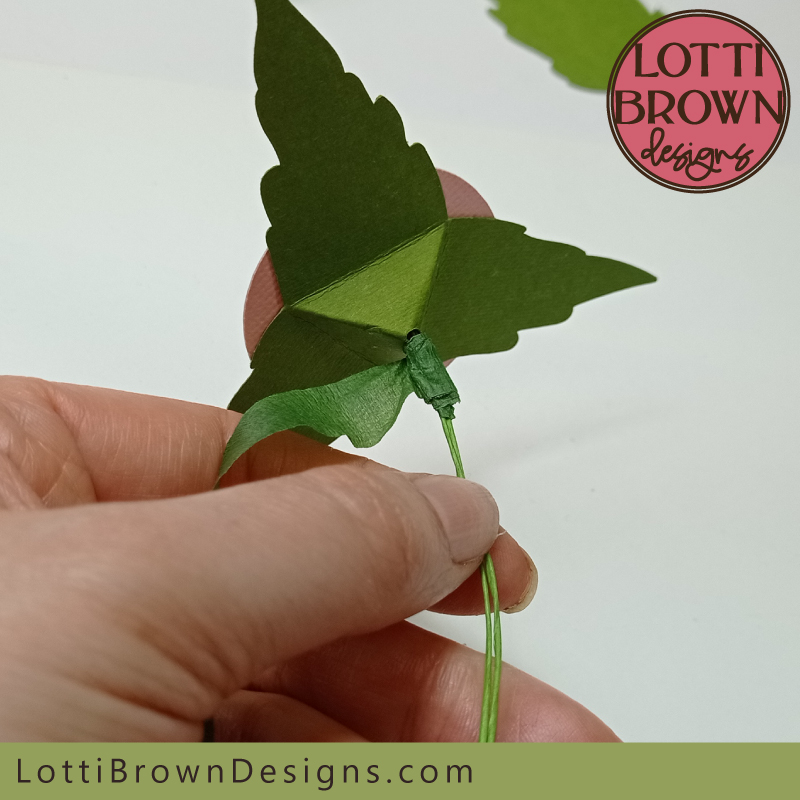 Wrap multiple times around the top of the stem before moving down the stem
- Then, keep on wrapping down the stem - hold the tape taut and turn the flower stem, while pressing down as you go - see the image below...
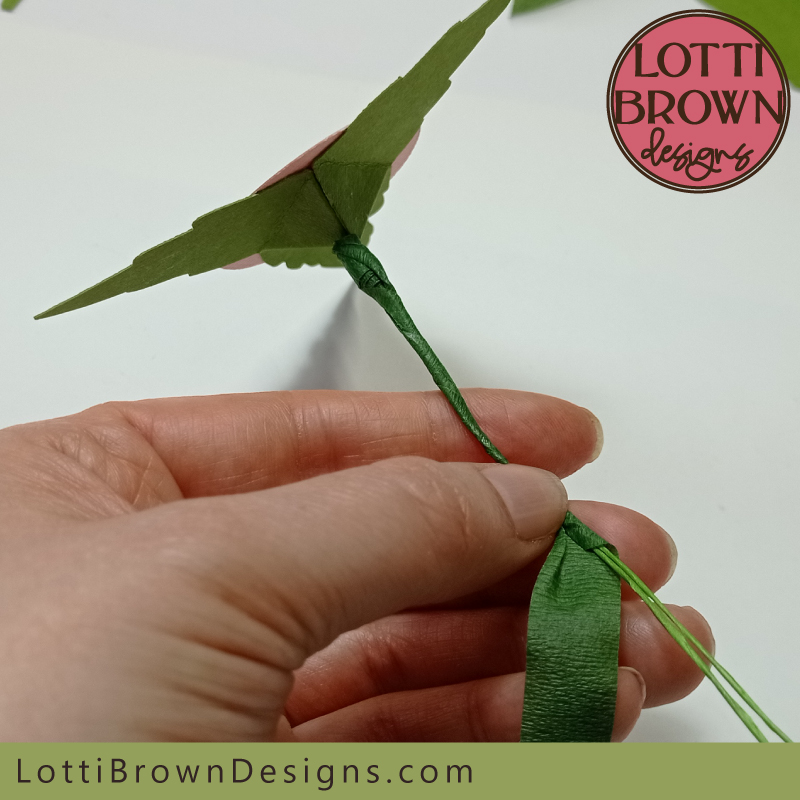 Keep on wrapping down the stem, holding the tape taut and pressing down as you go
Adding a Leaf
- When you're ready to add a leaf, just add it into the wrap, like you can see in the image below - add it at the point you want, then start to wrap it into the stem...
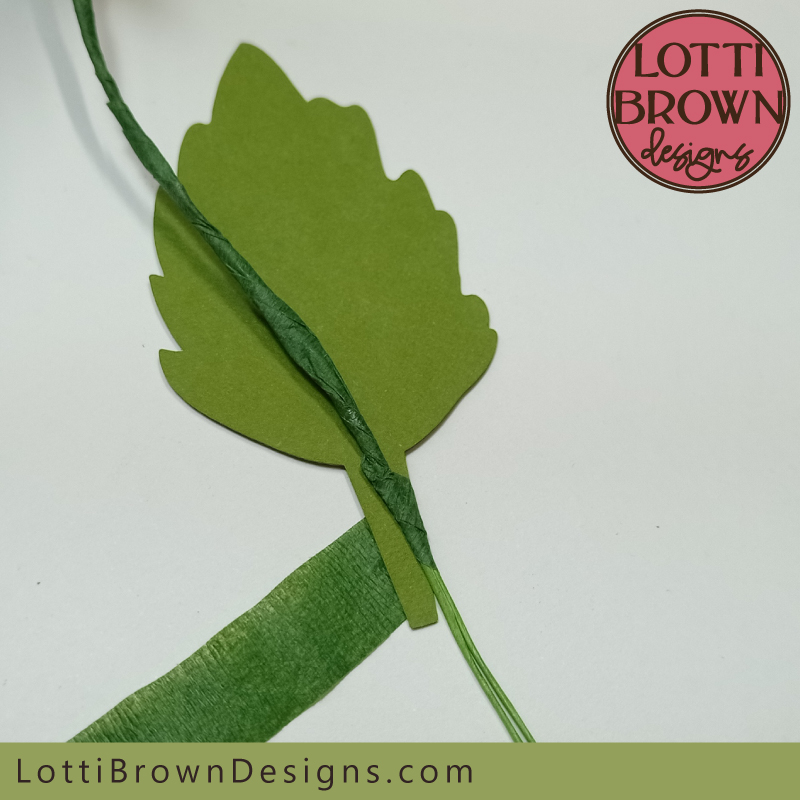 Start wrapping the leaf into the stem at any point you want
- Wrap up and down around the leaf stalk until it's held securely in the wrap - see the image below. You can also see in the 2 photos below how I've chosen to make my stem a little shorter, by simply bending the ends of the wire up, ready to wrap into the stem...
- We're still going to need to add a little more wrap to secure the leaf in place...
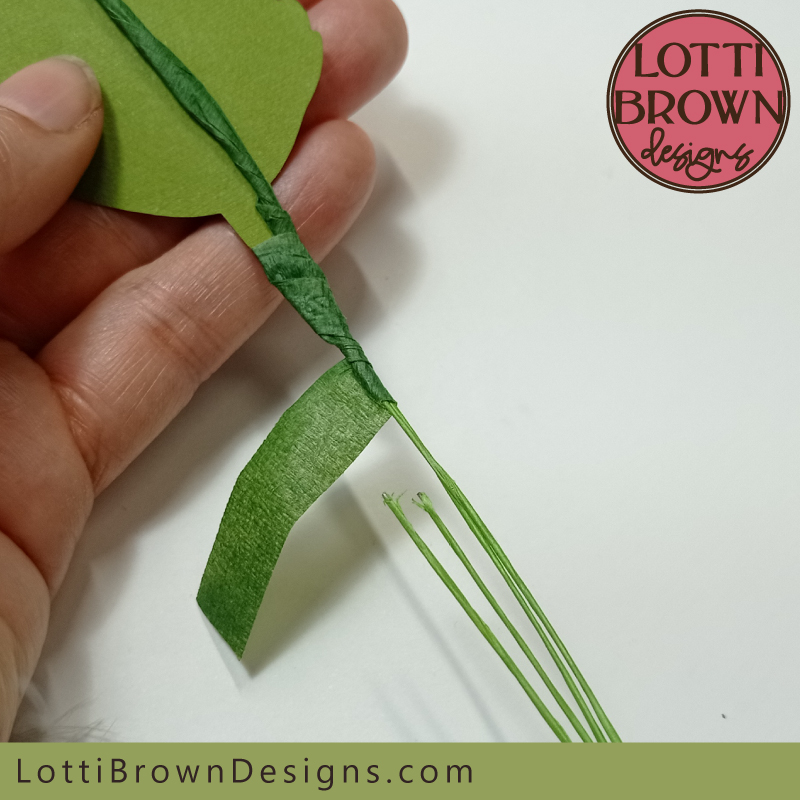 Wrap securely around the leaf stem to secure your leaf
- You may have also noticed that my tape has come to an end - I wanted to show you that you can just carry on wrapping until the tape runs out, then start with a fresh piece, allowing yourself a bit of an overlap, so start on the existing tape, maybe go down a bit, then go back up to secure the leaf, then continue back down - this should keep the wrap securely attached to the wire stem - see the 2 images below...
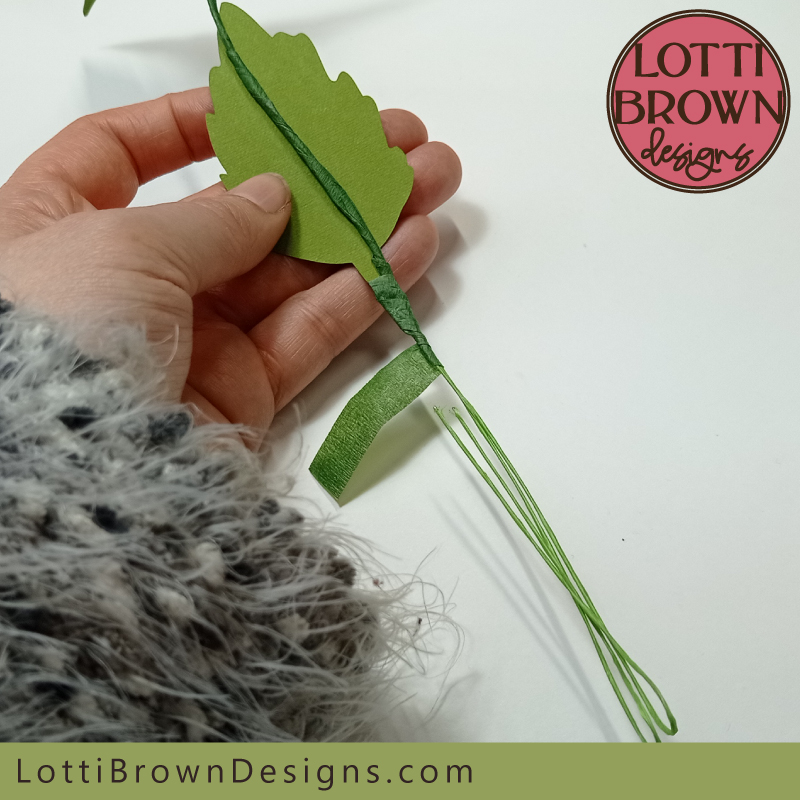 When the floral wrap tape runs out you can just start with a new piece...
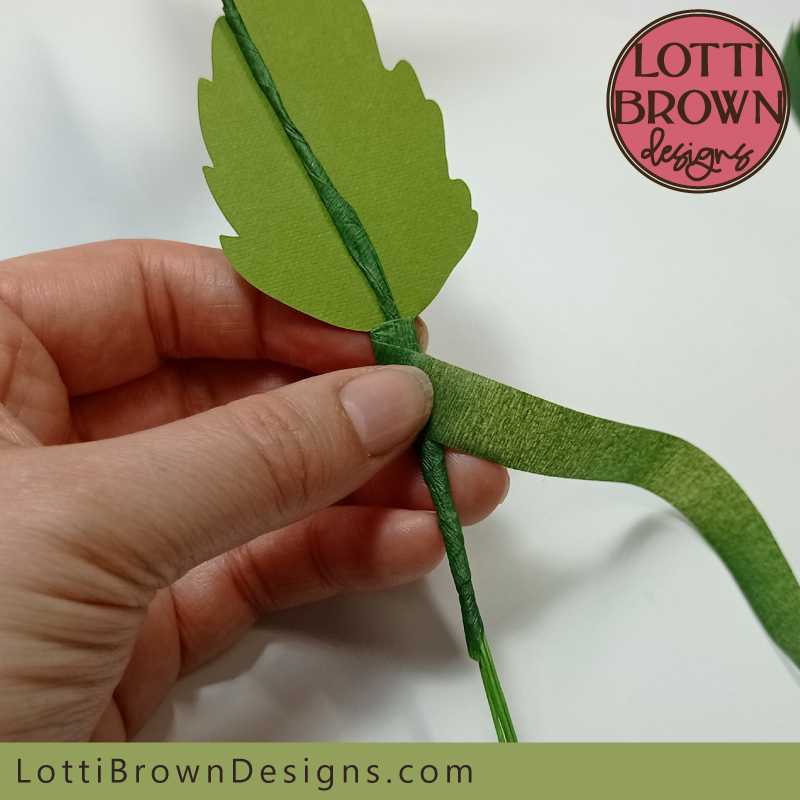 Overlap the two tapes to keep the wrapping secure
- Now, keep wrapping down the stem - you can see in the image below how I've left a little loop of wires at the bottom - I find the wrapping easier this way. Once you reach the bottom, go back up a little way to secure the end - press hard to stick the wrap down onto the lower layer - you can use a dab of glue on the end if you need to.
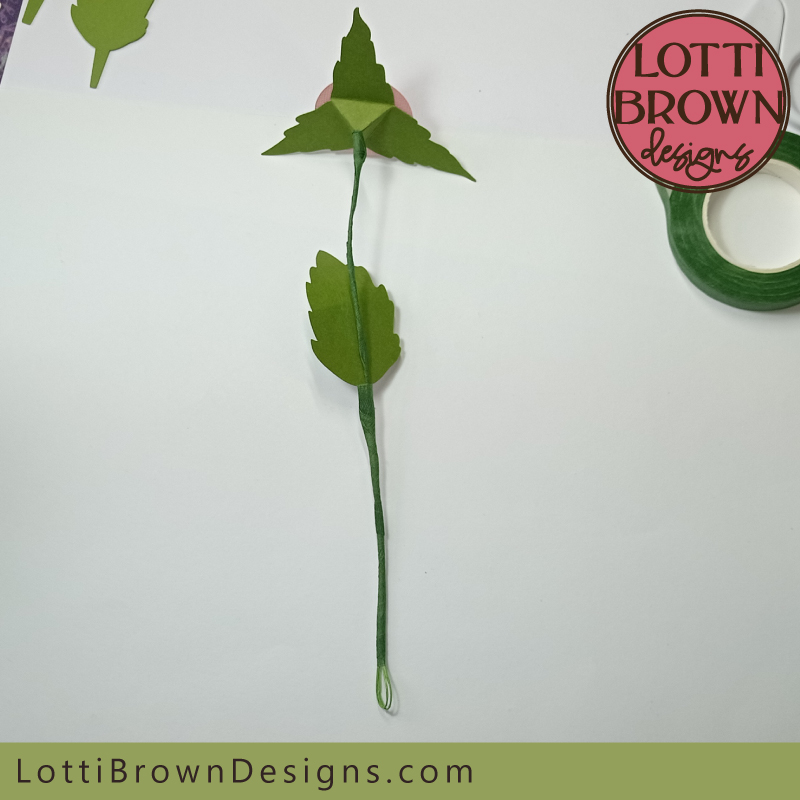 Wrap down the stem - when you readh the bottom, wrap back up for a little way, pressing hard to secure the end - you can add a dab of glue if you need to
- You've now finished your stem - it should look something like mine in the images above and below...
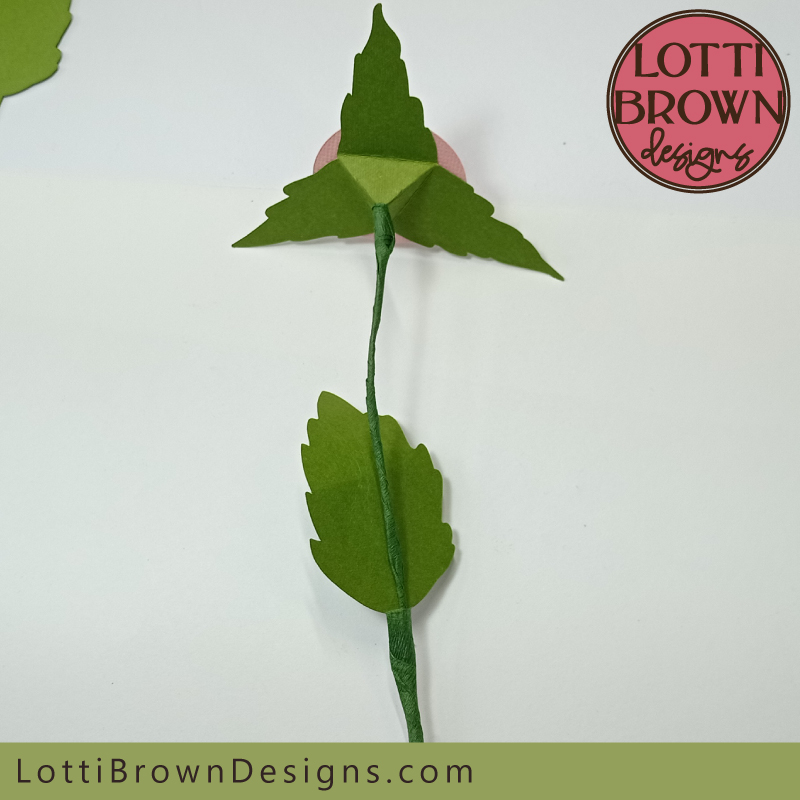 Paper flower stem with leaf
- You can see that I've just curved the leaf a little bit, just using my fingers to shape it, so that it looks more leaflike...
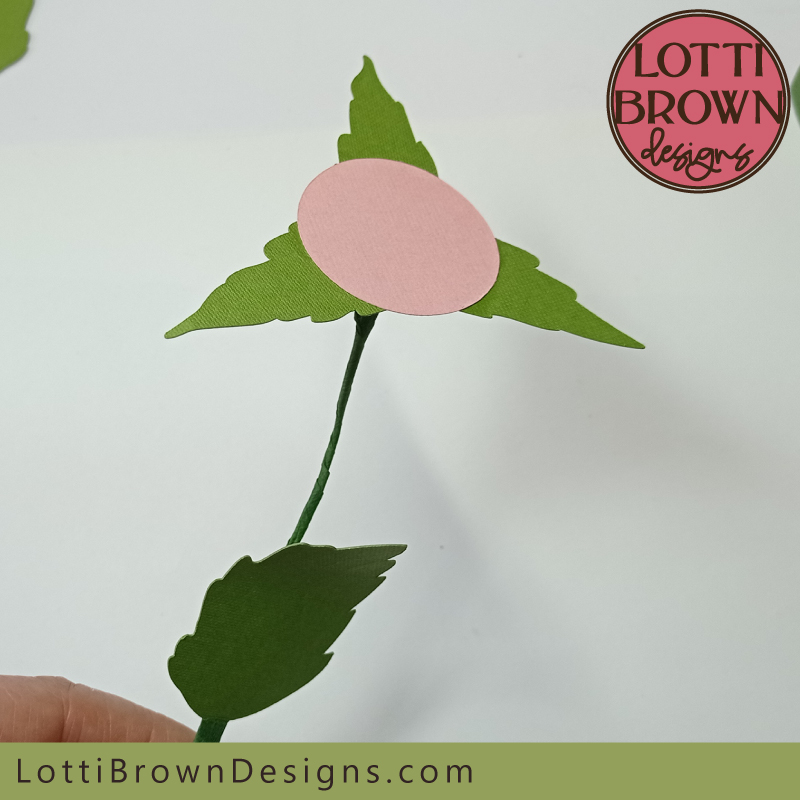 Your stem is now ready to attach the flower head
Attaching the Flower Head
- There's just one thing left to do now, and that's to attach the flower head to your stem - it's easy - just add some glue to the circle, making sure that you've got glue right up to the edges of the circle (don't get it on the green leafy sepals if you can help it) - see the 2 images below...
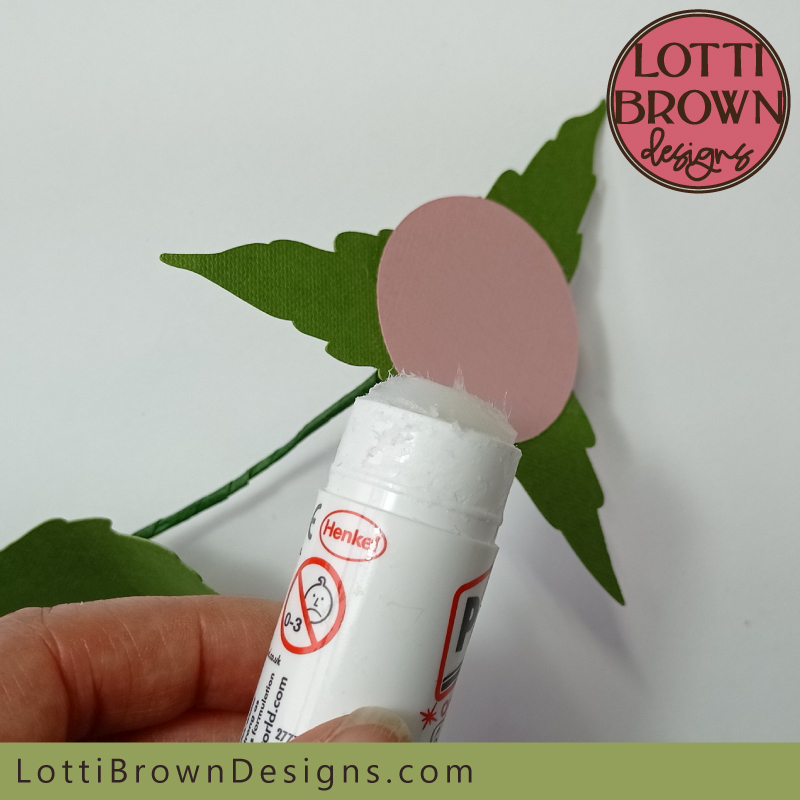 Add plenty of glue to the circle, going right up to the edges
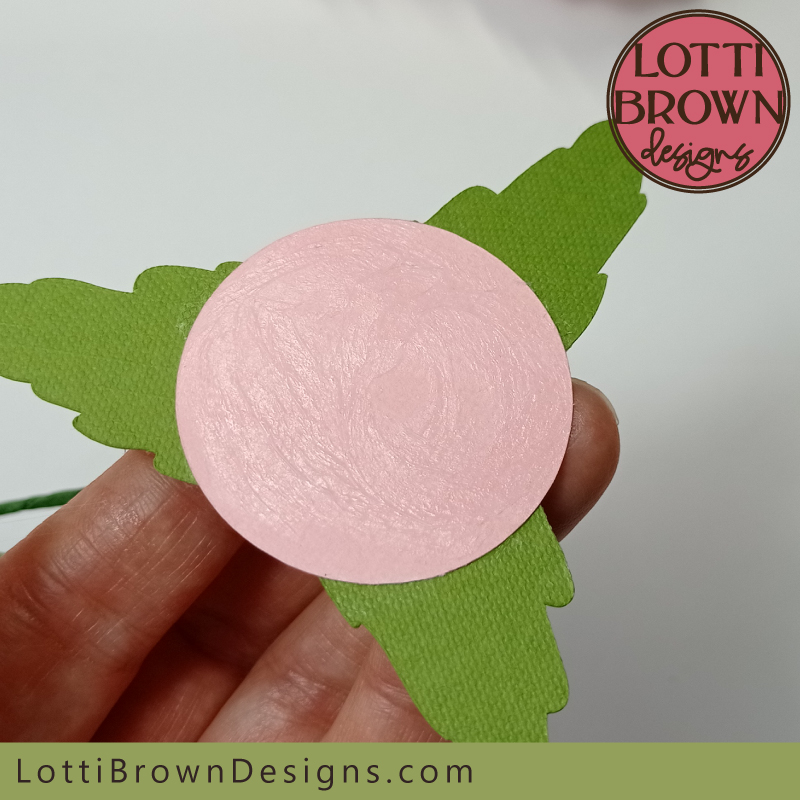 Add plenty of glue, right up to the edges
- Then glue the flower head on - you'll need to press down in the centre of the flower to secure the glue while also holding from behind at the same time - see the image below. This might squash the flower centres a little bit - but you can use your fingers to lift the little stalks back up again when you've finished.
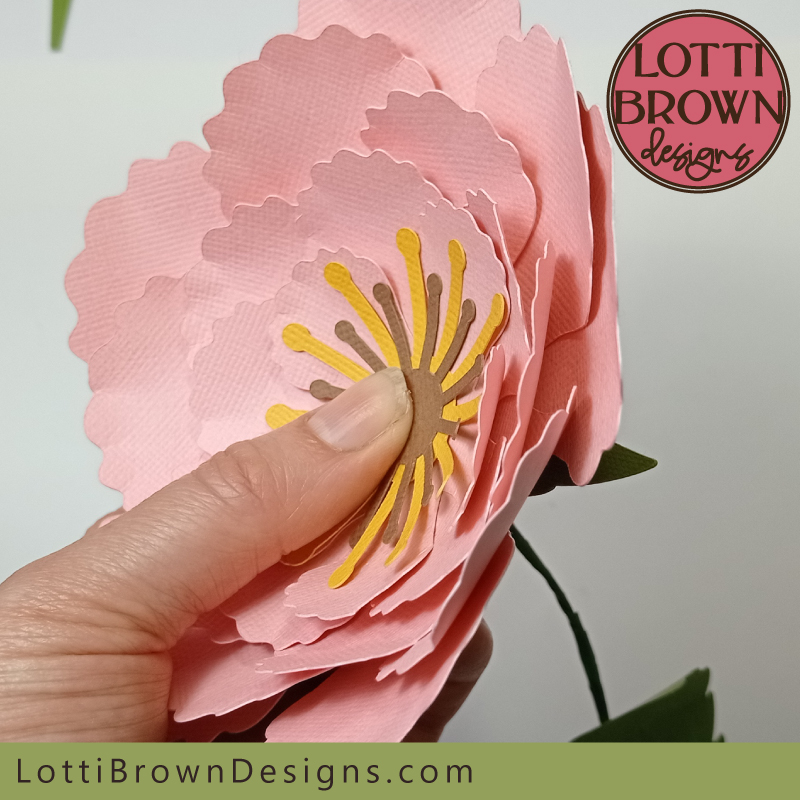 Glue the flower head down onto the stem
- And congratulations! You're done! The paper flower is finished!
 Beautiful paper flower with stem
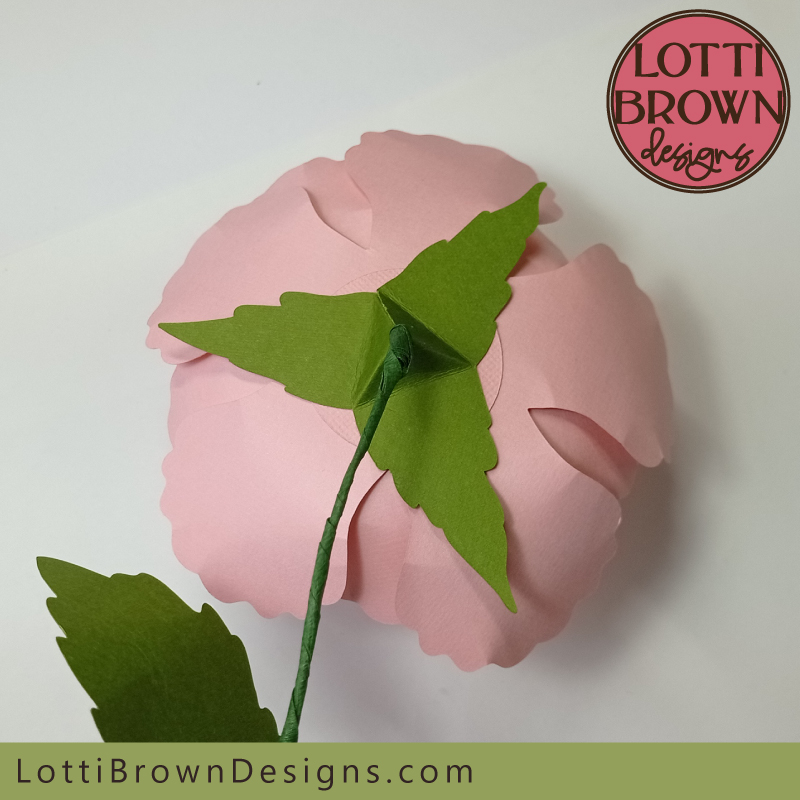 Showing the back of the flower with the stem attached
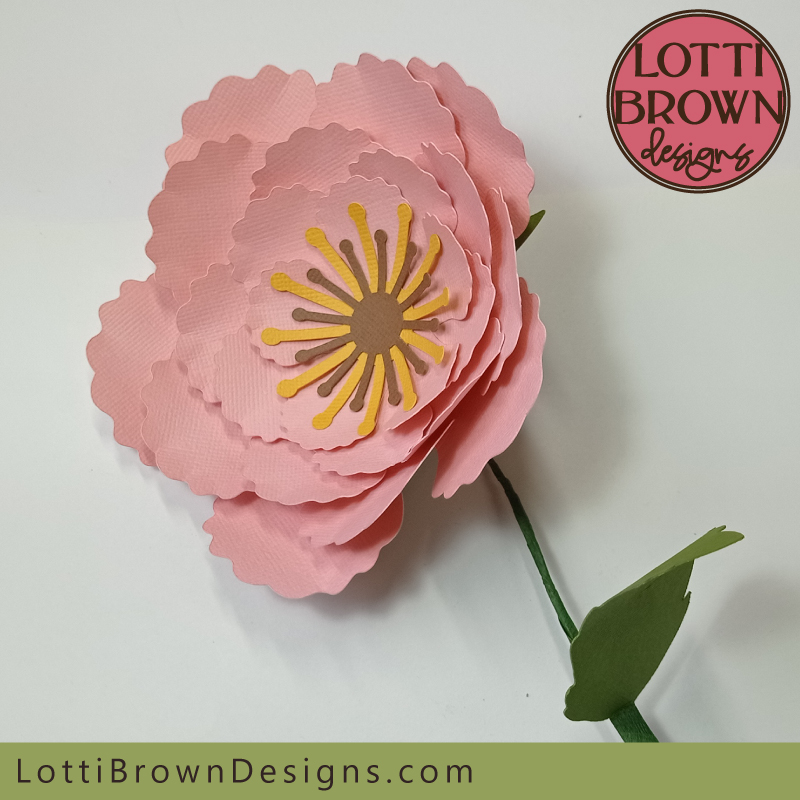 Papercraft flower with stem and leaf
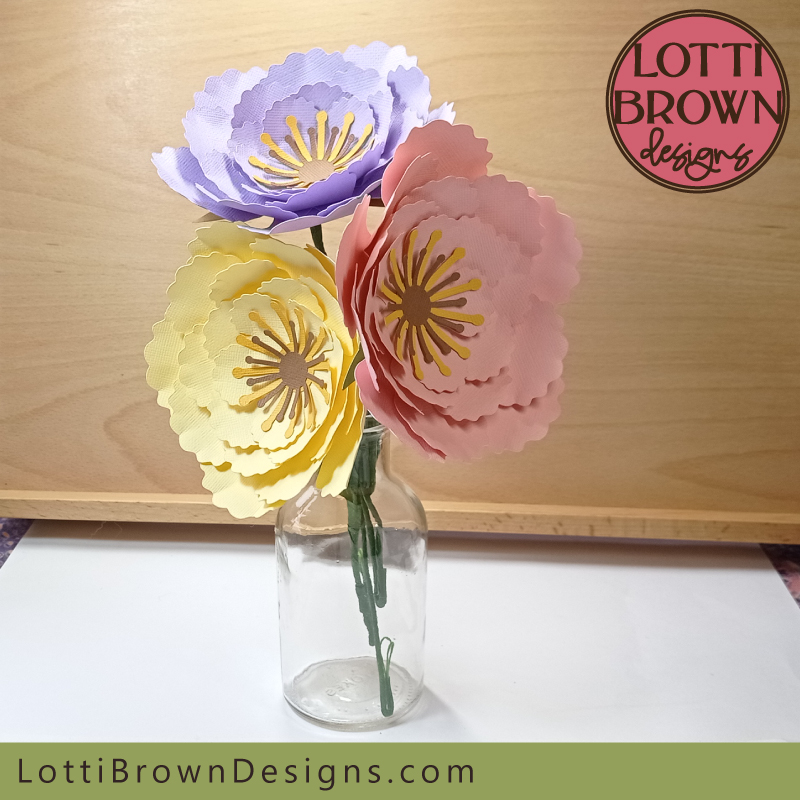
You can now add your paper flower to a vase and make more to go with it!
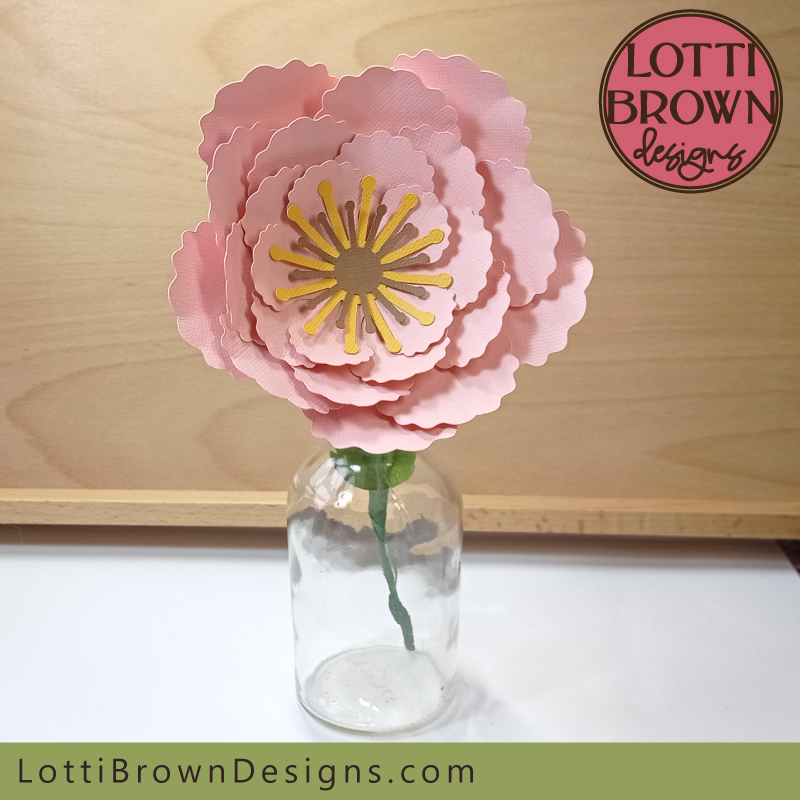 Paper flower template for a vase
 Papercraft flowers in a glass vase
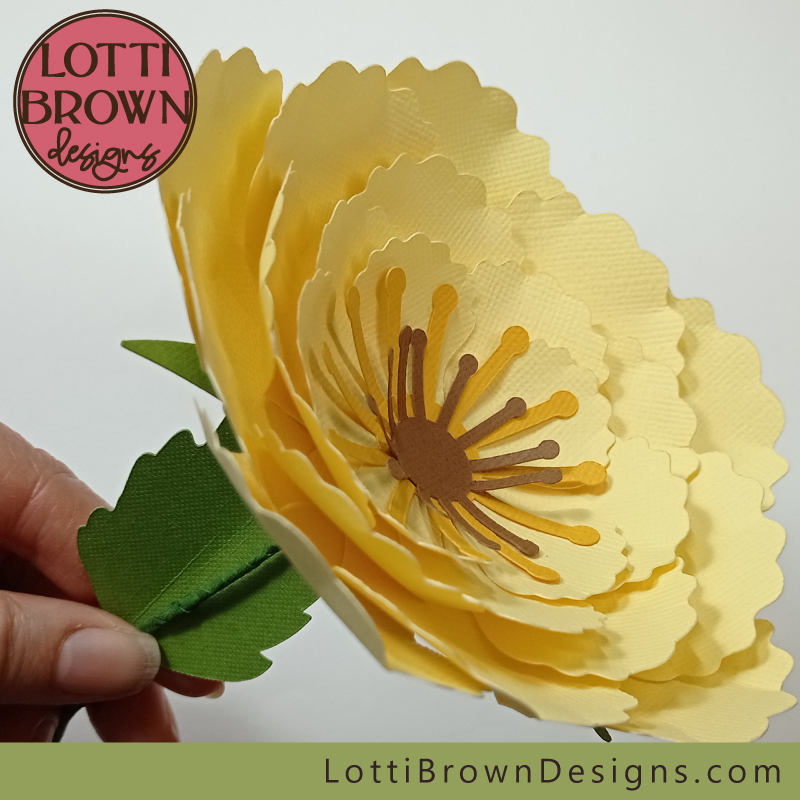 Paper flower template with stem
Where to Get the Template
If you enjoyed looking at this tutorial for how to add a stem to your paper flower, you might like to get the template and make it for yourself. You can get the template from my store with instant download, worldwide - see the link right below...
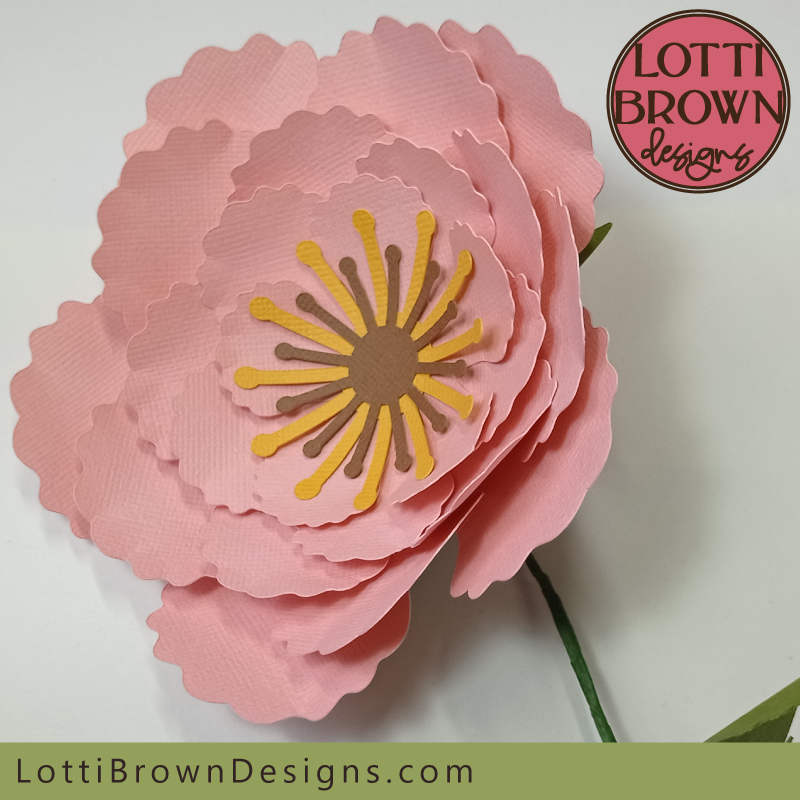 Paper flower template with stem and leaves
Get the paper flower template with stem and leaves from my store here
(can also be used flat-backed, without the stem)
SVG, DXF, EPS and PNG file formats
For personal use and small-business commercial use (up to 200 products)
For physical (craft) products only - no digital products, use, or sharing
You Might Also Like:
Lotti Brown's Designs & Templates
How-tos...
- How to use SVG cut files for Cricut (also other cut file formats & machines)
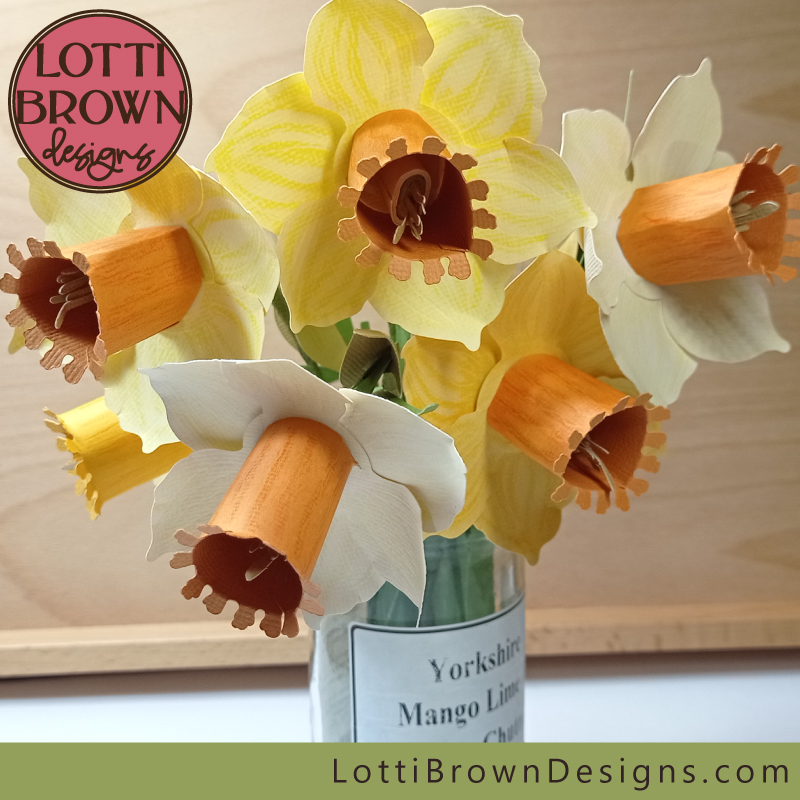 Paper daffodils craft project
If you like making paper flowers, you might also enjoy making these paper daffodils...
See all my floral SVG designs and templates here...
Want to keep in touch?
Sign up below for my free email newsletter...
My newsletter is usually sent out once a month (at the end of one month or the start of the following month) and you can unsubscribe any time...
Sign up below...!
Recent Articles
-
Willow Tree Symbolism and Celtic Willow Art
Apr 11, 25 05:43 AM
Explore willow tree symbolism and meaning - Celtic willow art and printed products... -
Wild Dog Rose Pattern & Products
Apr 07, 25 06:12 AM
Pretty dog rose pattern and products in a nostalgic heritage style recalling pretty hedgerows of flowers... -
British Robin Book Recommendations
Apr 04, 25 06:26 AM
My British Robin book reviews and recommendations - learn about Britain's favourite bird...
Follow me:
Share this page:


