*** IMPORTANT - I'm retiring my digital files - SVG/PNG/DXF/EPS - and printables from 31st December 2025 ***
*** Please ensure that you have everything you need - files and/or instructions printed off from the website (find them currently in the ARCHIVES section) - by 31st December 2025 as they will not be available after this date ***

How to Score on your Cricut
- Home
- SVG files
- SVG Card Templates
- How to Score
Learn how to score on your Cricut cutting machine - this tutorial will help you to use my greetings cards SVG designs which need a score line to create the fold for the card and envelope.
We'll also look at whether you need the scoring stylus or scoring wheel for your machine - and how to work with SVG designs and score lines within Cricut Design Space to get the results you want.
You will be able use the same principles for other projects - and I also share ideas for how to create the score if you don't have the scoring stylus or scoring wheel for your Cricut.
So let's get started...
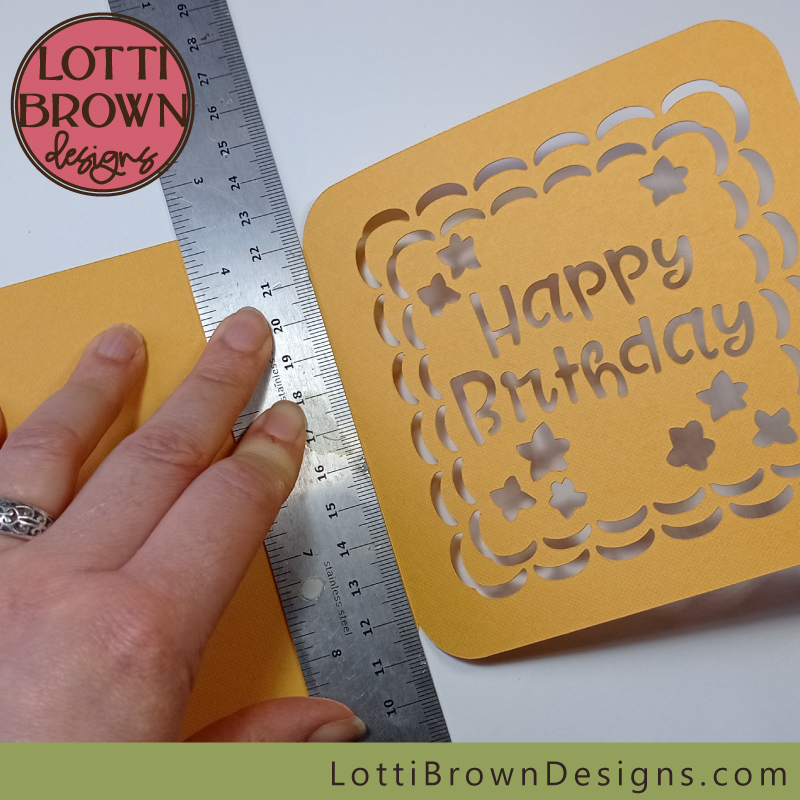 How to set up my greetings cards SVG files for scoring using Cricut Design Space
Do you need the cut and score instructions for working with the card template in Silhouette Studio instead? I've got those here...
Do I need a Scoring Stylus or Scoring Wheel for my Cricut?
When I first got my Cricut Maker, I was disappointed to see how much extra the scoring wheel cost, and delayed getting one as it was a bit expensive for me at the time...
When I decided to splurge and get one, I discovered that I could actually use the (much cheaper) scoring stylus in my Cricut Maker machine - so I bought that instead and I'm pretty happy with it.
Here's how to know which one to get...
- The Cricut scoring wheel and double scoring wheel only work with the Cricut Maker family of cutting machines - and NOT with the Explore or Joy machines. So, basically, if you have an Explore or Joy machine, you should get the Cricut scoring stylus for your scoring projects.
- If you do have a Cricut Maker (including the newer Maker 3) you can choose whether to get a scoring stylus or a scoring wheel. The scoring wheel is more expensive but it does apply a little more pressure which makes the material easier to fold.
- If you decide to get the scoring wheel, you can choose to get just the single scoring wheel or the single AND the double scoring wheel - the single scoring wheel is recommended for most paper and card projects but the double scoring wheel is used for those much thicker cardstock projects where it makes two parallel lines close together for a better fold (the fold works best when the scoring is created on the outside of the fold).
- The scoring wheel uses the 'Quick Swap' housing system, so if you already have this, you can just buy the scoring wheel blade, and use the 'Quick Swap' housing you already have. If you don't have it, you will need to buy the 'Quick Swap' housing too.
What if I Don't Have a Scoring Tool for my Cricut?
If you don't have a scoring wheel or a scoring stylus for your Cricut, it's not a complete disaster, you can still make score lines but you'll just need to make them manually.
I find the best way to do this is with a metal ruler (which I recommend anyway, even with the scoring stylus or scoring wheel) plus a slightly sharp point - a knitting needle would be an excellent choice or a scissor point.
- You will need to remember to delete the score lines from the design when you cut it in Cricut Design Space
- You may need to re-draw the scorelines in lightly in pencil to get them in the right place when you manually score them - sometimes you don't need to, as the location for the scoreline is quite obviously positioned between two corner points, other times it's not so easy to do. (You shouldn't have too much difficulty with my greeting card SVGs).
So simply:
- Draw a light guideline in the correct position (very lightly in pencil is best)
- Line up your metal ruler along this line, and hold it down firmly
- Score along the ruler with your sharp point (like a knitting needle)
- Keeping your ruler in place, fold your card up against your ruler
- Then turn over your card, and fold again the other way, you can grip all along the folded edge between finger and thumb to improve the fold.
How to Score with your Cricut - Using Design Space
If you've already made some scoring projects using designs already found on Cricut Design Space, the score line is already set up ready for you to use...
If you're uploading an outside design into Design Space (like my SVGs), the score line is not set up ready to use and you just need to make a few extra clicks to tell Design Space which are the score lines and which are the cut lines - if you don't do this, or if you forget, your Cricut will cut all the lines, and cut your nice project into little pieces!
Please note that the files are set up to cut on a standard Cricut mat, NOT the new card mat!
Here's what you need to do, just a couple of extra steps to make your greeting card project ready to use in Cricut Design Space...
How to set your file up to score with Cricut Design Space...
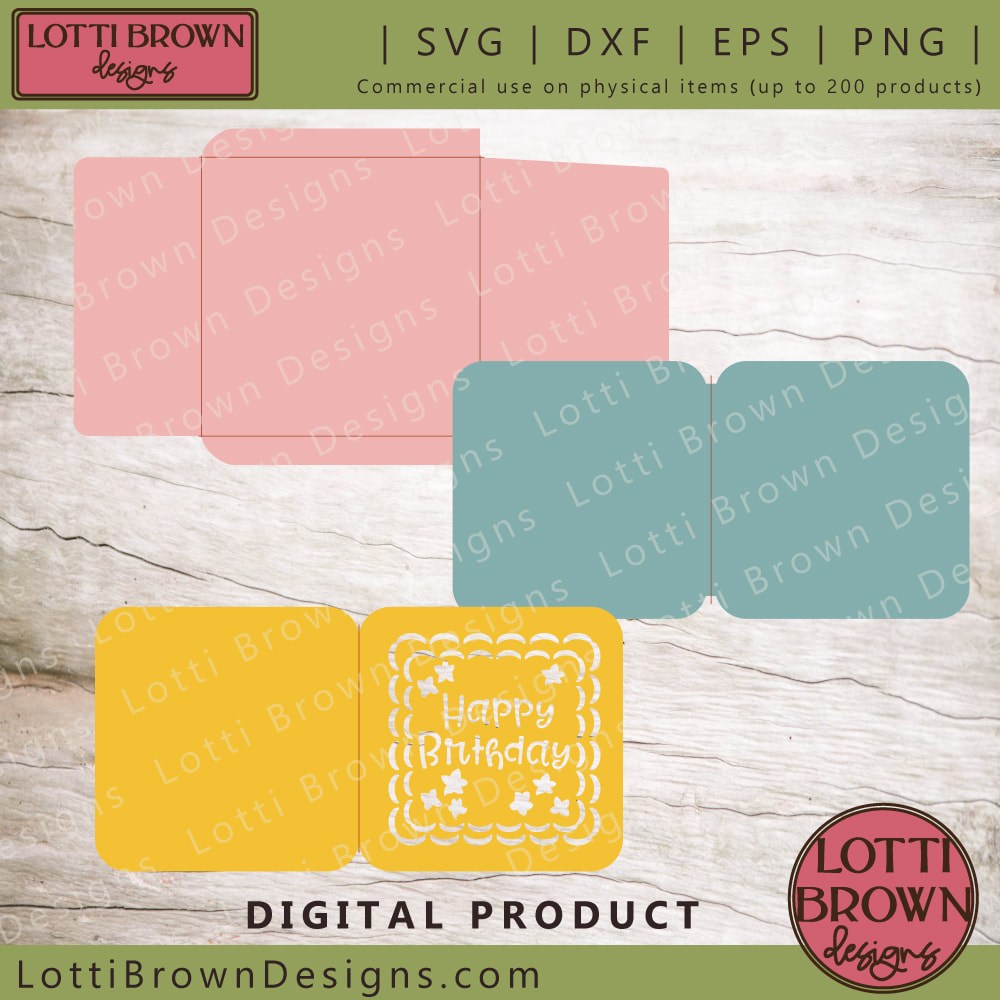 Cut and score greeting card template
This tutorial uses my 'Happy Birthday' card SVG to show the method of setting your new SVG up ready to score in Cricut Design Space - many of my other greetings card SVGs are in exactly the same format and require the same method - the labels on the layers and the colours of the card may be different, but the layer order and set up is exactly the same method, so just follow along...
If you're using another file type or cutting machine programme, or if you need to resize PNG files, you can get the dimensions for the files here...
Instructions for Silhouette Studio users are here...
1) Upload the greeting card SVG into Cricut Design Space and open it on your 'Canvas' - if you need help with that, you can find that here...
2) On the right-hand side of the screen you will be able to see all the layers. You will see that I've positioned:
- the score line for the outer part of the card just above the cutting shape for the outer part of the card
- the score line for the inner card just above the cutting shape for the inner card
- the FOUR score lines for the envelope just above the cutting shape for the envelope (this is right at the bottom of the pile)
Make a mental note as we'll need to be able to identify and select these in a minute!
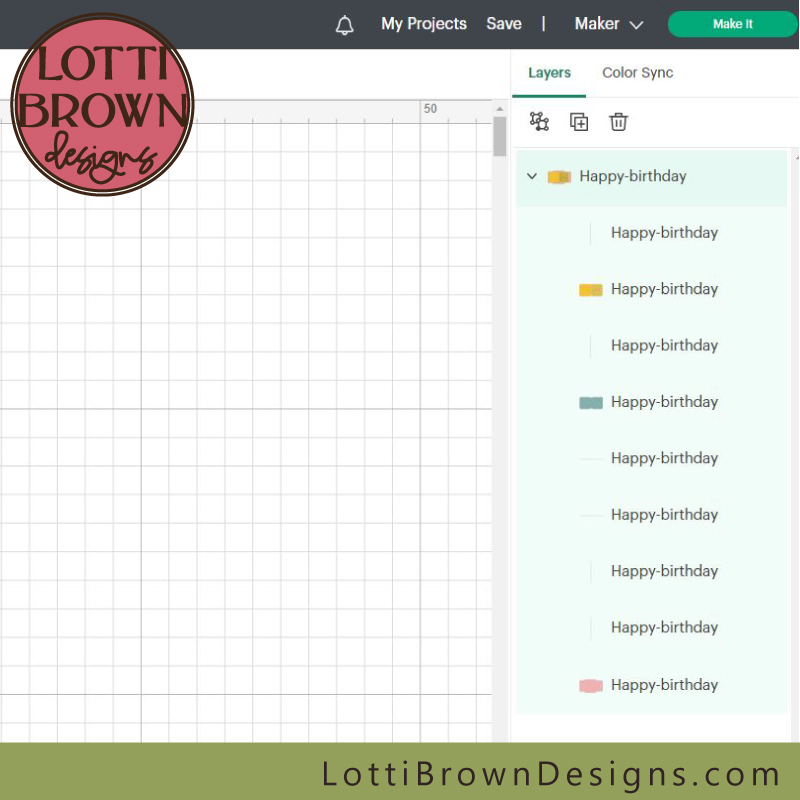 Note how the score lines are positioned right above the part that they're to score into/onto
3) Click 'Ungroup'...
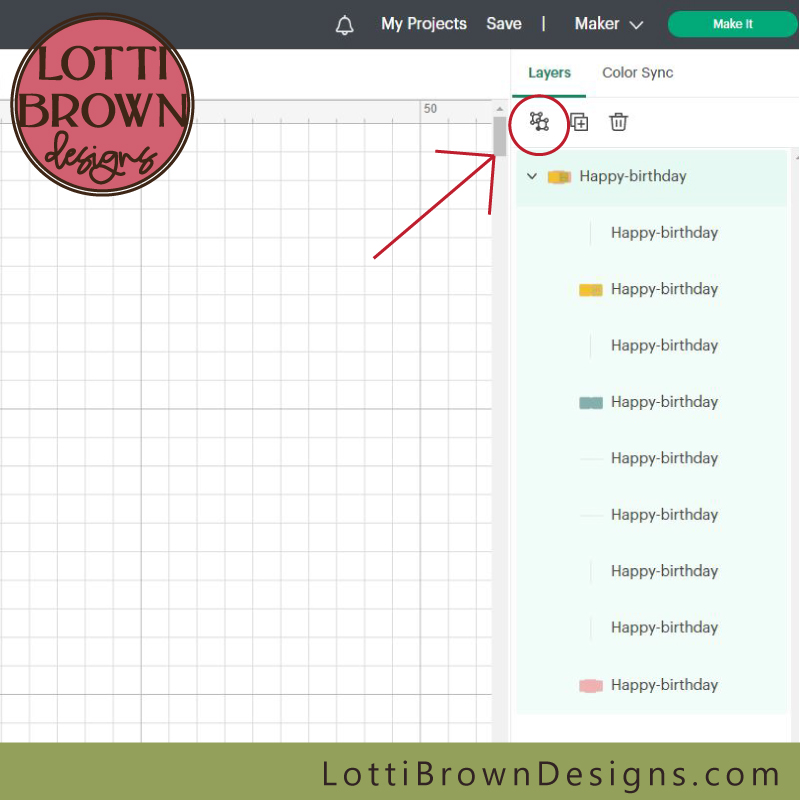 'Ungroup' everything to start...
4) Next, we're going to select each of the lines that we want to be score lines - you can do this individually if you want, but it's much quicker to select them all together. You can do this by holding down the 'Shift' key on your keyboard and clicking on the ones you want to select...
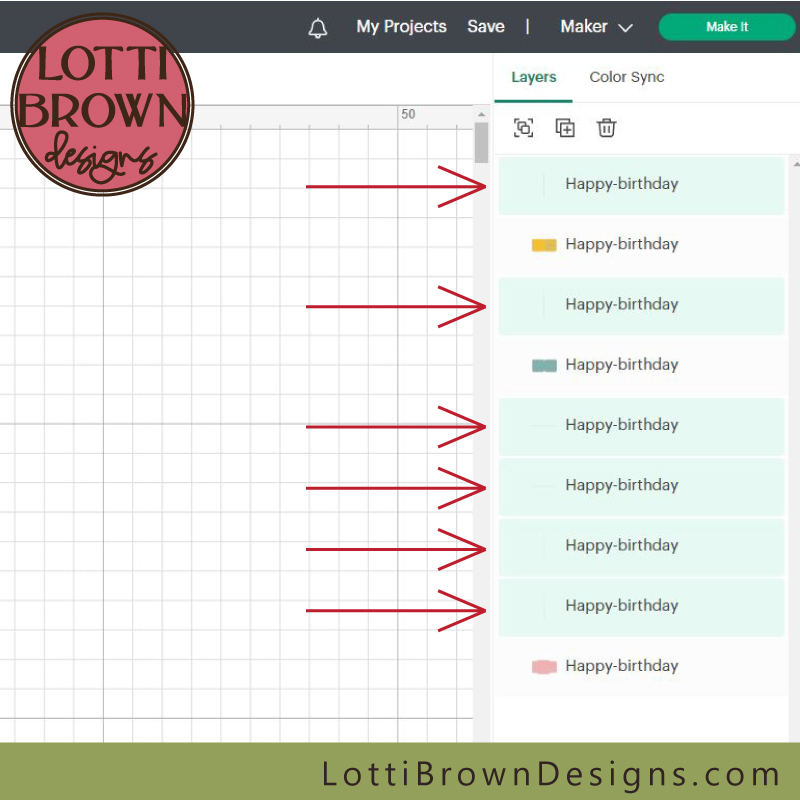 Click on each of the lines that need to be set to score lines - TIP - hold the shift key as you click to select them all in one go
5) With the lines to be scored selected, look in the top left corner of Cricut Design Space, where it says 'Operation' and 'Cut' in the drop-down menu, click the little arrow by the side to access other options and select 'Score' in the section marked 'Draw'. Your lines are now all set to score and not cut.
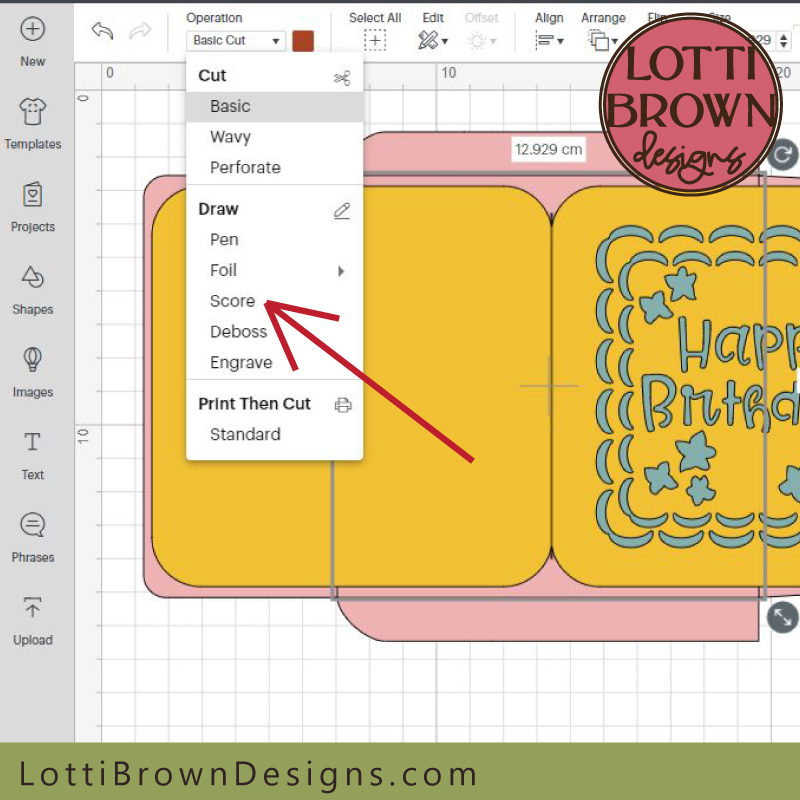 For 'Operation' select 'Score'
6) Now, we need to tell Cricut Design Space which score lines we want to associate with each cutting shape, we need to link them correctly so that we're not having the envelope score lines on the card and the card score lines on the envelope - what a mess! So we just need to work down the layers, associating each score line (or group of score lines) with the cut shape underneath it.
- Select the score line and the card outer (using the 'Shift' key, as before) - then press 'Attach' (bottom of the screen)
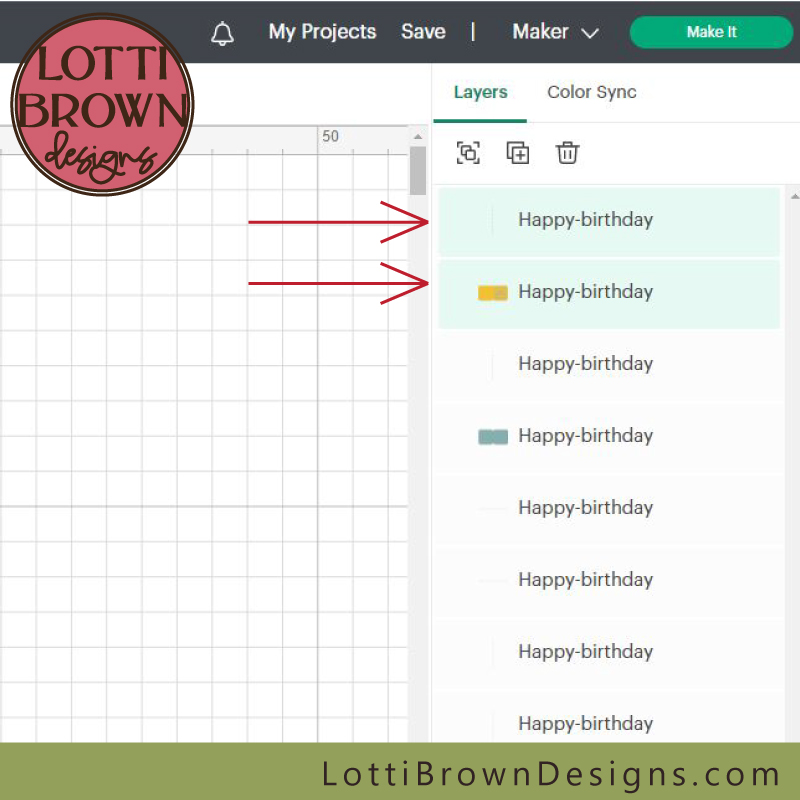 Select the top score line and associate it with the card outer, just beneath it
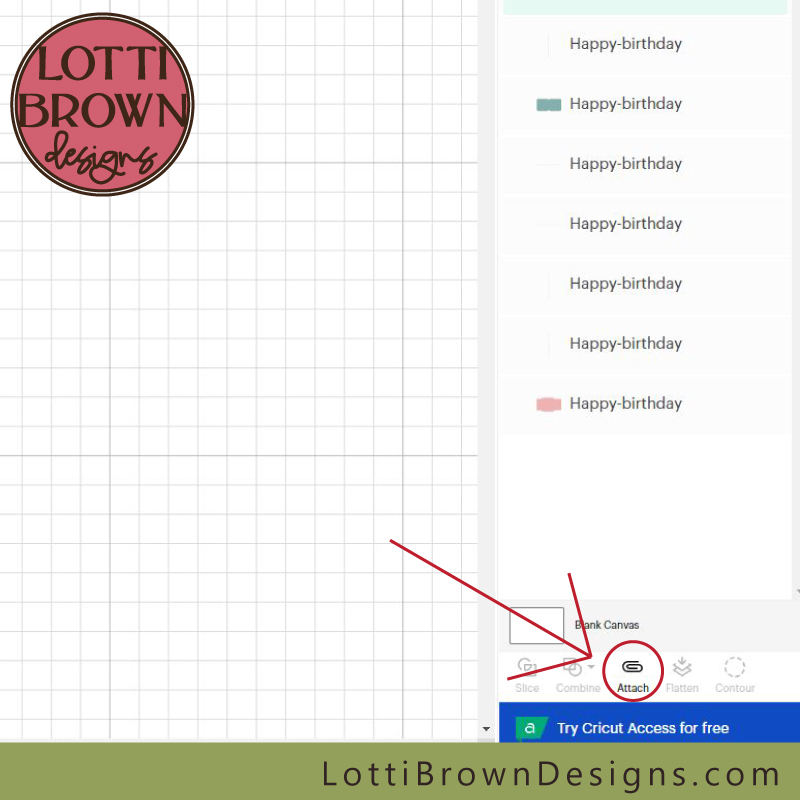 Click 'Attach'
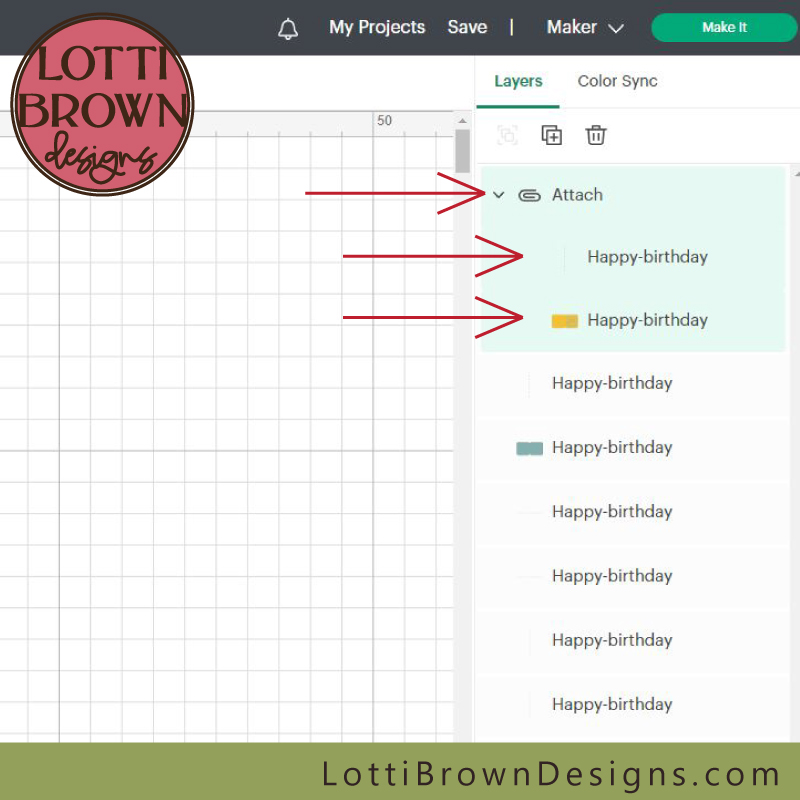 You can now see, in the layers panel, that these are now 'attached' - note how the attached layers are indented a little beneath the 'attach' line
MARCH 2024 - after the Cricut update, this image above will look slightly different with the contents of the 'attach' nested under the arrow but hidden. If you want to see it looking like this, just click on the arrow next to the 'Attach' to see what's in the group.
- Repeat this, selecting and attaching the score line with the inner card...
- And then the FOUR score lines all together with the envelope at the bottom.
- Finally, check that the layers look okay with everything attached where it should be - the order may be rearranged, with the envelope on top - this doesn't matter. (On Cricut Design Space, you may need to scroll down the layers panel to see the final layer or layers). New from March '24 - click on the arrows if you want to see what's in each 'Attach' grouping so it looks like the images below.
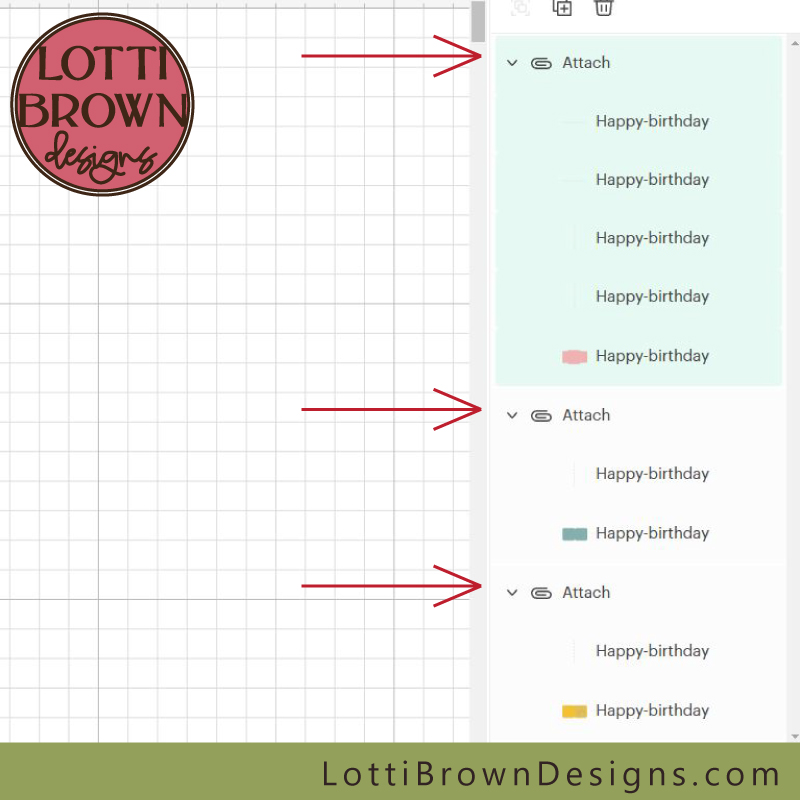 Time for a final check of the layers panel
7) Now, we are ready to 'Make it' (top right, as usual)
8) Prepare your first mat - check it says 'Score' and 'Basic Cut' for each mat
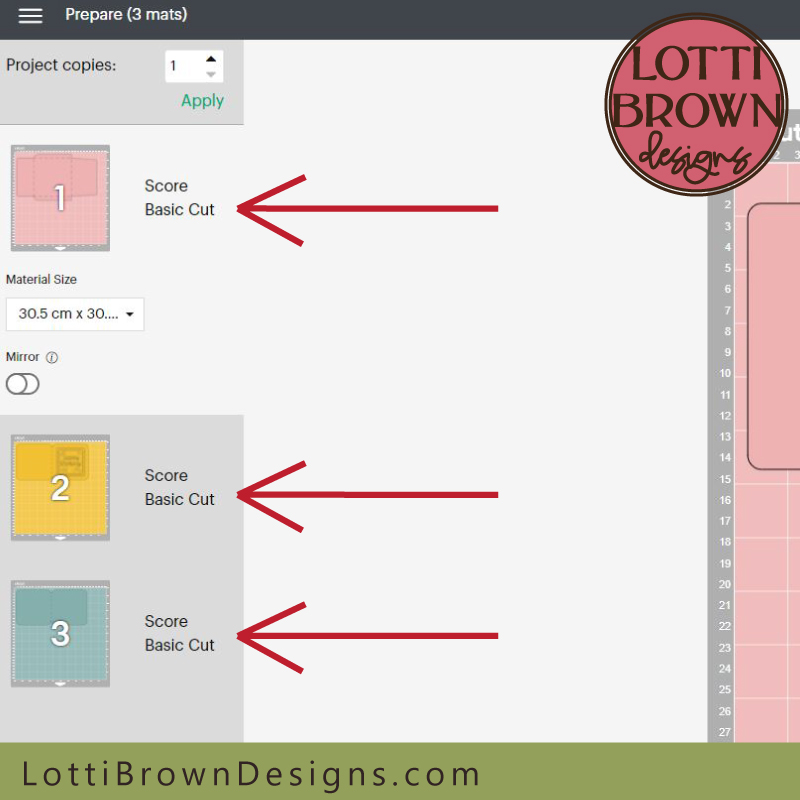 There should be three mats, each with a score and a basic cut
9) When you're ready, press 'Continue' (bottom right) as usual.
10) Select your paper type as usual (such as light cardstock)
11) Make sure the correct tools are selected - for the Explore or Joy the scoring stylus should appear with the cutting blade, for the Maker, it defaults to the scoring wheel - if you want to use the scoring stylus with the Maker, just click on 'Edit Tools' and then select the scoring stylus and press 'apply'.
Don't forget to also insert the correct tool in the correct slot in the machine too!
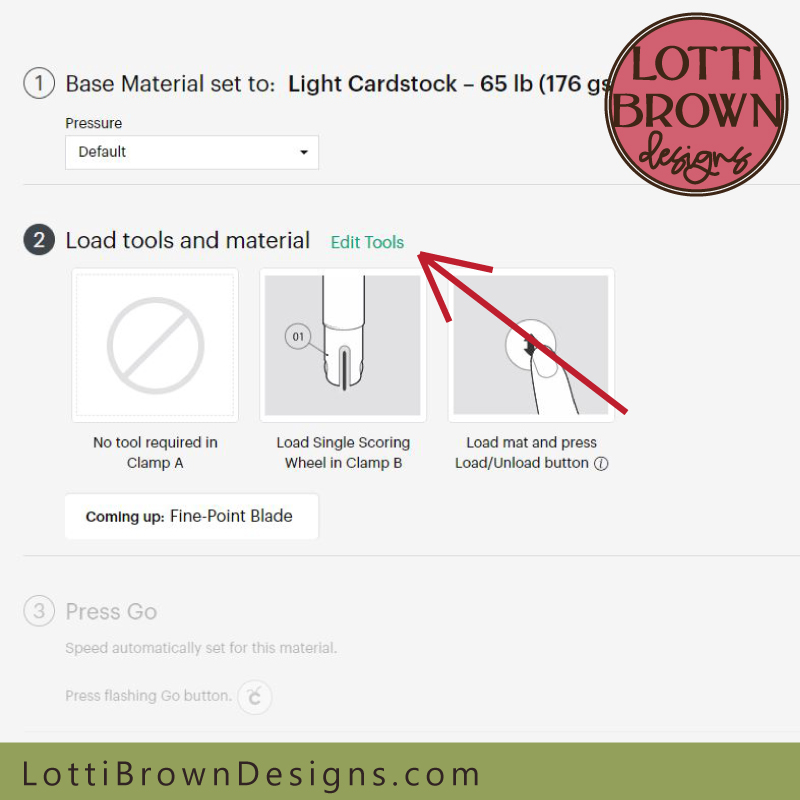 If you need to Edit your scoring tool type, do it here
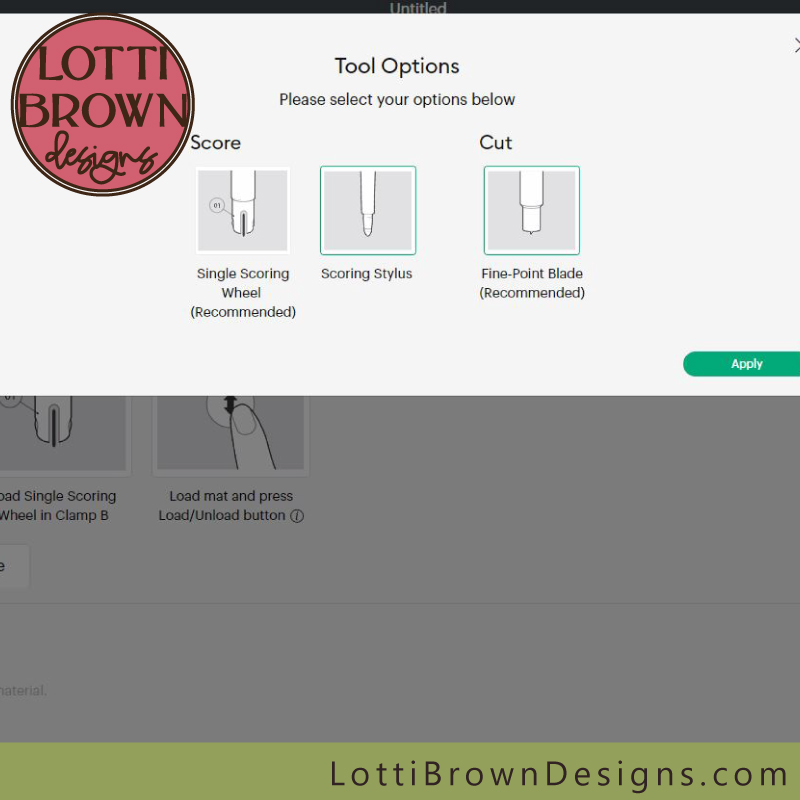 The Maker is all set up for the Scoring Stylus now
12) The correct tools should now be ready to go, so just insert your prepared mat, set the machine off and follow the same process for the other layers.
When your layers are all cut by the machine, I'll show you how to fold and assemble them at this easy Cricut greeting card tutorial here...
If you need any more help with your scoring on Cricut, you can check out the Cricut help pages here...
And you can see all my greetings cards SVG templates here...
You Might Also Like:
Lotti Brown's Designs & Templates
How-tos...
- How to use SVG cut files for Cricut (also other cut file formats & machines)
Shall we stay in touch..?
Each month, I share stories from my own nature journal, new art from my studio, and simple seasonal inspiration to help you feel more connected with the turning year...
Recent Articles
-
British Nature Folklore Library: Stories, Seasons & Celtic Tree Wisdom
Dec 01, 25 05:09 AM
Explore British nature folklore, Celtic tree meanings, and seasonal wildlife stories. A growing library of myth, meaning, and hand-drawn inspiration. -
Beautiful Art Inspired by Nature
Dec 01, 25 05:04 AM
Beautiful folksy art inspired by nature from the fields and hedgerows of Yorkshire - colourful birds and wildlife with a nostalgic floral touch... -
Birds and Folklore in Britain: A November Nature Journal
Nov 26, 25 04:32 AM
November birds and berries - fieldfares, redwings, lapwings and snow geese with folklore, meaning and nature journal inspiration.
Follow me:
Share this page:


