*** IMPORTANT - I'm retiring my digital files - SVG/PNG/DXF/EPS - and printables from 31st December 2025 ***
*** Please ensure that you have everything you need - files and/or instructions printed off from the website (find them currently in the ARCHIVES section) - by 31st December 2025 as they will not be available after this date ***

Never Ending Card Tutorial 2
Making the Basic Card
- Home
- SVG files
- SVG Card Templates
- Never Ending Card Tutorial 2 - Make the Basic Card
Step-by-step never ending card tutorial - instructions to help you make the basic card from my template for Cricut and other cutting machines...
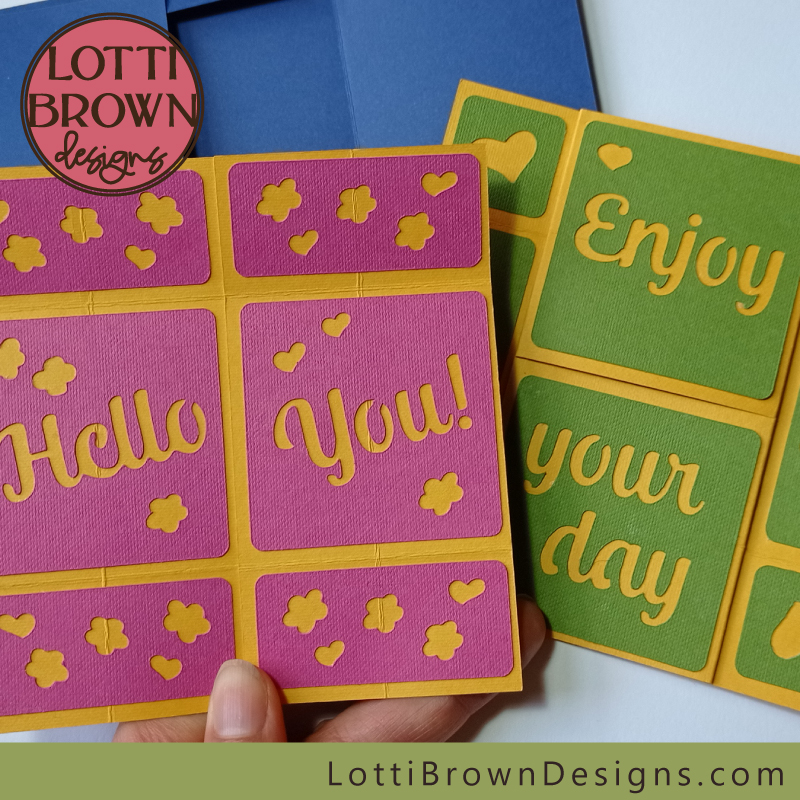 Never ending card - a fun folding interactive 3D card!
This is part of the instructions to help you make the never ending card from my template. This tutorial will help you to put together and make the basic card.
- If you've not already been there, it's best to start on this page, which tells you a little about the template, shows you how it works, and talks about the materials and equipment you'll need to make the card.
- You will need to have already cut and scored the pieces to make the card before you start this tutorial - you can do this with your Cricut, another cutting machine, or even by hand. Here is the page to help you with this - it's mainly for Cricut users, with detailed step-by-step instructions on setting up the file to cut and score correctly in Cricut Design Space, but you may also find it useful if you use another brand of cutting machine or if you intend to cut and/or score by hand.
- I also have another page for the final part of this tutorial (that comes after this one), which is for decorating the card and making the envelope. I'll direct you there at the end of these instructions.
The tutorials are quite long since I took loads of photos to help you follow-along step by step. That's why I split them into different sections/pages. I hope they explain it all well, though, and help you to make the card...
There is a print function on the page, in case you'd like to print the page out (find it at top right of page and also towards the bottom of the page (centre).
Never Ending Card Tutorial
So if you've cut and scored the card and have all your cut pieces ready to go, like this, then you're ready to start this tutorial...
Let's go!
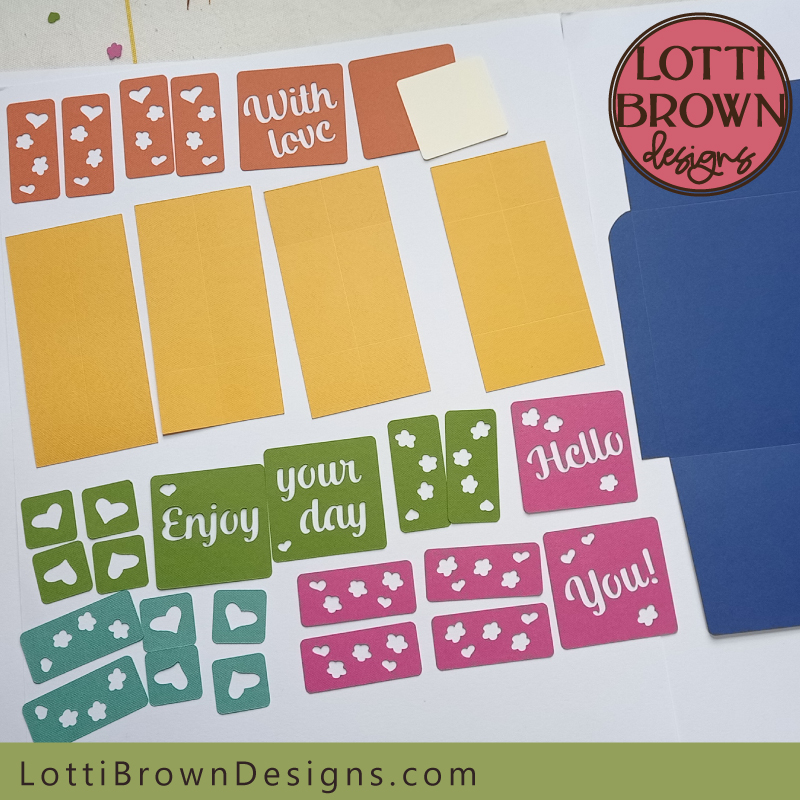 All the cut pieces ready to go to start making the never ending card
- We'll start with the four yellow rectangle pieces - they should have score lines on them - these pieces make up the main card...
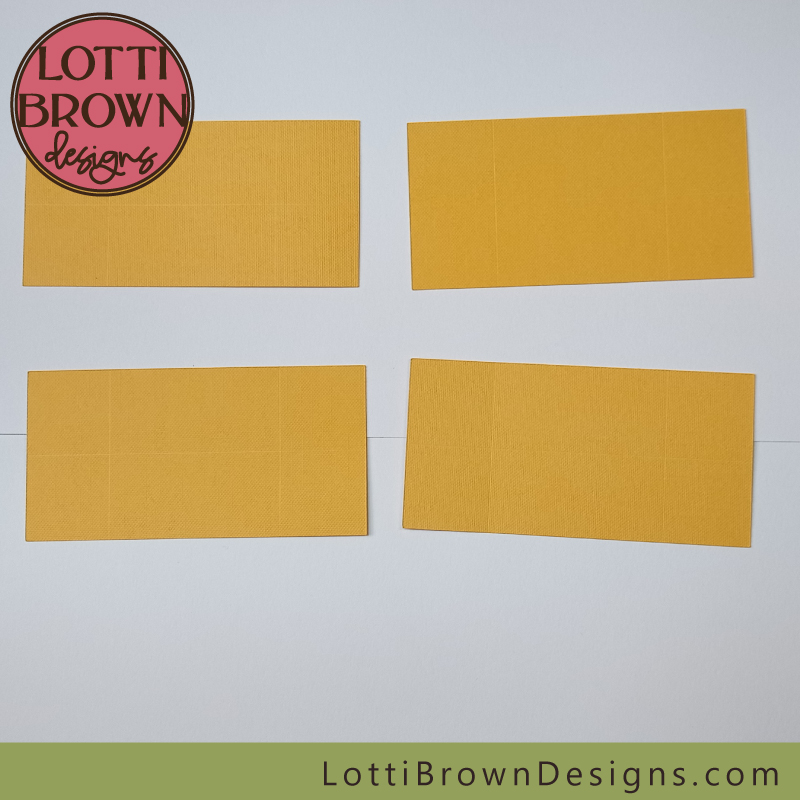 Four yellow rectangles with scored lines
- So our first job is to make the folds on each of the score lines. We do this by folding the card up, along the score line, using a metal ruler (or similar hard, straight edge)...
- Start with one of the short score lines, across the end of the card. Fold up against the metal ruler, like in the image below...
- Use your fingers to push and rub along the edge as you fold, to fold it in tight and hard against the edge.
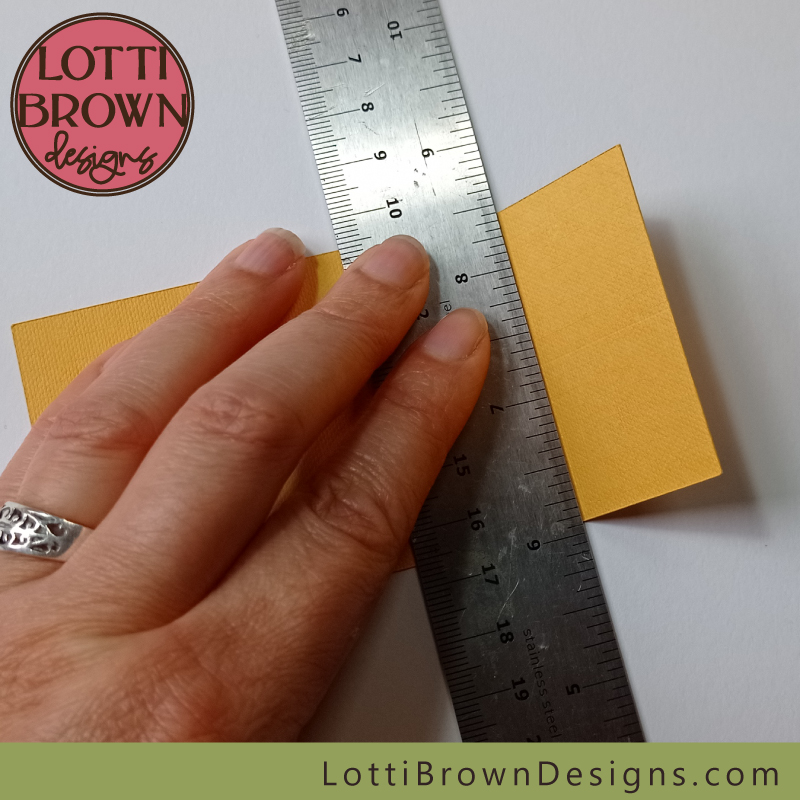 Fold the end of the card up once, hard against the metal ruler
- Then, once you've started the fold against the hard edge, remove the ruler, and fold the piece right down, running your fingers along the crease - fold it both ways, several times - we want to get a really good, strong crease and fold in on each of these score lines so that they'll happily fold both ways, as that's what we want when we make the card.
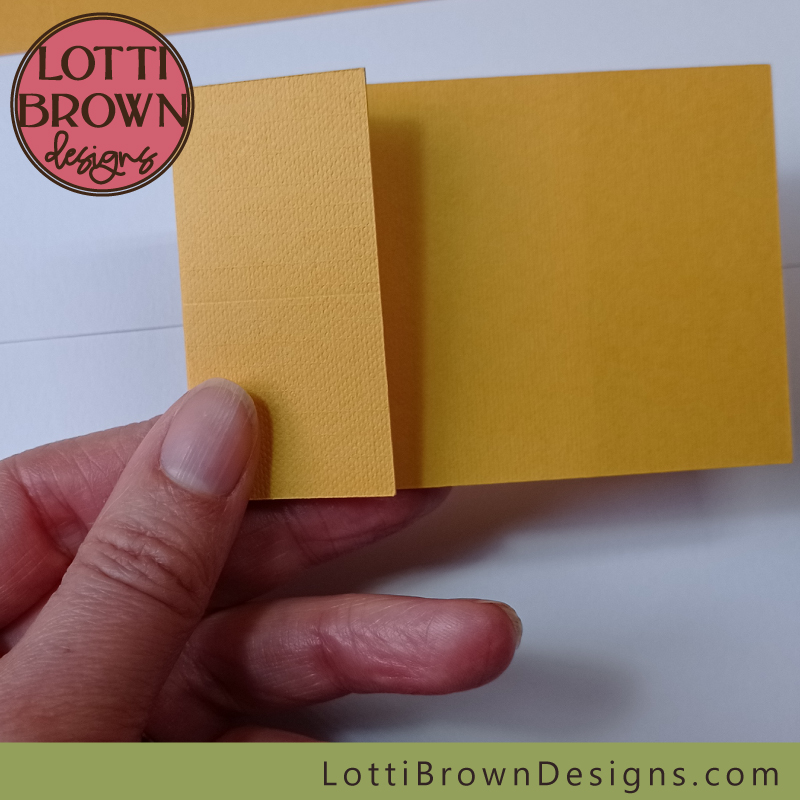 Fold both ways along the crease
- Repeat this process along every score line for each of the four yellow rectangles (see below)...
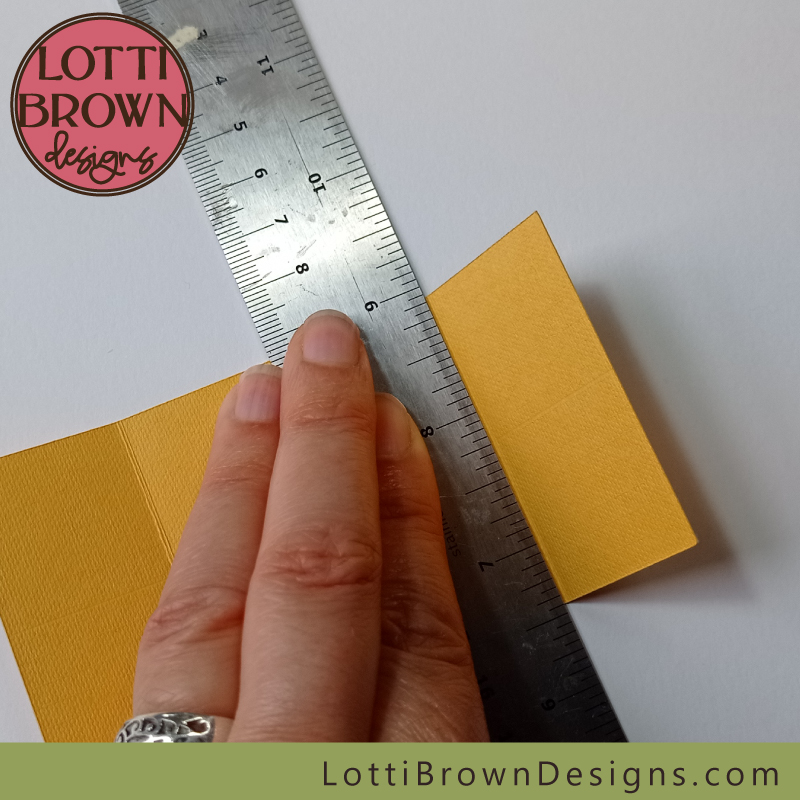 Repeat this folding process for every score line for each of the four yellow rectangles
- Remember to do the central score line and the two end score lines for each rectangle...
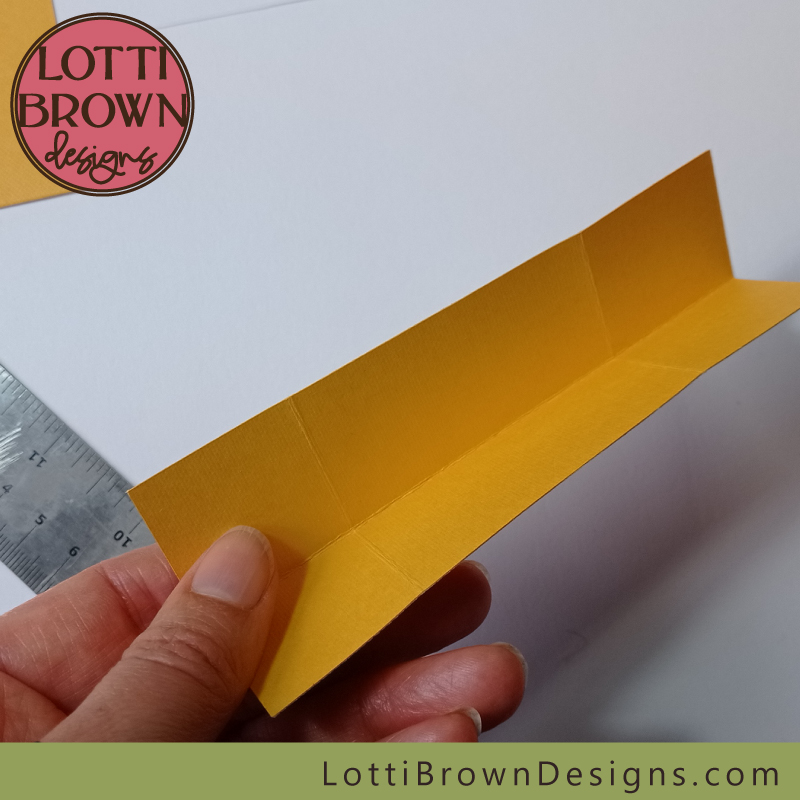 There are three score lines on each yellow rectangle - fold them all!
- When you're done, the creases should be noticeable and should happily fold in both directions...
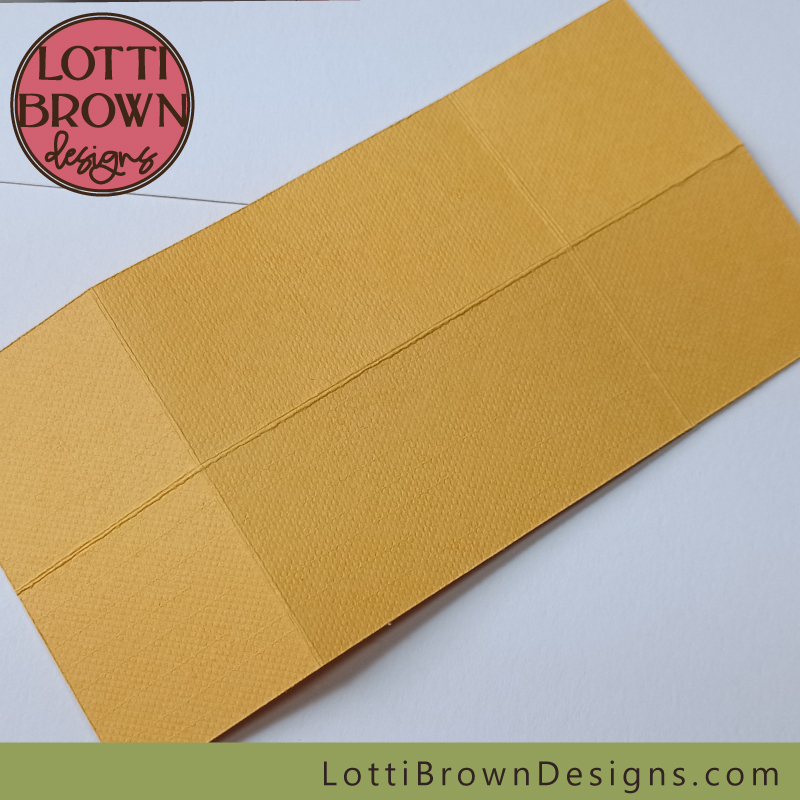 The creases should be happy to fold really well in both directions
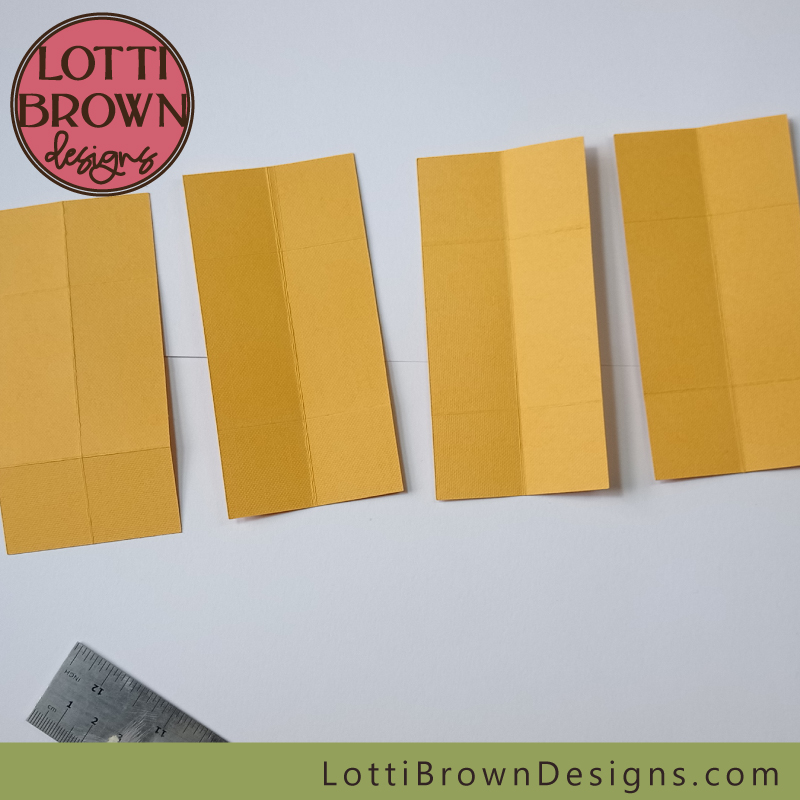 You should end up with four creased rectangles looking like this
- Take two of the rectangles and lay them together like this (below)...
- The front and the back of the Cricut cardstock that I'm using is very similar, which is exactly what we want and why I chose it, but please make sure you have these two pieces facing up the same way (ie two fronts or two backs, it doesn't really matter which way).
- Try and get them straight and neatly aligned - so that the central edges sit together nicely (but with no overlaps) and so that the edges around the outside of the square are also as neat and straight as possible - the card can cope with a little 'wonkiness' but not too much.
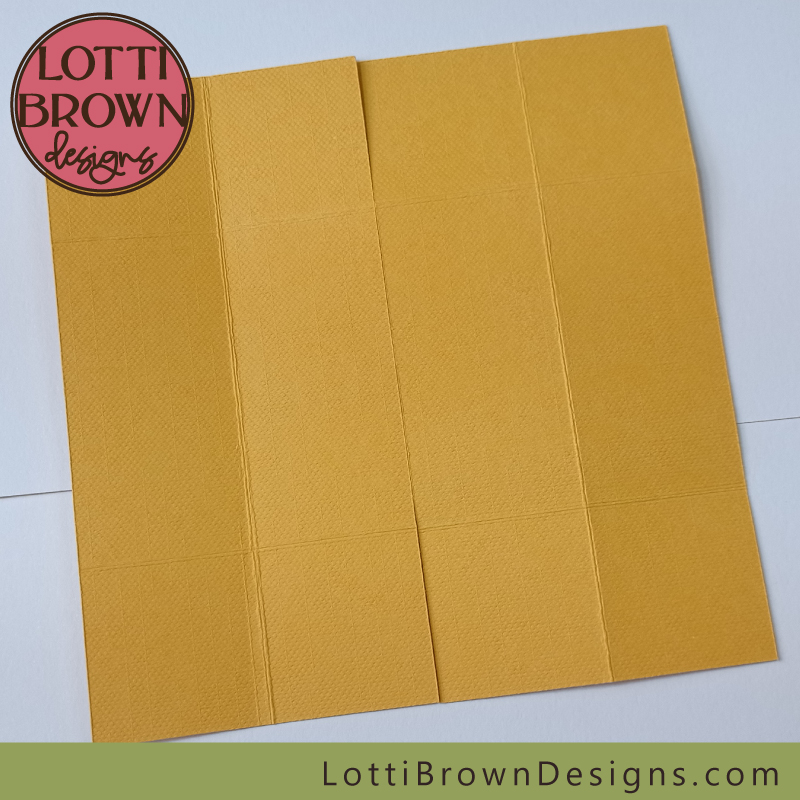 Fit two rectangles together into a square like this
- When you're happy you've got the two rectangles nicely straight and together, stick a little magic tape across the middle - make sure you keep this just in the central area (between the creases) as below...
- You can use magic tape or a light masking tape - the important thing is that the tape shouldn't be so sticky that it pulls off the cardstock surface when we remove it - it's just there temporarily. I stick the magic tape across the back of my hand a couple of times, first, before sticking it onto the card, to make sure that it won't pull any of the surface off when I remove it in a few minutes time.
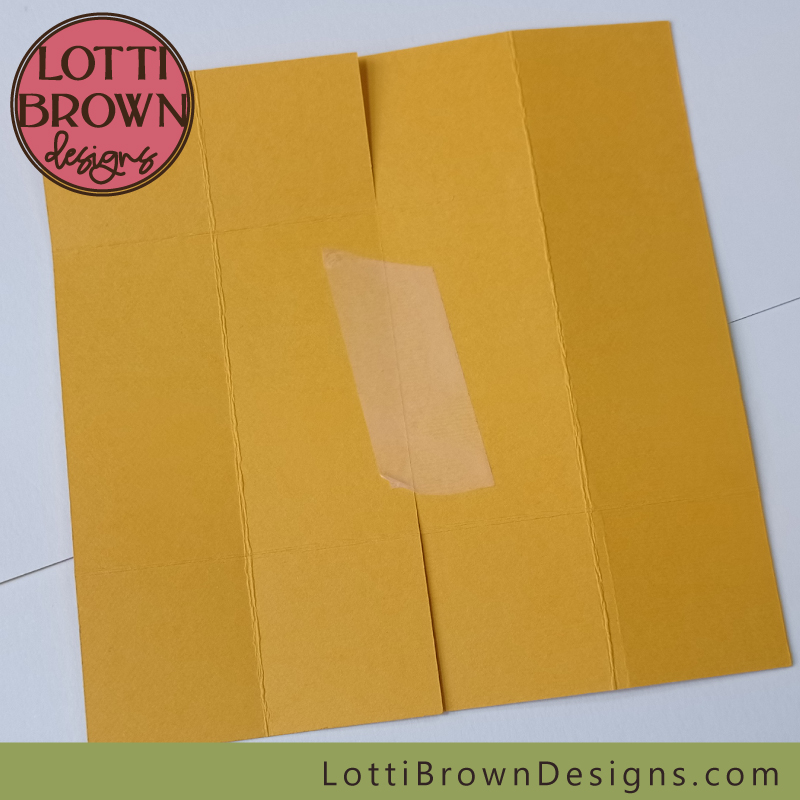 Use a little magic tape to stick the two rectangles together
- Then flip your taped rectangles over, so that the tape is on the 'back' (against the table). Hopefully everything should still be fairly straight and aligned (see below)...
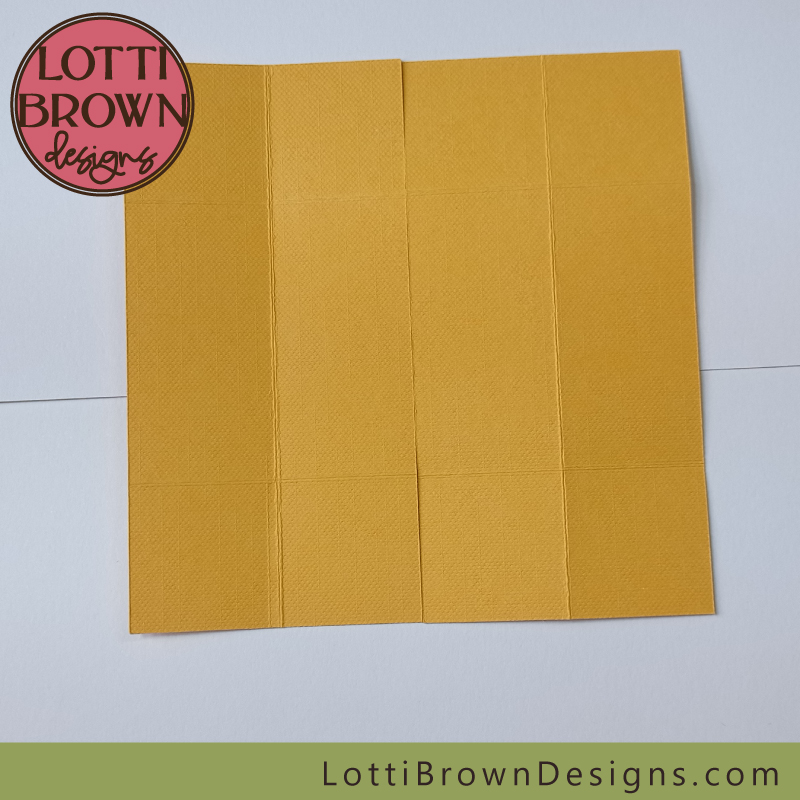 Your two rectangles should look like this with the tape on the back
- Now, we're just going to add a (fairly big) dab of paper glue into the two top corners - keep it inside the corner squares...
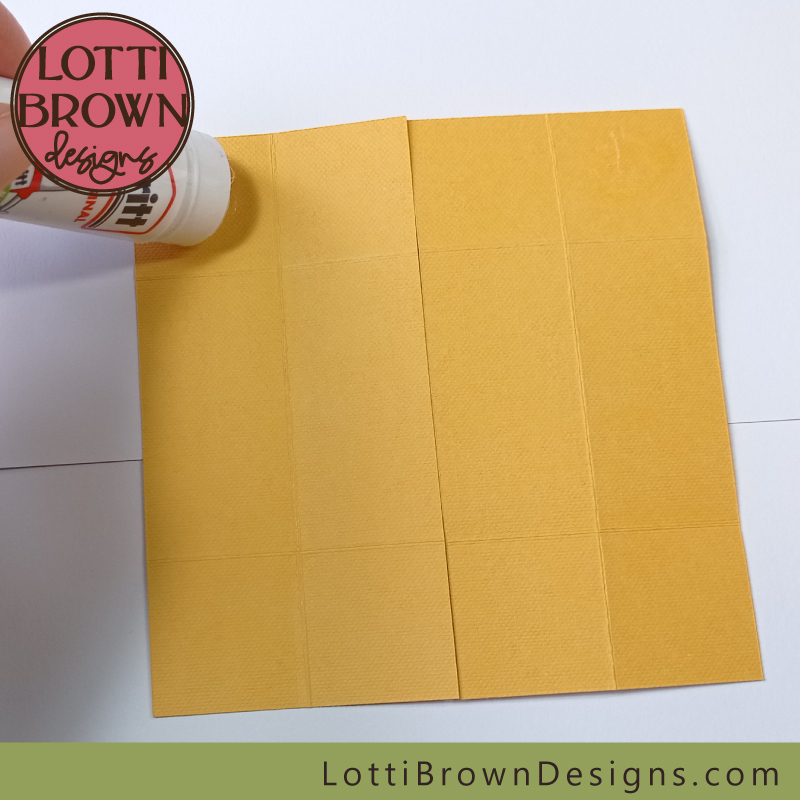 Add glue to the top two corners
- And then we take one of the remaining two rectangles, and stick it down on top of the taped ones, so that it sits at a right-angle, as in the image below - it's important to try and line up the edges and corners as well as you can.
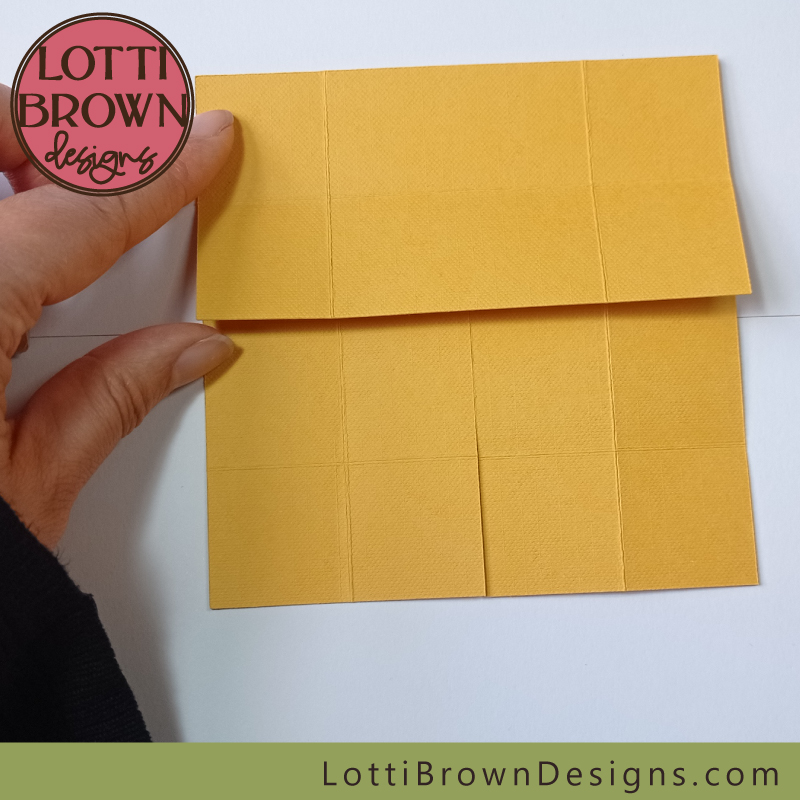 Glue a rectangle on top of the bottom pair, lining up the edges and corners as best you can
- Then add glue to the bottom two corners, as below...
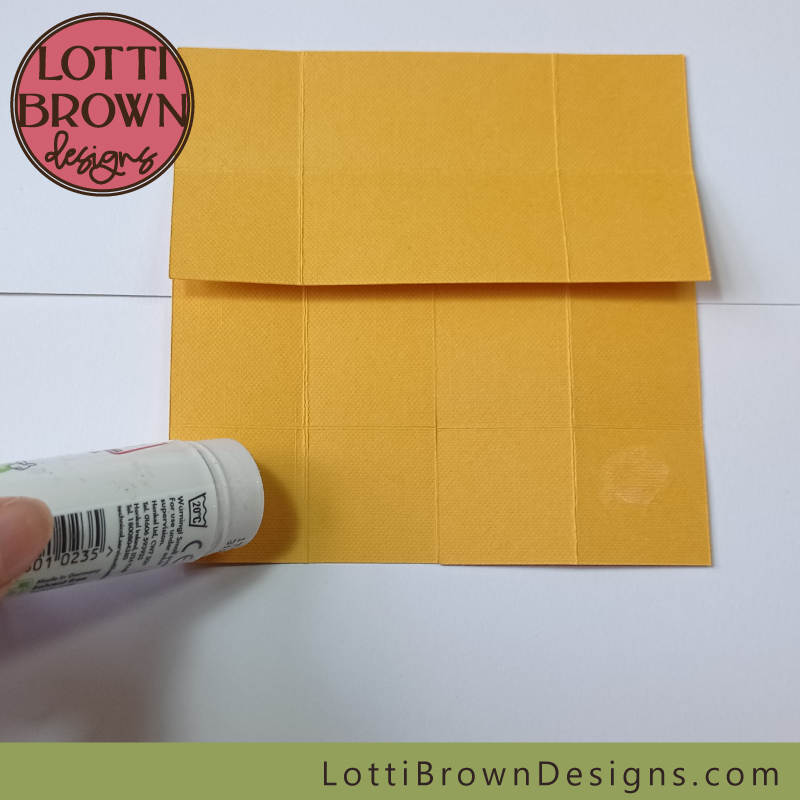 Add glue to the bottom two corners
- And stick down the last rectangle onto the base, trying to make sure as best you can that all corners and edges are aligned and the central opening is straight (and does not overlap). Again, try and also make sure that the two fronts or backs of the card are both facing the same way (so that they match as you look at them like this) - see the image below...
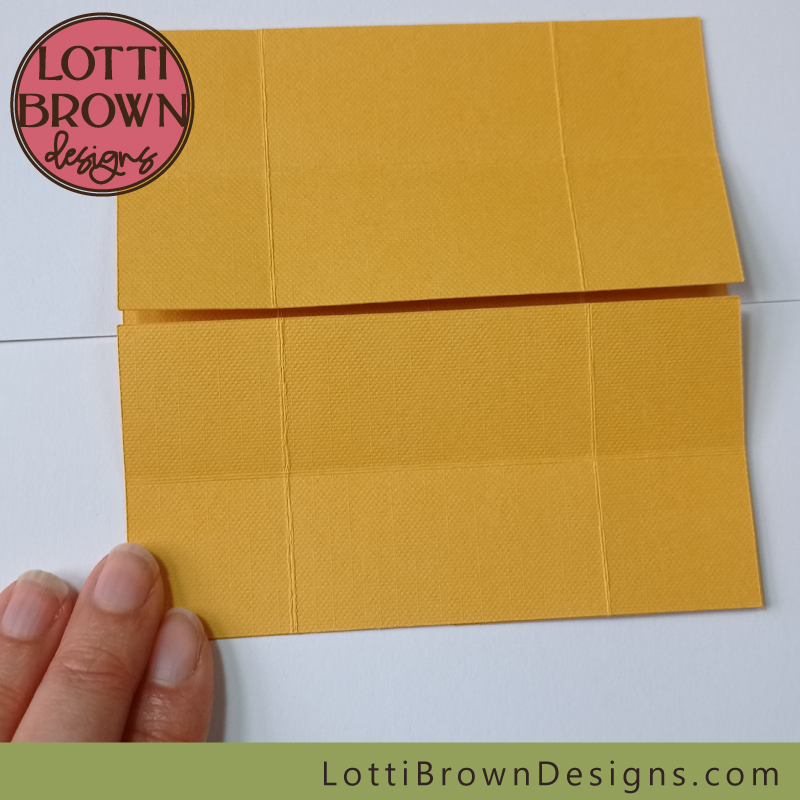 Glue the final rectangle in place
- Now, just leave it for a few minutes for the glue to dry - if you've used a glue stick like me, then it won't take long, but we don't really want it slipping about as we start folding and unfolding our new card...
- Once it's dry, we can start to fold, and fold, and fold, the card to make the never ending card - I'll show you how so that you're confident with what you're doing!
- I think now's a good time for a quick reminder of how the card is supposed to work - see the video below of the finished card, and then we'll get going to make our card do this (we'll add the pretty bits later)!

- First, let's just flip the card over and remove the bit of tape we left on the back.
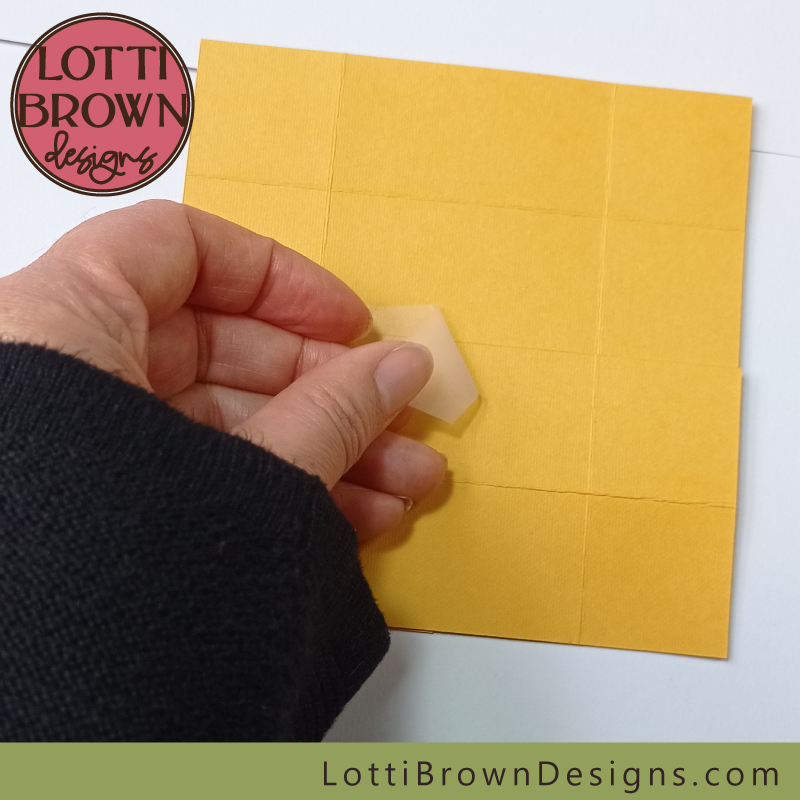 Remove the tape
- And now, let's start with the central opening vertical - turn your card until it looks like the image below. This will be side 1 of your card...
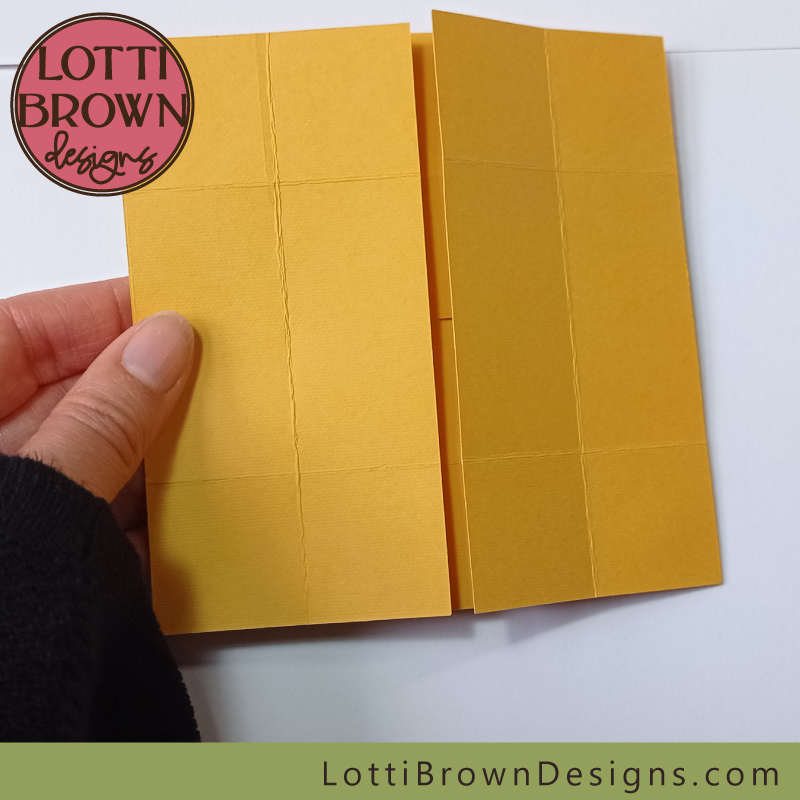 Start with a vertical opening
- Start opening the two flaps, like a double door, but as you do so, also try to bend the whole card right back along this crease (both layers)...
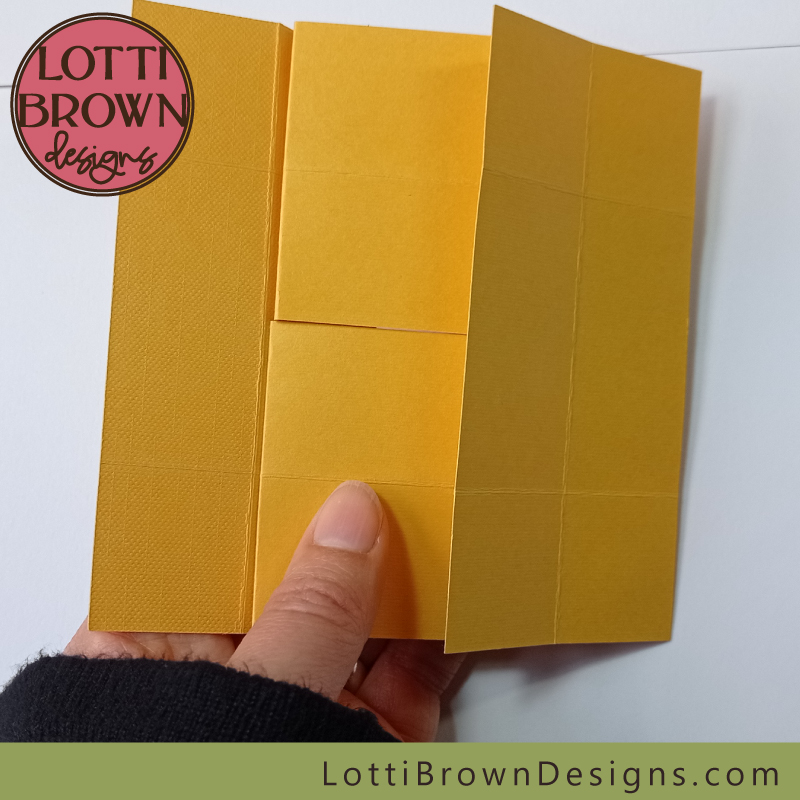 Open the flaps and bend the card right back on both left and right edges
- It should look like this (below) - press on the creases to make this fold easier in the future. This will be side 2 of your card.
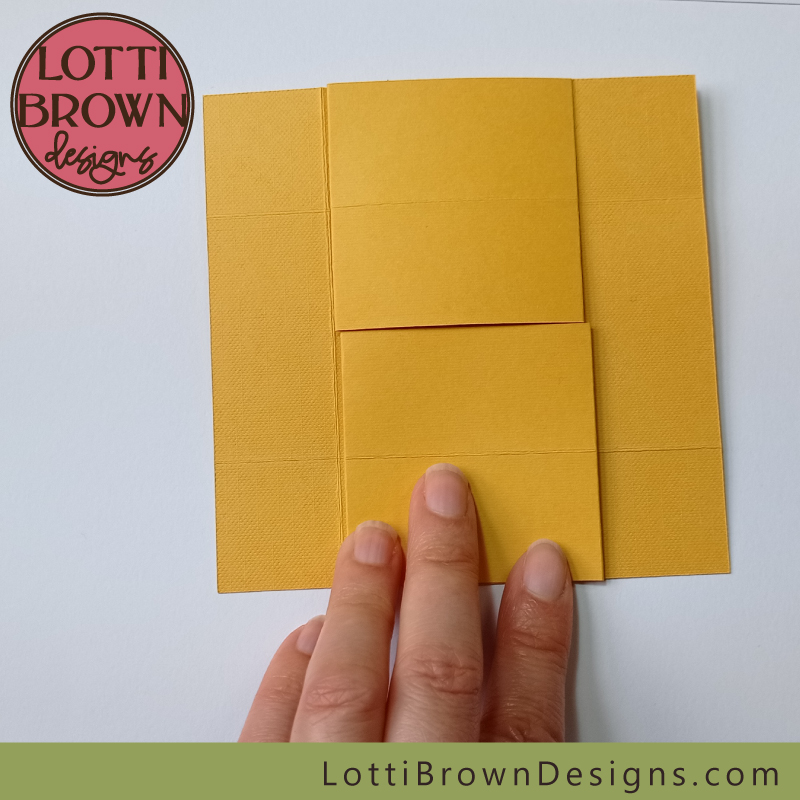 The second side of the never ending card
- For the next stage, we're going to lift the top central flap up, and while we're doing that, bend the whole card (both layers) back along that crease (see the image below).
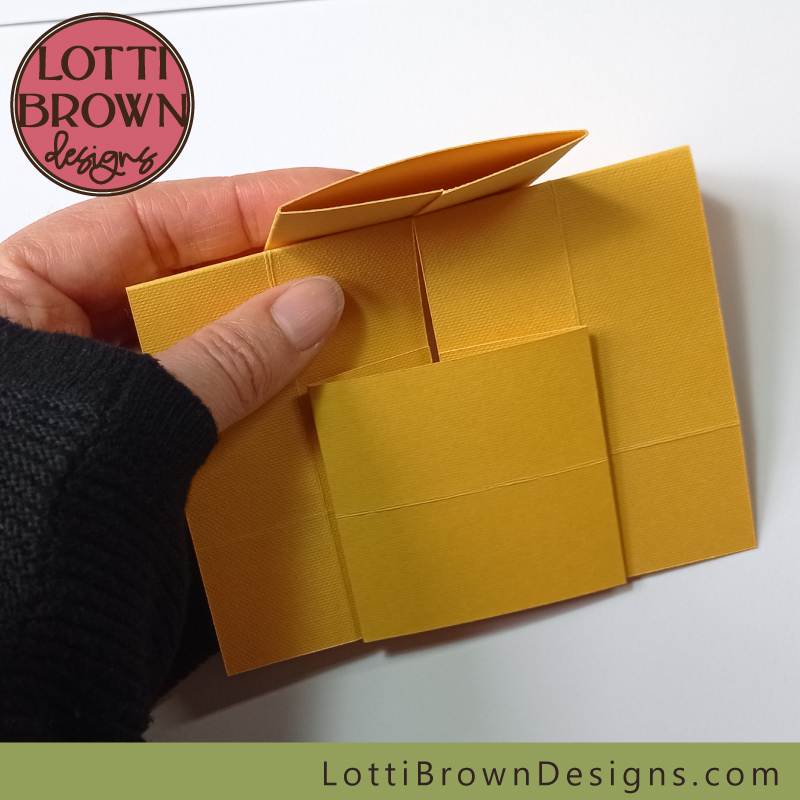 Lift the central flap up and bend the card back
- And repeat this action for the bottom flap too, bending it down and back on itself, until you have them both folded right back and the card looks like the image below. This is side 3 of your never ending card. Firm down the creases so that it's easier to do this fold next time.
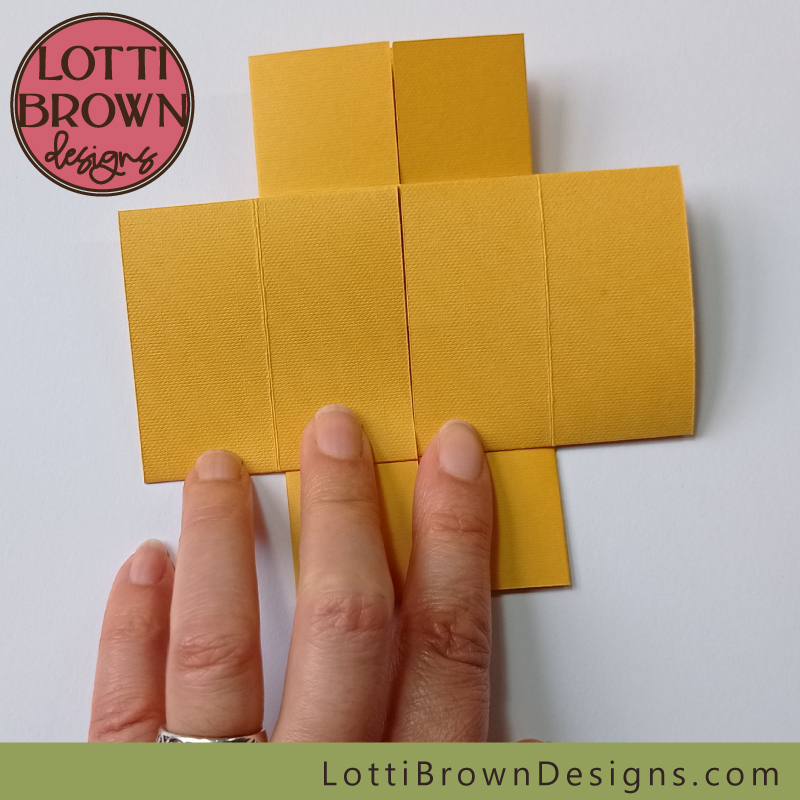 Your card should now look like this, side 3 of your never ending card
- Now, just open the central flaps and pull them outwards, and the card will open up into a flat square again as in the image below. This is side 4 of your card.
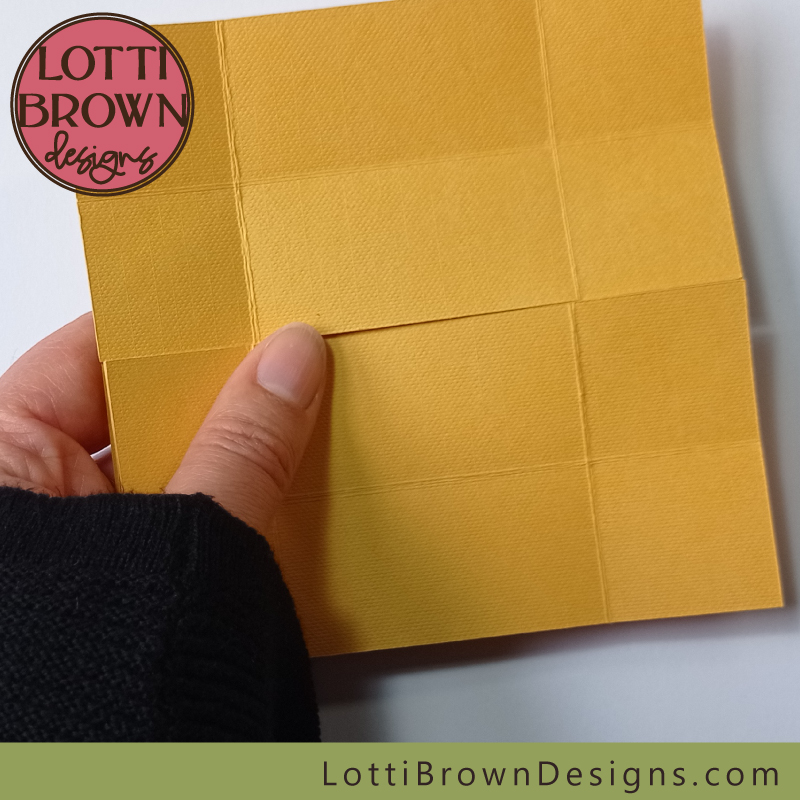 Side 4 of the never ending card
- The last fold, which takes us back to the beginning again, is to fold the flaps out (top flap up and bottom flap down) - see the image below...
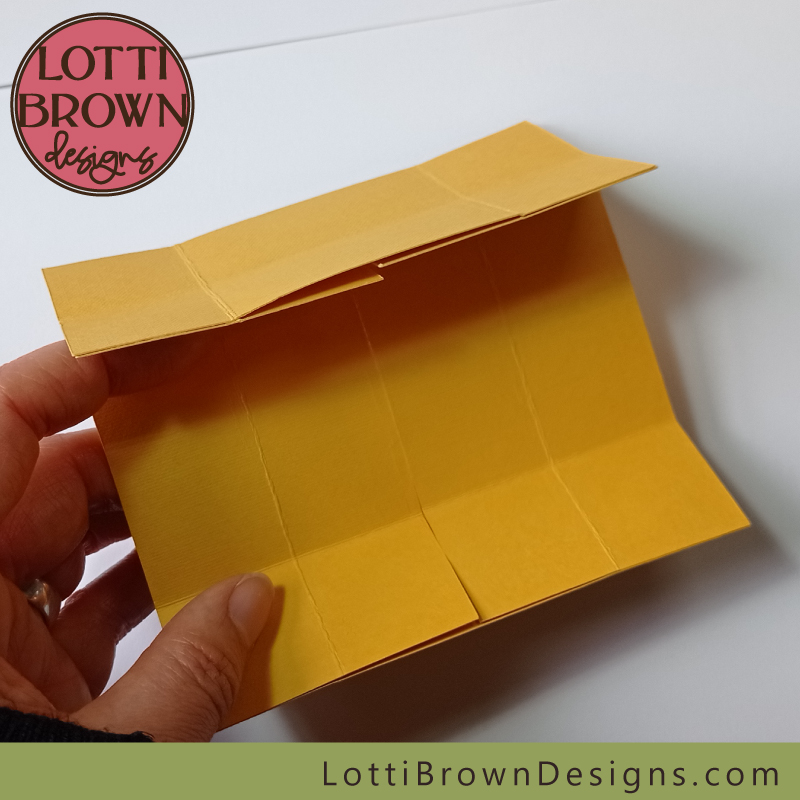 The final fold for the never ending card
- And here we are, back at the beginning again (side 1).
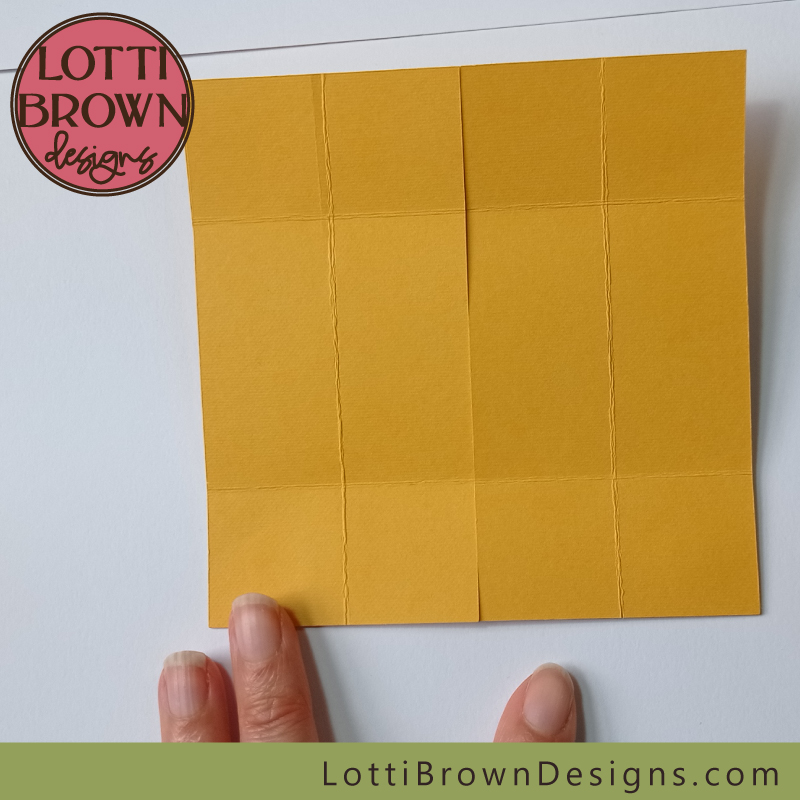 We're right back at the beginning of the card again, side 1
- Make the whole sequence of folds several more times to make sure everything is working well and the folds are folding well, and as they should - and when you're ready, we can go onto decorating the card with the designs to make it look pretty - you can follow the tutorial for that here...
If you need the main page for the never ending card with the template, list of materials, Cricut instructions, and the links to all the tutorials, find that here...
All my card templates are here...
And I have more Cricut (mainly cardstock) projects for you here...
You Might Also Like:
Lotti Brown's Designs & Templates
How-tos...
- How to use SVG cut files for Cricut (also other cut file formats & machines)
Shall we stay in touch..?
Each month, I share stories from my own nature journal, new art from my studio, and simple seasonal inspiration to help you feel more connected with the turning year...
Recent Articles
-
December Berries Folklore in Britain - Rosehips, Holly and Haws
Dec 24, 25 04:35 AM
Explore December berries folklore in Britain - rosehips, haws, holly, ivy and sloes - with seasonal nature notes, birdlife, and quiet winter magic. -
Birch Tree Symbolism, Myth, and Folklore
Dec 23, 25 04:19 AM
Explore birch tree symbolism, myth, meaning and folklore as part of my Celtic Tree Calendar art project... -
British Nature Folklore Library: Stories, Seasons & Celtic Tree Wisdom
Dec 01, 25 05:09 AM
Explore British nature folklore, Celtic tree meanings, and seasonal wildlife stories. A growing library of myth, meaning, and hand-drawn inspiration.
Follow me:
Share this page:


