*** IMPORTANT - I'm retiring my digital files - SVG/PNG/DXF/EPS - and printables from 31st December 2025 ***
*** Please ensure that you have everything you need - files and/or instructions printed off from the website (find them currently in the ARCHIVES section) - by 31st December 2025 as they will not be available after this date ***

Pretty Pumpkin with Flowers
SVG Project
- Home
- SVG files
- Halloween & Fall SVGs
- Pumpkin with Flowers SVG
A beautiful pumpkin with flowers SVG design for you to make a Fall project with your Cricut or similar cutting machine.
A perfect project to celebrate Fall, Thanksgiving or decorate for Halloween!
With full instructions for making on this page...
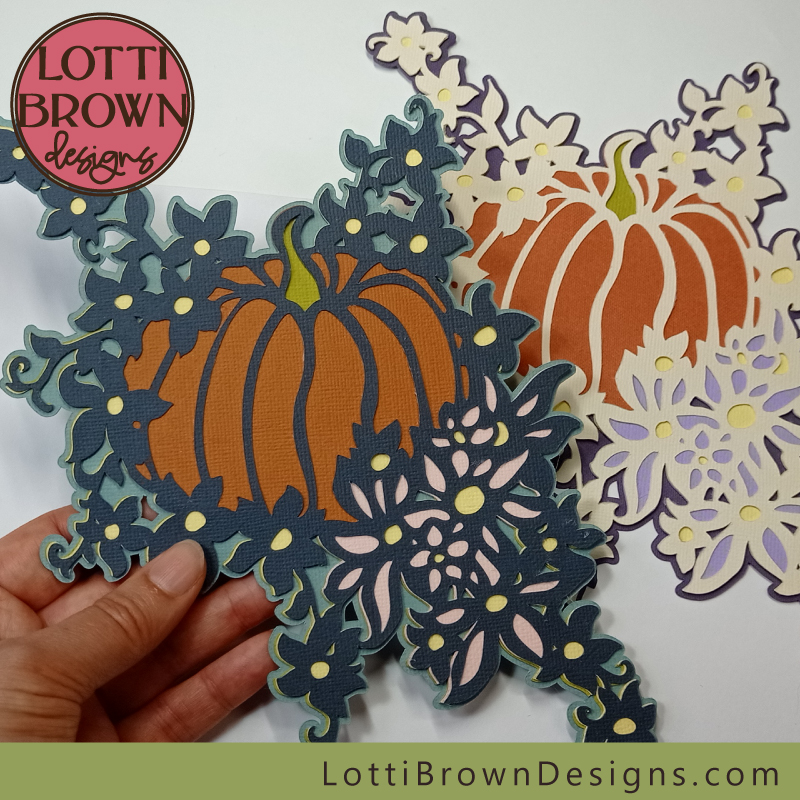 Celebrate Fall with this pretty pumpkin with flowers design to make
Get the pumpkin with flowers SVG cut file from my store here...
Design comes in SVG, DXF, EPS & PNG formats, suitable for Cricut and many other cutting machines
For personal and small-business crafting (up to 200 units)
For physical (craft) products only - no digital use, products or sharing
Pumpkin with Flowers SVG Design
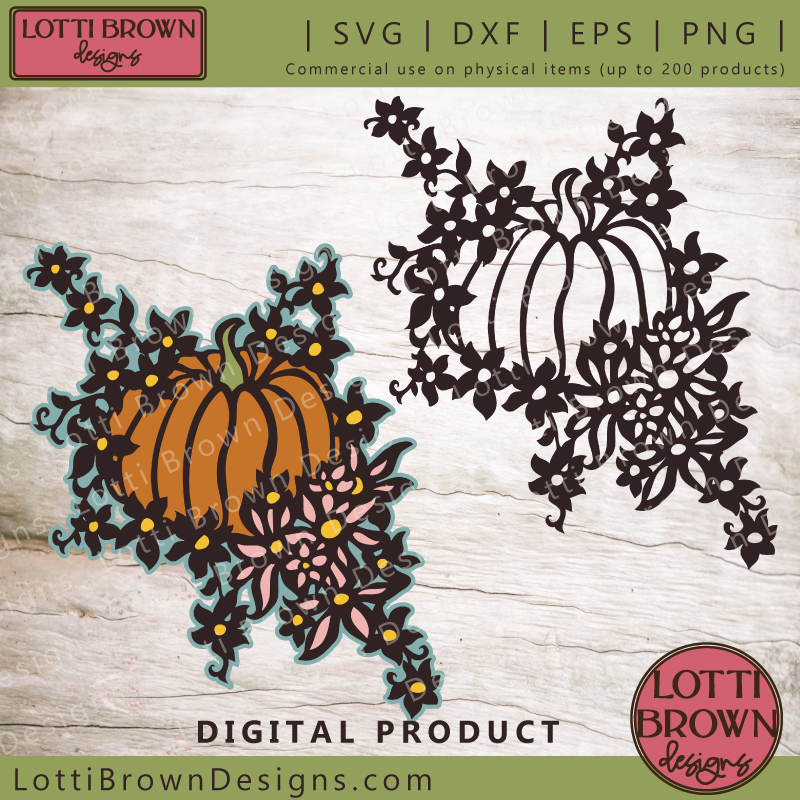 You can get use the pumpkin and flowers design with or without the layers
My pretty pumpkin with flowers SVG cut file is based on my own hand-drawn design which I created in layers to give you a beautiful and colourful project to make - I'm making it in cardstock, but you could also adapt the cutting file to be used for other cutting machine crafts and materials, it's up to you!
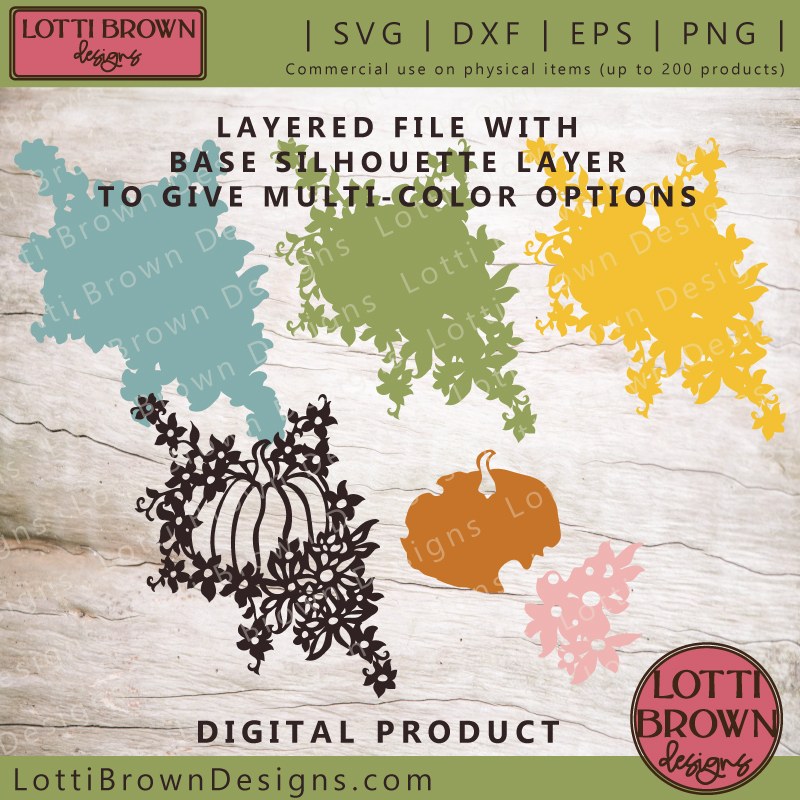 There are six different layers to make up the pumpkin and flowers file
The layers include:
- intricate top cut layer with the pumpkin and flowers design - you can also use this separately if you don't want to use all the layers, or mix and match it with any of the layers below...
- silhouette layer (green) - fits the outline of the intricate top layer perfectly allowing you to add a second colour
- base outline layer (blue) - fits at the bottom of the design and gives it an extra outline - you can use it just with the top layer or with the top layer and green layer
- yellow layer - provides colour for the flower centres and contains the cut out for the pumpkin stalk
- orange layer - the pumpkin layer
- pink layer - the colour for the flowers
I played about with the layers, missing some out, trying a few things, and you can make some pretty nice effects, so do give it a go while you're creating and see what you like! Here are some ideas below...
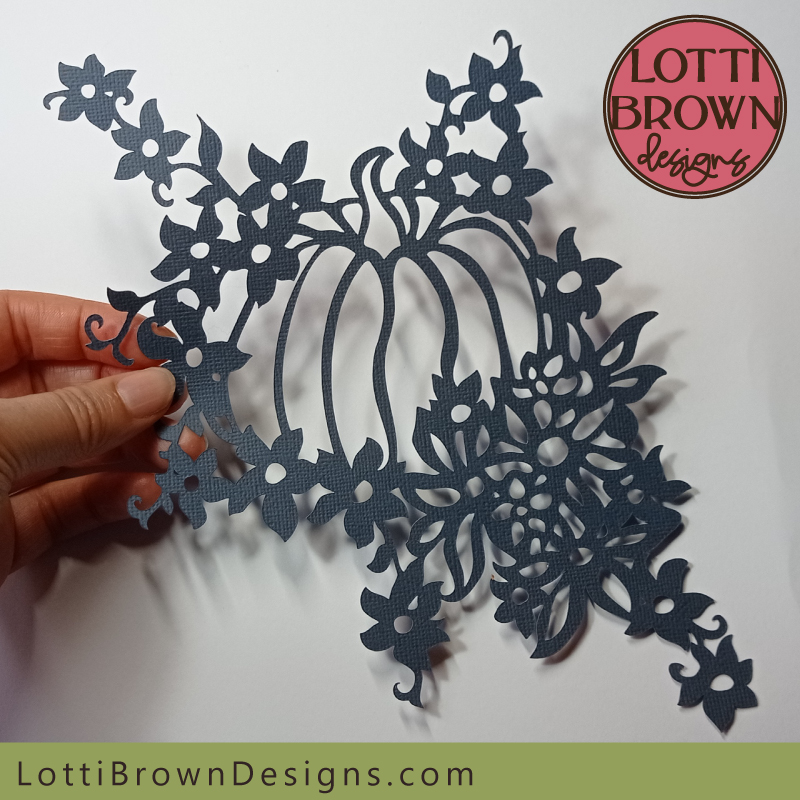 Single-layer
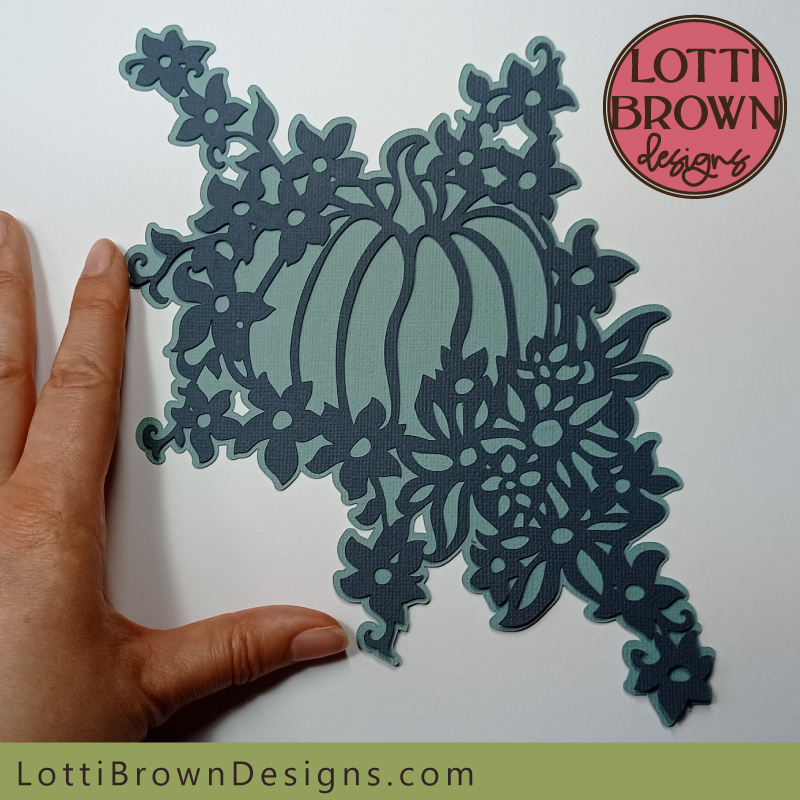 Top and bottom layers together
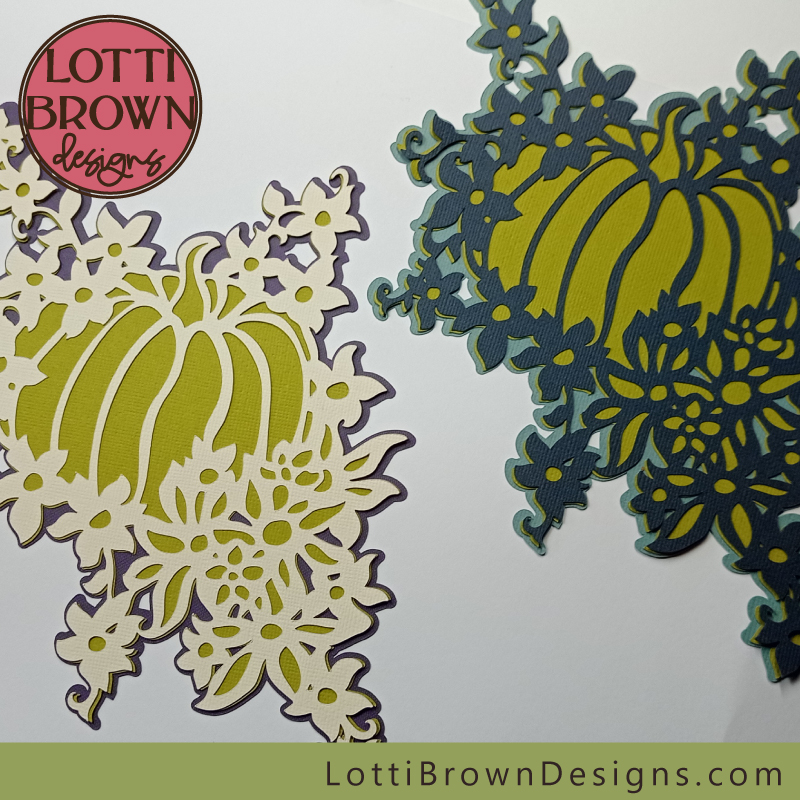 Here, this is the top intricate layer plus the bottom two layers - in the original template design plus my alternative colour idea
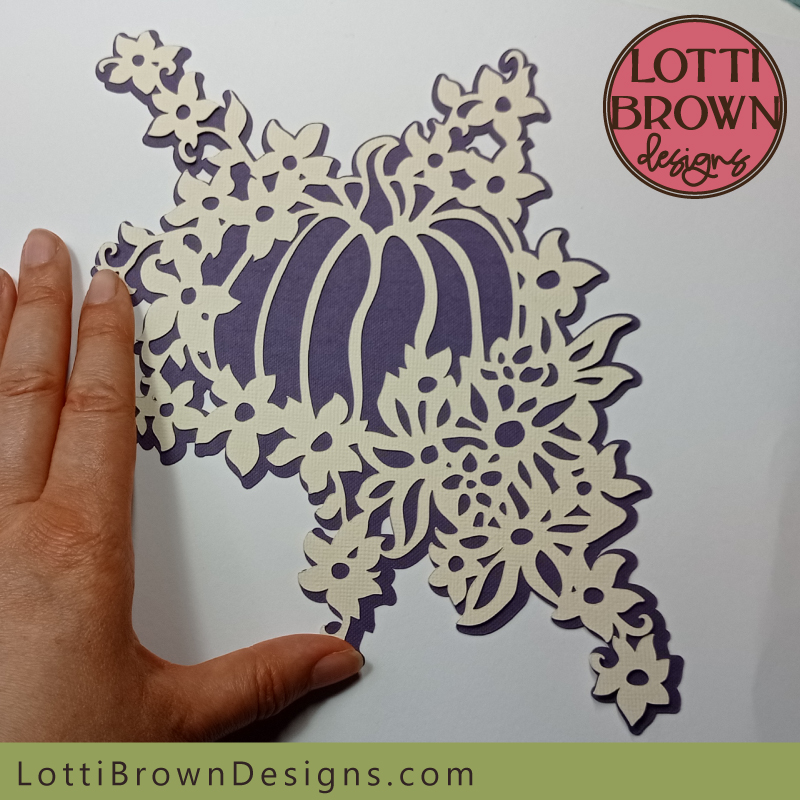 Keeping it simple - two layers (top and bottom) and pretty purple and cream
Of course, you're probably keen to see about making the whole project with all the layers, so let's get on with that next...
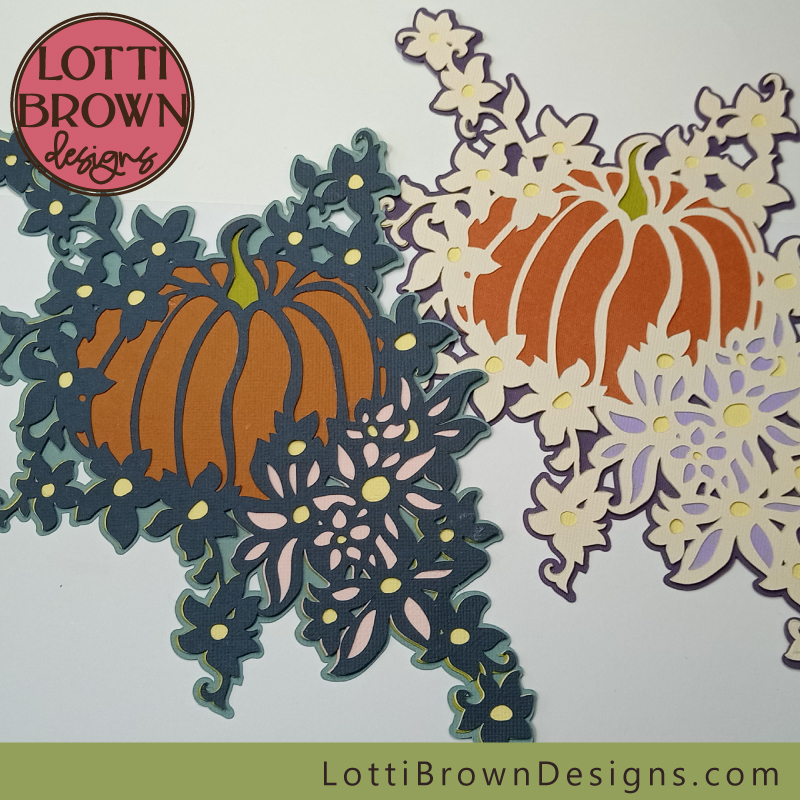 I made two colour schemes to inspire you - the one in the template is the one with the dark design layer (pink flowers) and that's the one we'll be following in the tutorial too...
Pumpkin with Flowers SVG Tutorial
Let's get started with the craft tutorial - we'll be making the dark version of the pumpkin with flowers SVG, which is the one in the file.
You can use any colours you like - you can see it looks effective with either a dark or pale top layer (the layer with the intricate design) so play about with different colours and see what you like - you could even make your pumpkin a different colour (not orange) if you're feeling very creative!
You will need:
- Cardstock in six different colours - I've used Sizzix 'Surfacez' textured card for nearly all the project, for both colour versions (the orange and the dark purple on the pale version are Cricut cardstock from the Jewel pack - note how the two oranges are slightly different colours on each pumpkin).
- Glue or another way of sticking - I'm using paper glue, a glue stick - you could also use glue dots or similar.
- A way of cutting your card - I'm using my Cricut Maker to cut my cardstock, you may have another cutting machine and programme, or you may prefer to cut by hand. I used the 'intricate-cardstock' setting on my Cricut for this project.
- My pumpkin with flowers template from my store here (if you don't already have it).
You will need to have all the layers cut out and ready, and then we can begin...
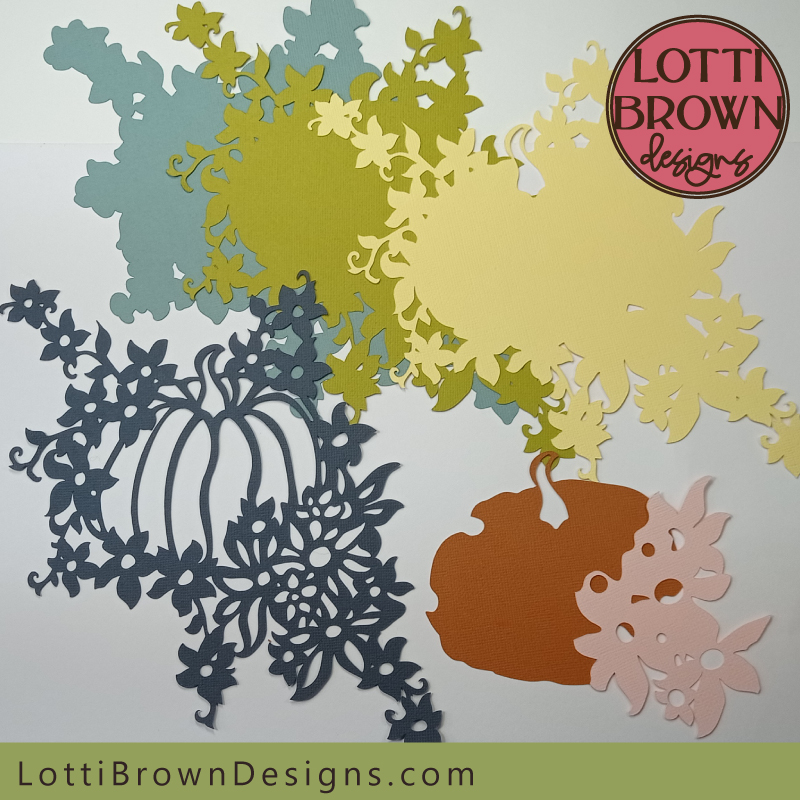 Pumpkin layers cut out and ready to go!
- We'll start from the back (bottom) and work towards the front (top) - so let's start with the two back layers of card, that's the blue and green one here...
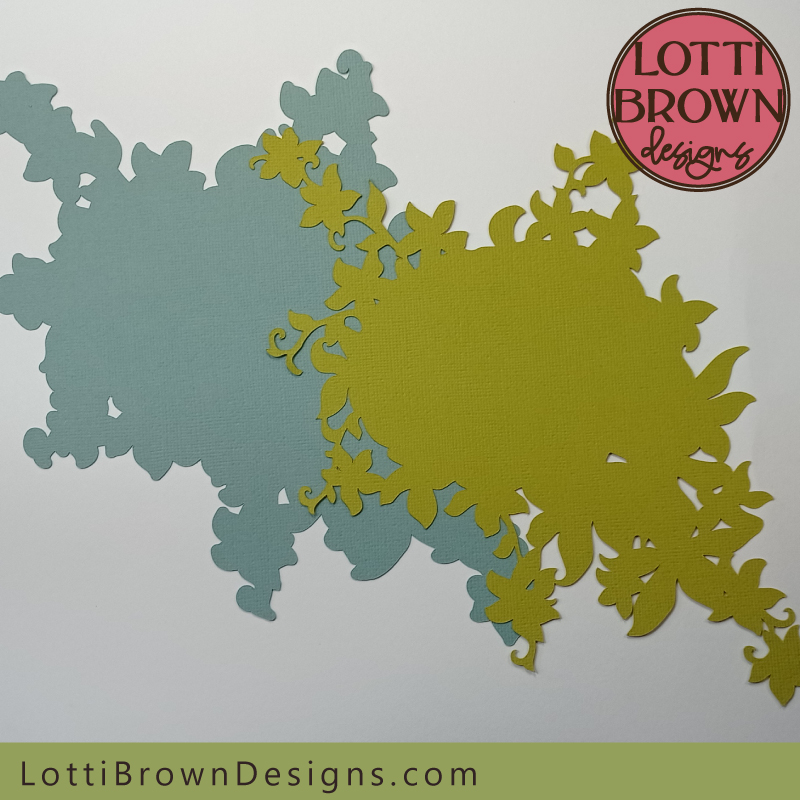 Let's start with these two bottom layers
- All you need to do is add some glue on the back of the green layer - there are some intricate bits, so I chose to use a glue-stick so that I could get to all the edges (and excess is easily wiped off). Don't forget to protect your work surface from the sticky glue. See image below...
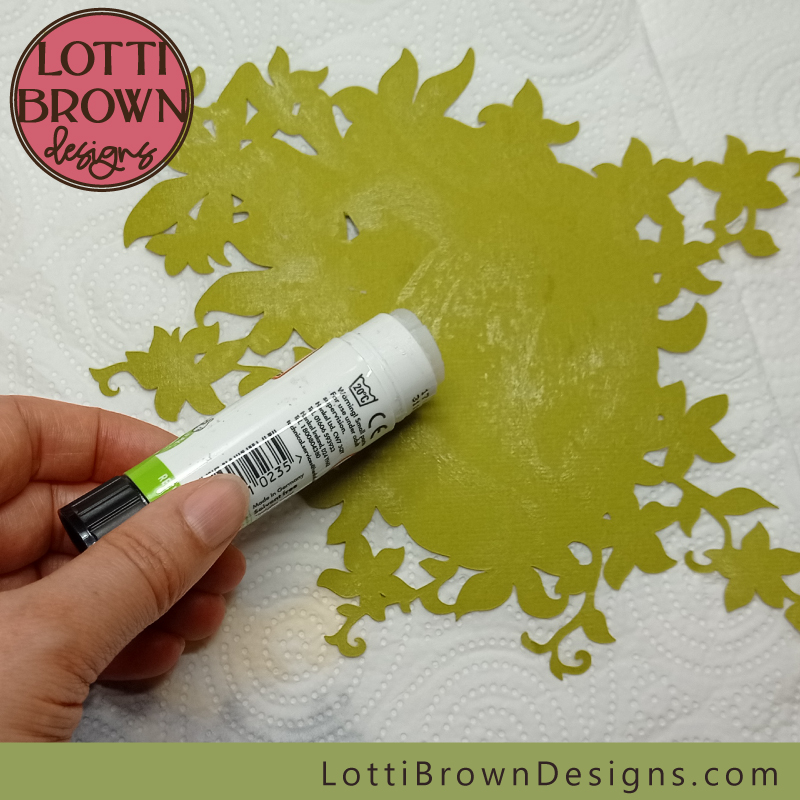 Add glue to the back of the green layer
- The green layer is carefully positioned in the centre of the blue layer - there should be a fairly even edge all the way around - see the image below...
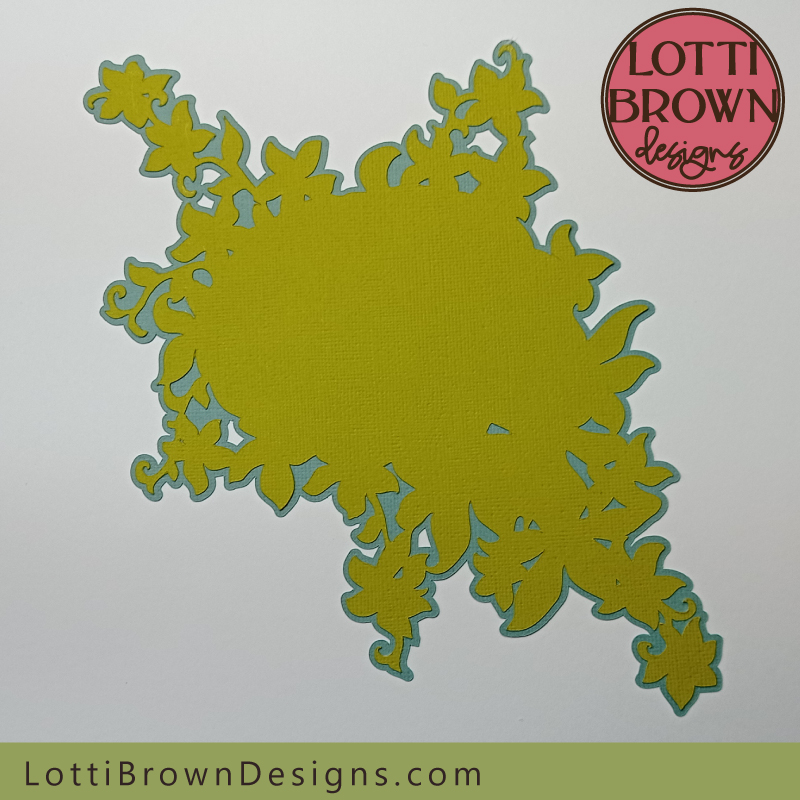 The green layer is stuck down onto the blue layer
- Next, is the yellow layer - so again, add glue to the back of this layer - see the image below...
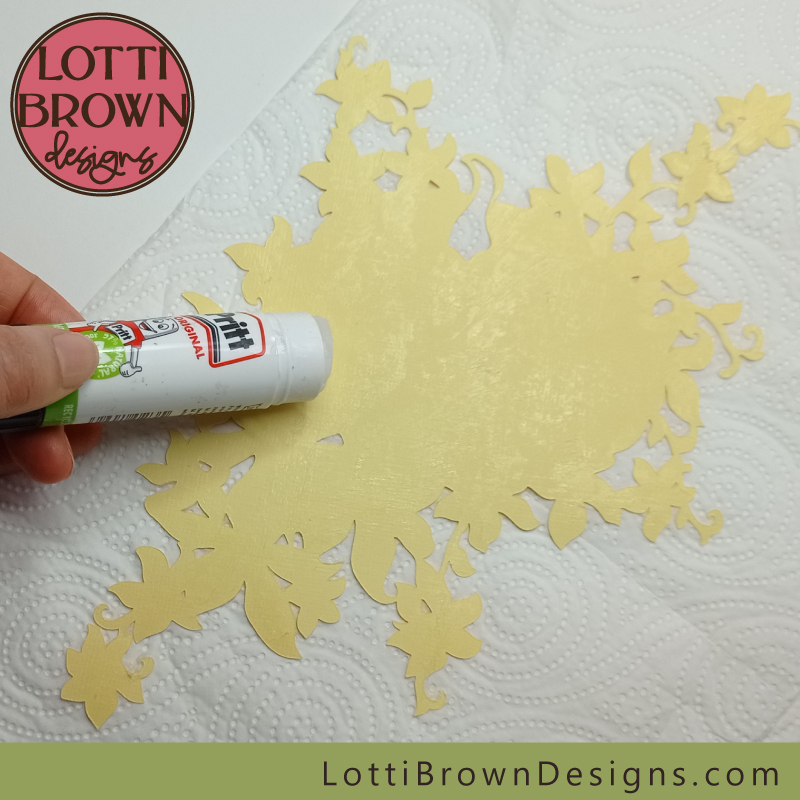 Add glue to the back of the yellow layer, carefully going all the way to the edges
- This fits on top of the green layer, and it should fit exactly, so ease it down carefully and adjust as you go to get all the edges aligned - it can be tricky, so if you don't get it exactly, don't worry, as the extra edges and flash of colour can help to give the project an extra dimension and more of a sense of being in 3D... (see below)
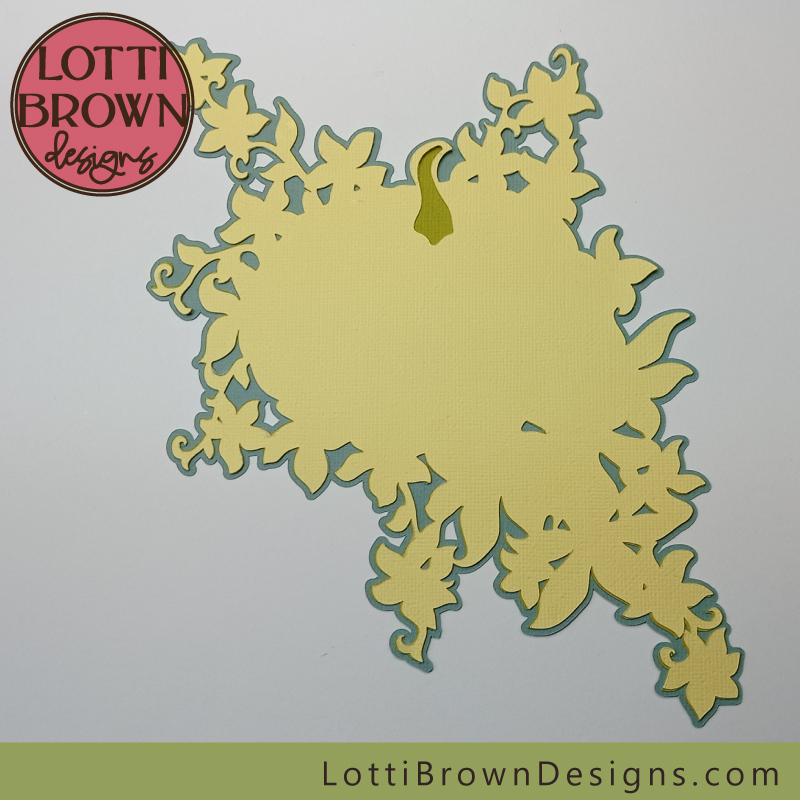 When your yellow layer is added, it creates the stalk for the pumpkin
- Next, is the pink layer - this creates the petal colour for the flowers in the bottom right part of the design - so just add glue to the back of this layer, too - see below...
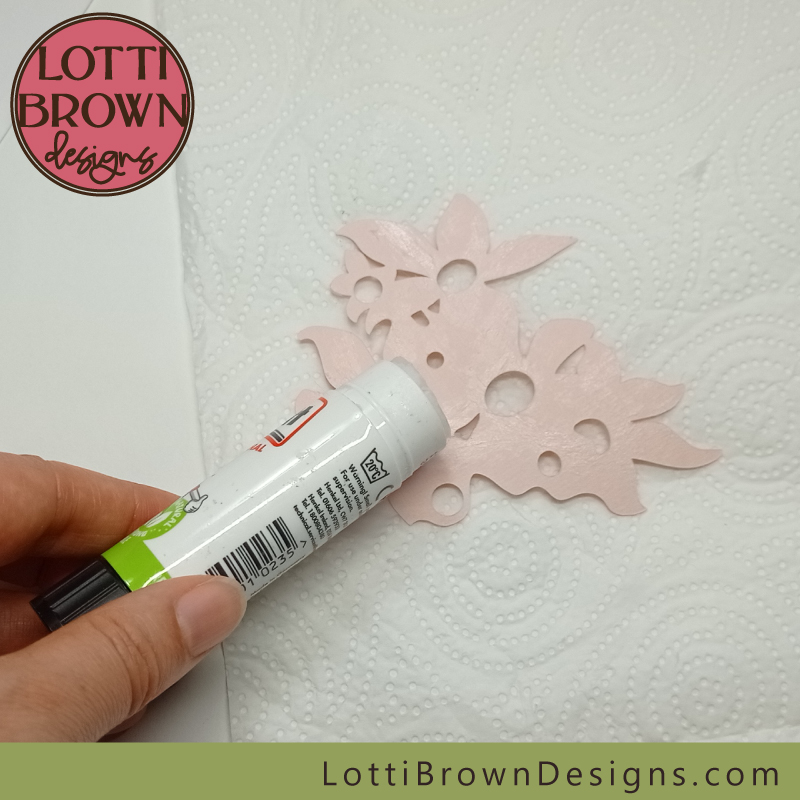 Add glue to the back of the pink layer
- Line up the edges at the parts I'm pointing to in the images below to get it properly aligned...
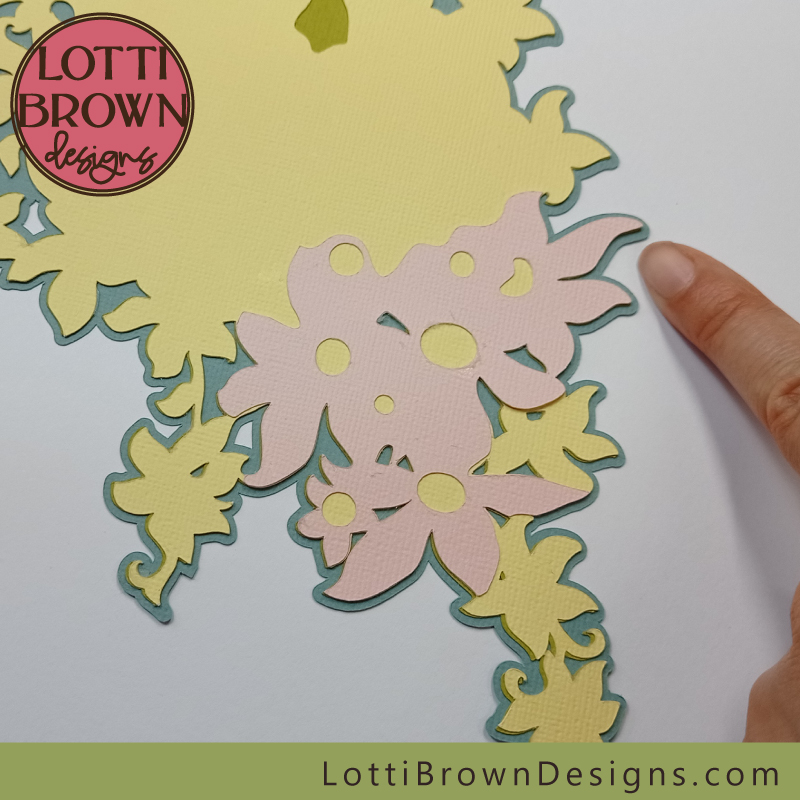 Line up the outer edges of the petals on the right-hand side here...
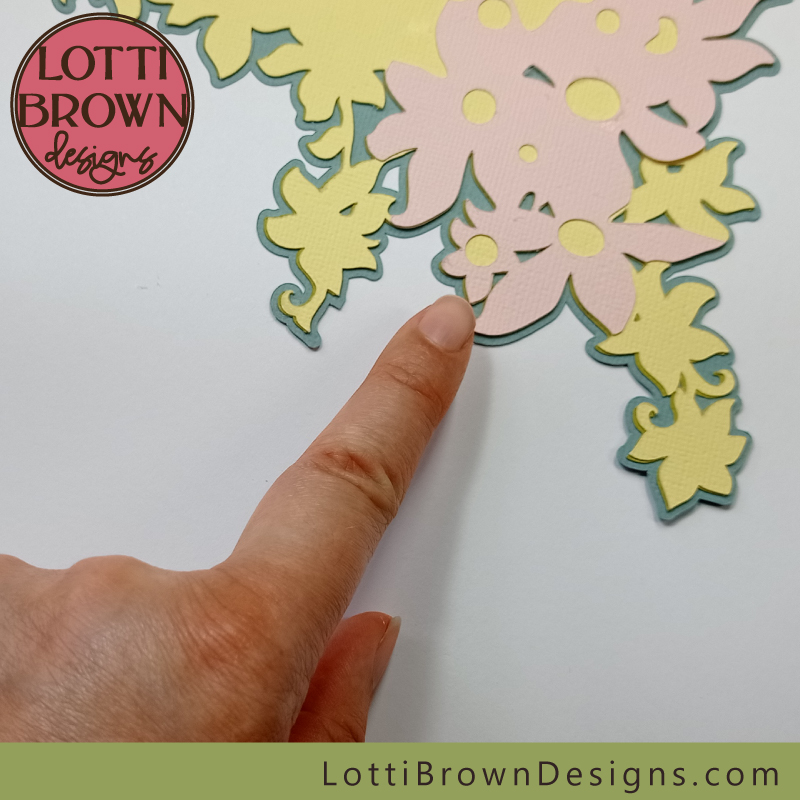 AND line up the outer edges of the petals on the left-hand side just here, too...
- Your project should now be looking something like the image below...
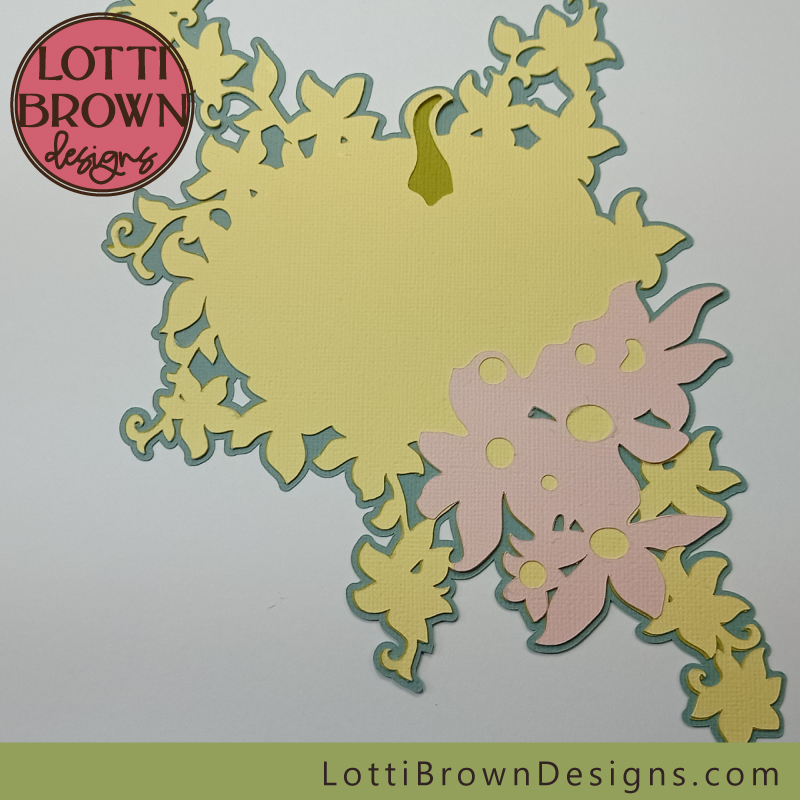 Your project should now be looking something like this!
- Next, it's the pumpkin - so grab the orange piece and glue it up, taking care to get the glue right up to the edges of the stalk, in particular... (see below)
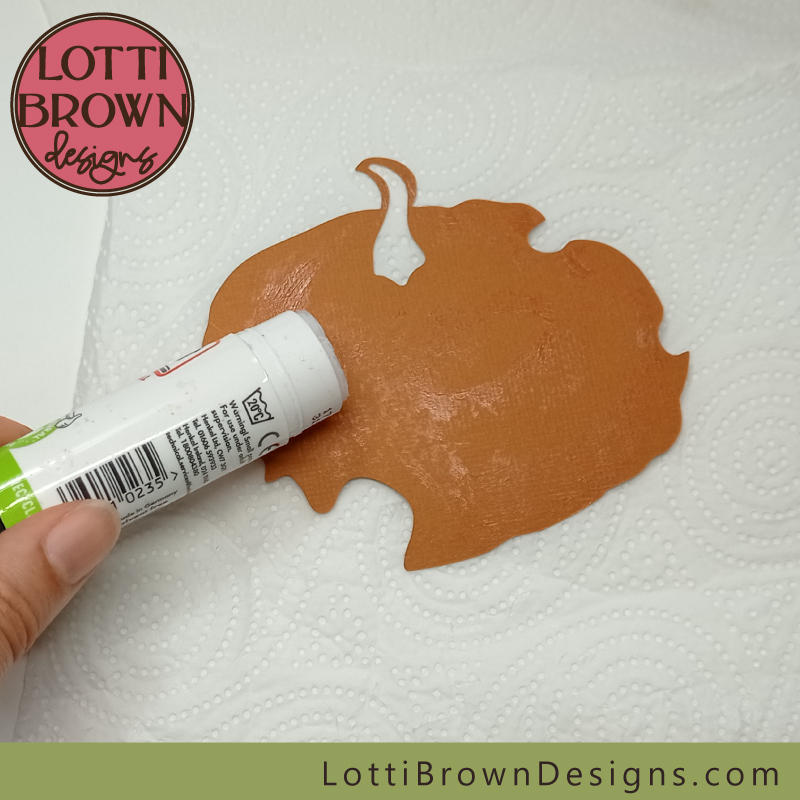 Add glue to the back of the pumpkin shape, ready to add into the design
- There's just a couple of places where the edges line up for this shape - check out the areas I'm pointing to in the images below and line up these edges with those in the underneath layers...
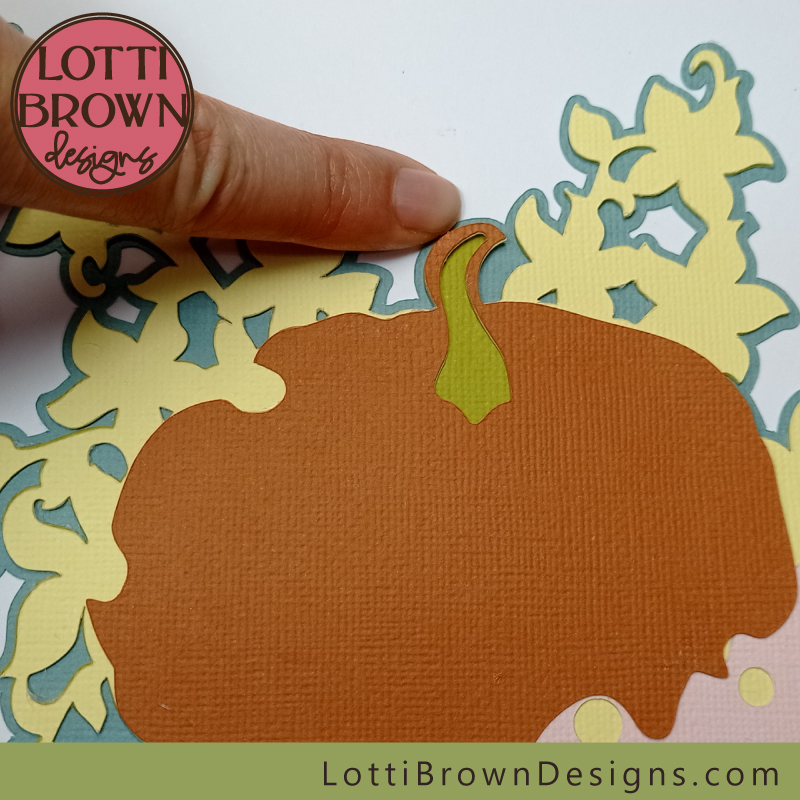 Get all the stalk edges nicely lined up with the stalks in the layers underneath
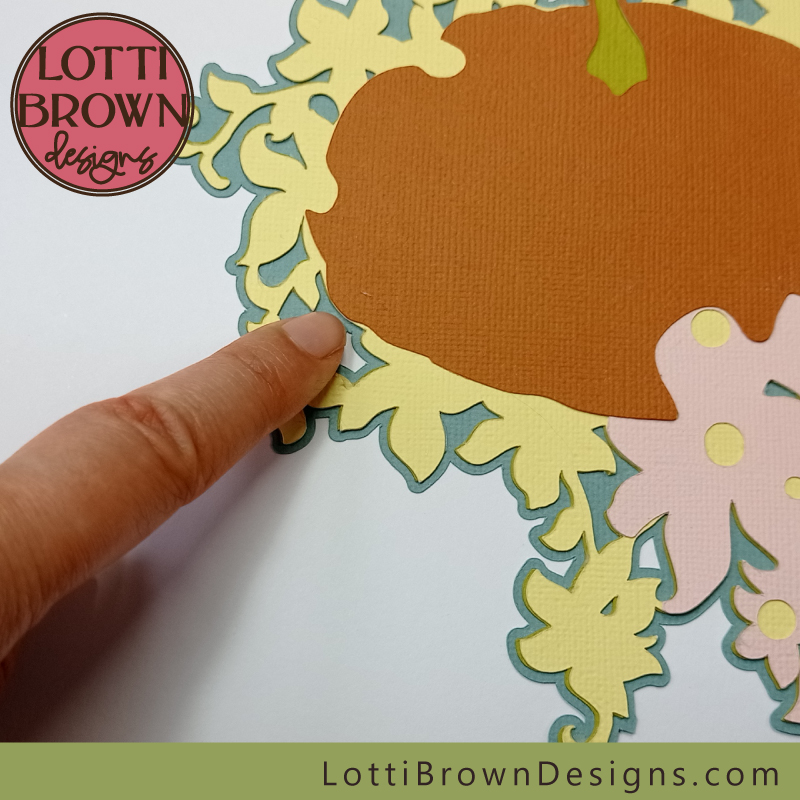 Line up the edges at this small point on the left-hand side here
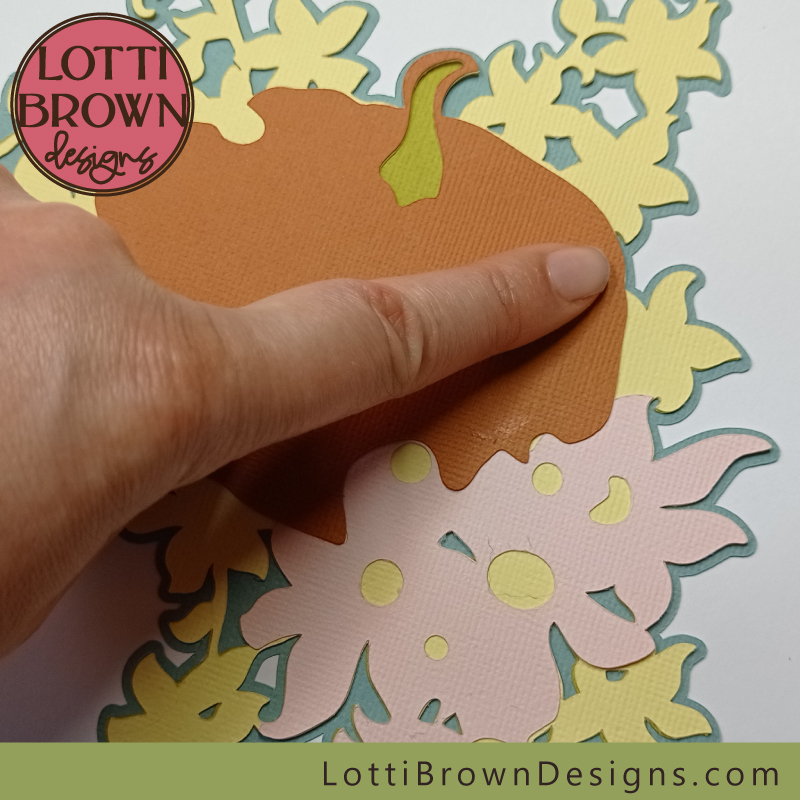 And line up the pumpkin edge with the edges beneath in this small area on the right-hand side
- When your pumpkin is in place, it's time to add that final layer that brings it all together... add glue to the back of the intricate cut layer with the main design, making sure to get glue on all those little edges and swirls so that they stick down well...
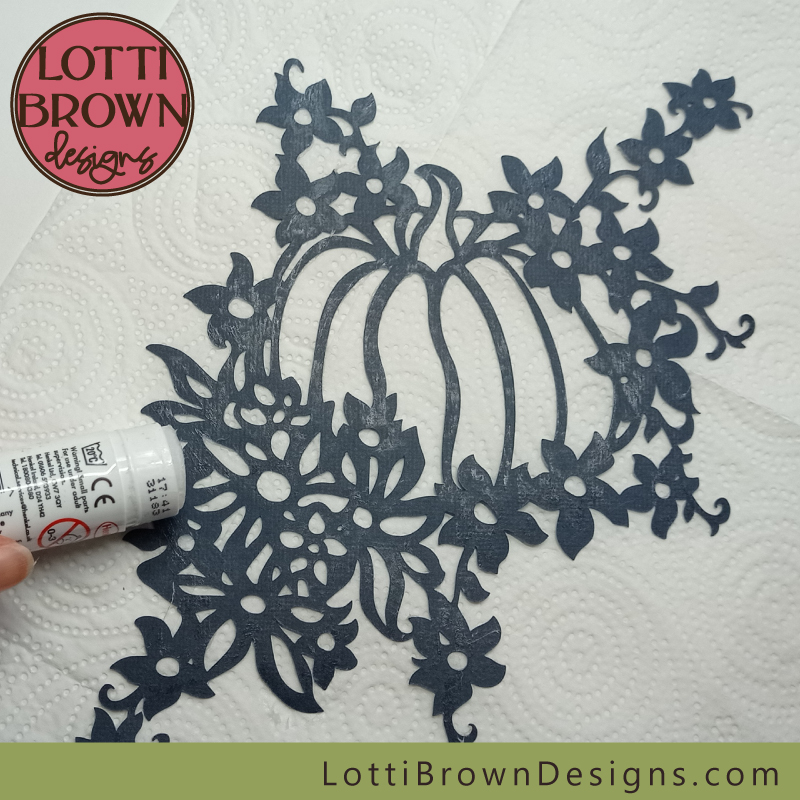 Add glue to the back of the main pumpkin and flowers layer
- And line it up carefully with the layers beneath - and when you're happy with the positioning, stick it down and press it down well to make sure all the edges are stuck down well - see the image below for how your finished pumpkin with flowers SVG project should end up looking...
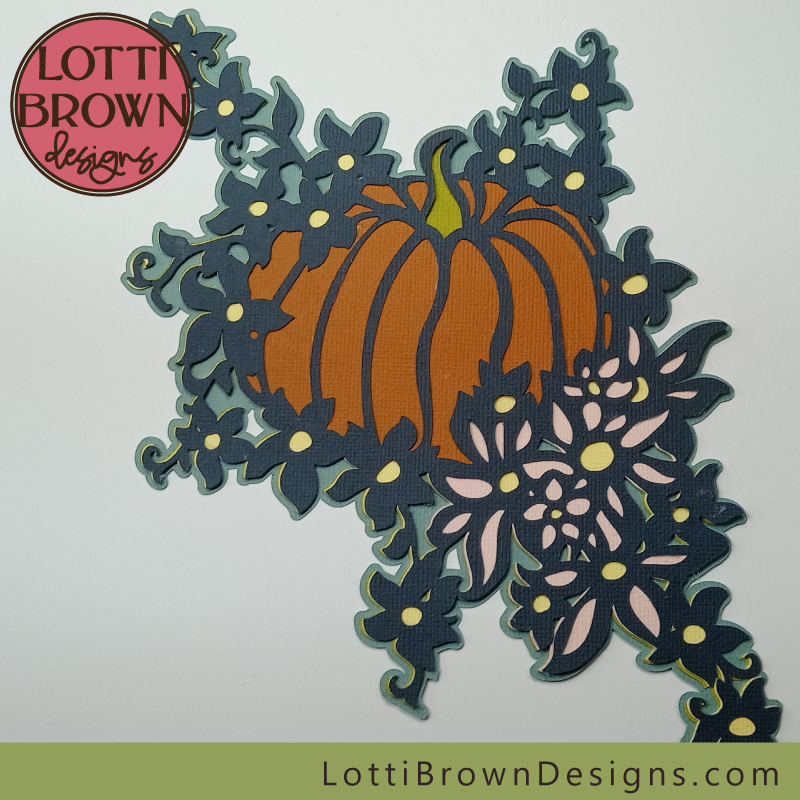 The completed pumpkin with flowers cardstock project!
You can use your pumpkin with flowers SVG project to decorate your home for Fall, Halloween, or Thanksgiving, create beautiful papercut art, or give as a hand-made gift to celebrate the season...
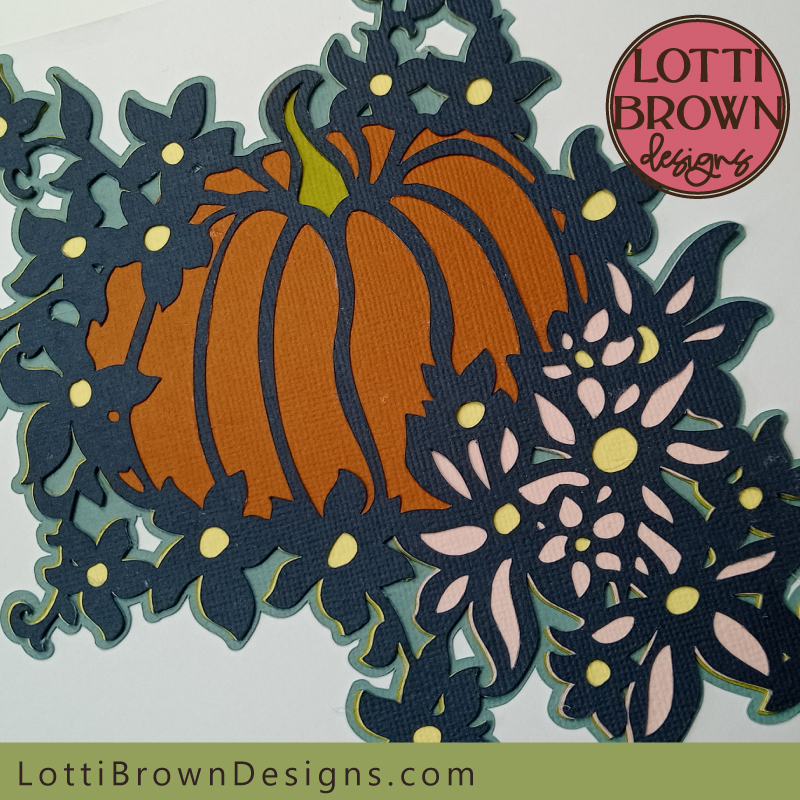 Close-up look!
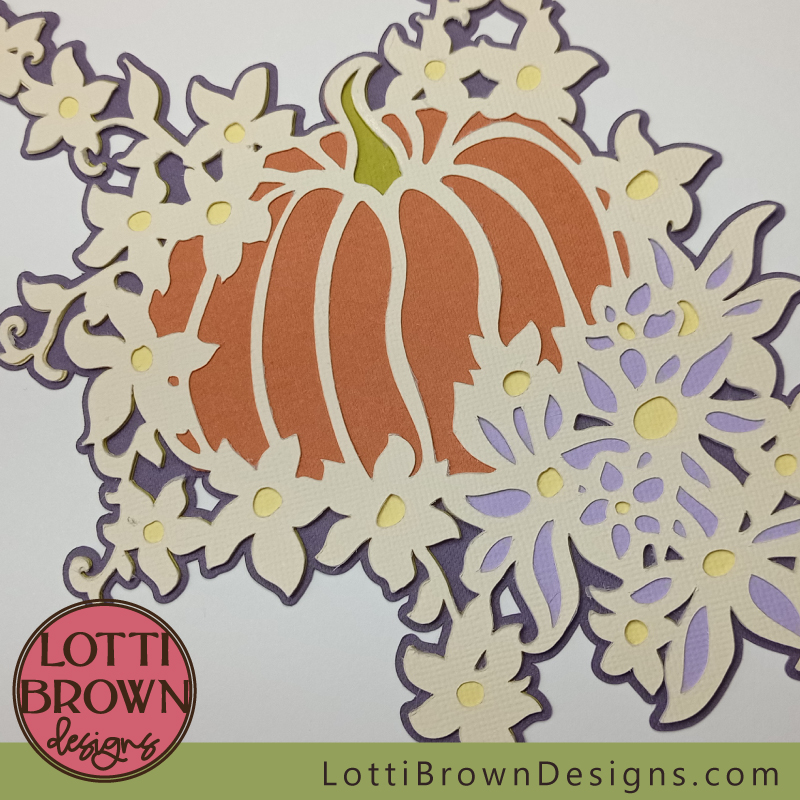 Colour inspiration - alternative idea!
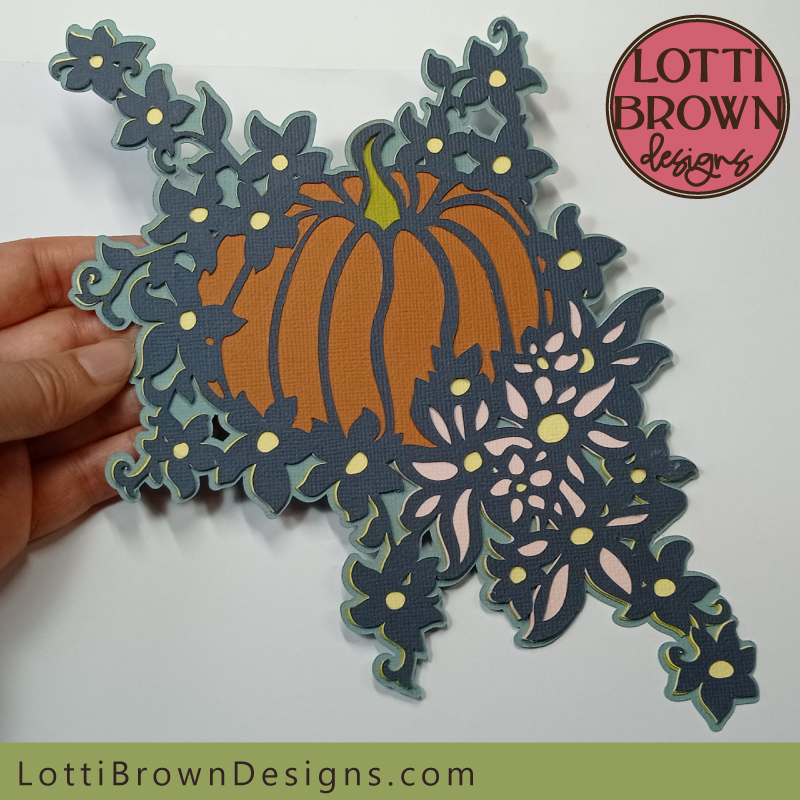 Pretty pumpkin & flowers papercraft project
Where to Get the Pumpkin with Flowers SVG File
 Layered pumpkin and flowers SVG file - use all the layers or just one - SVG, EPS, DXF, PNG formats
You can get the pumpkin with flowers SVG file from my store here
Design comes in SVG, DXF, EPS & PNG formats, suitable for Cricut and many other cutting machines
For personal and small-business crafting (up to 200 units)
For physical (craft) products only - no digital use, products or sharing
You Might Also Like:
Lotti Brown's Designs & Templates
How-tos...
- How to use SVG cut files for Cricut (also other cut file formats & machines)
You might also like this pretty swirly pumpkin and leaves SVG design - see it here!
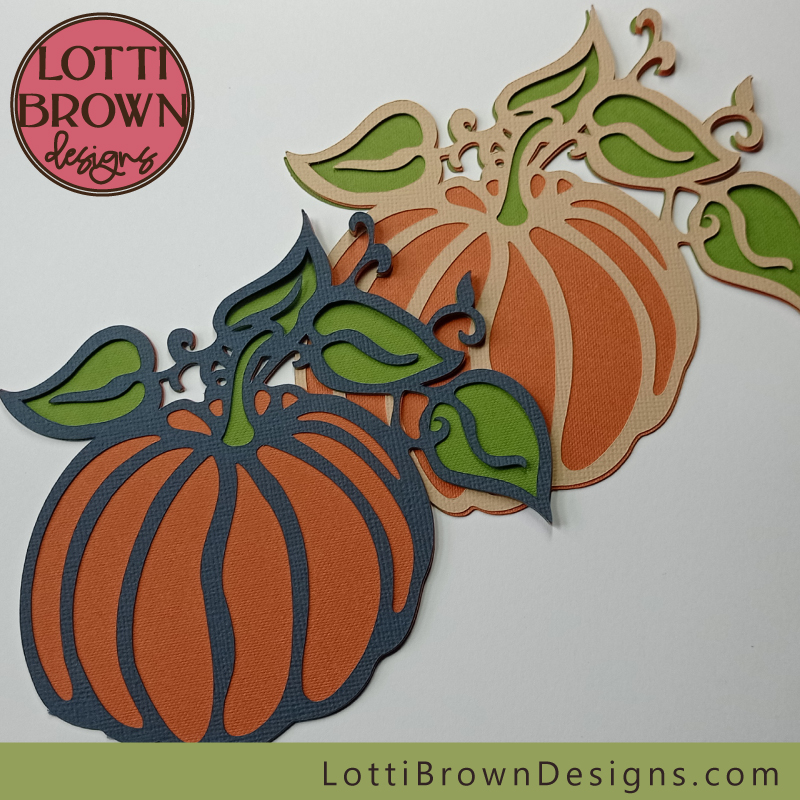 Super-swirly pumpkin and leaves SVG design
See all the pumpkin, Halloween and Fall themed SVG designs here...
Shall we stay in touch..?
Each month, I share stories from my own nature journal, new art from my studio, and simple seasonal inspiration to help you feel more connected with the turning year...
Recent Articles
-
British Nature Folklore Library: Stories, Seasons & Celtic Tree Wisdom
Dec 01, 25 05:09 AM
Explore British nature folklore, Celtic tree meanings, and seasonal wildlife stories. A growing library of myth, meaning, and hand-drawn inspiration. -
Beautiful Art Inspired by Nature
Dec 01, 25 05:04 AM
Beautiful folksy art inspired by nature from the fields and hedgerows of Yorkshire - colourful birds and wildlife with a nostalgic floral touch... -
Birds and Folklore in Britain: A November Nature Journal
Nov 26, 25 04:32 AM
November birds and berries - fieldfares, redwings, lapwings and snow geese with folklore, meaning and nature journal inspiration.
Follow me:
Share this page:


