SPRING 2025 - I've just completed a WEBSITE REVAMP! Everything is still here but may be in a slightly different place where than you left it and there's also lots of new sections, so if you're having trouble finding something in particular or you spot something that's not working as it should, please do get in touch and I'll do my best to help!

Beautiful Wedding Card SVG Designs
- Home
- SVG files
- SVG Card Templates
- Wedding Card SVGs
Gorgeous wedding card SVG templates for Cricut, Silhouette, ScanNCut and other cutting machines - cut and make at home to gift to loved ones... With making instructions and craft tutorial.
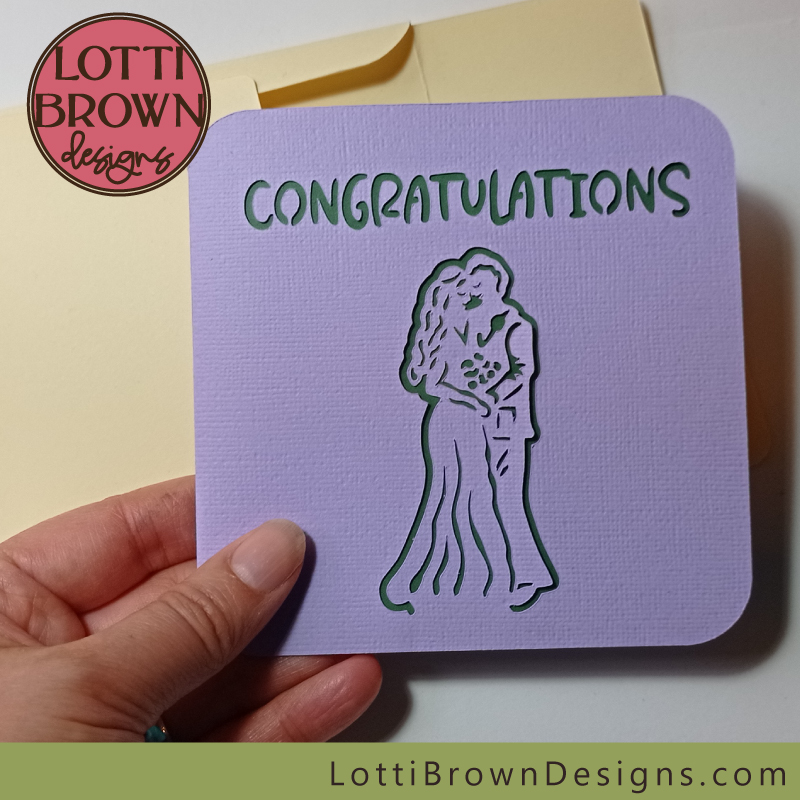 Simple cut-out 'Congratulations' wedding card template
See the 'Congratulations' wedding card template in my store here
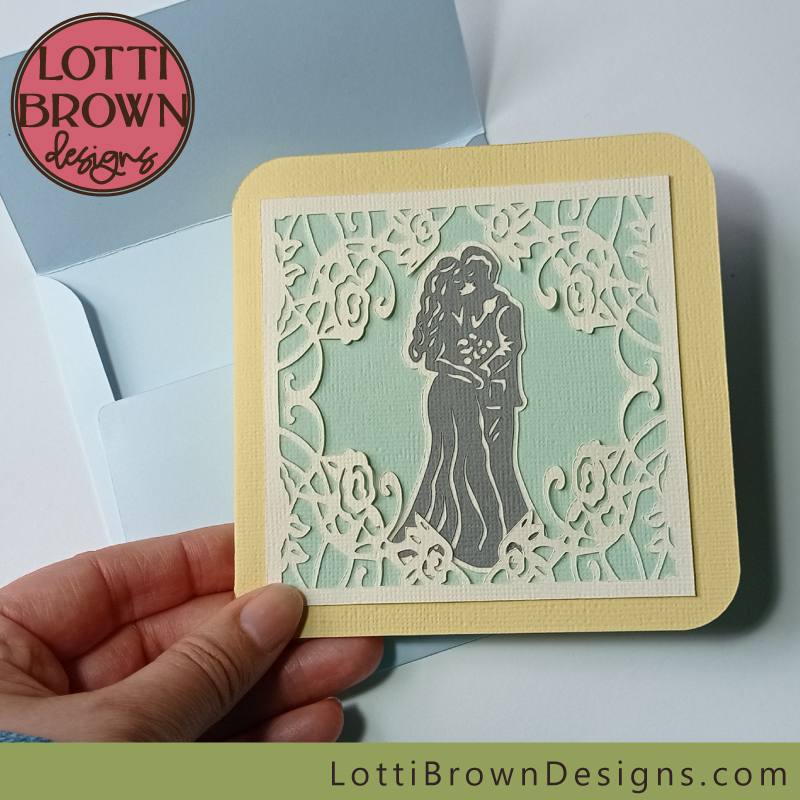 Layered wedding card template with papercut toppers
See the layered topper wedding card template in my store here
I made these two beautiful wedding card designs, based on the designs for my wedding shadow box as well as my rainbow wedding shadow box design, so that you can gift the shadow box along with a card - or perhaps just send one of the cards if you don't need to gift...
Each card design is available separately in my store.
I've also since made the same designs as a 'bride & bride' and 'groom & groom' version of each card - so those are also available, if you want them (look here), and this page will also act as the making instructions for those versions too.
Here, I'll show you both styles and also share on this page how to make each one, to help you decide which is the right choice for you. They're both pretty easy to make, so don't worry - just cut, score, fold, stick and go...
If you're making either the 'bride & bride' or 'groom & groom' version (from this page), it's exactly the same, but the figure design is different for each - just follow along with the same instructions, too...
Details & Instructions
Find out more about the 'Congratulations' cut-out wedding card
Find out more about the layered topper wedding card with intricate lacy design
Both cards are:
- Available in SVG/DXF/PNG & EPS formats - suitable for Cricut and most other cutting machines, or hand-cutting (use the PNG).
- Also include the envelope in the template for you to make and send your card
- Can be used with A4 or Letter-sized cardstock - makes a card approximately 12 x 12 cm (4.7 x 4.7 inches)
- For personal craft use and/or small-business commercial use (up to 200 products).
- For physical products (crafts) only - no digital products or sharing please
'Congratulations' Wedding Card SVG Design
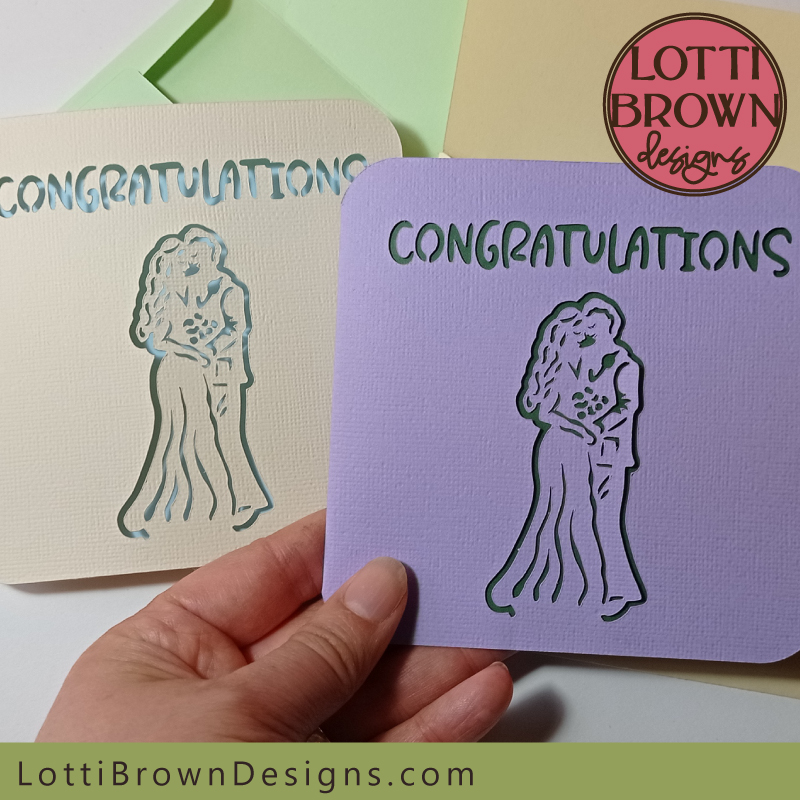 'Congratulations' wedding card SVG design - perfect for Cricut and other cutting machines
This is a lovely, simple and modern card - but very elegant with those flowing curves of dress and hair.
I made the card in a lilac and green which co-ordinates nicely with my wedding shadow box design - I also made it in a very pretty cream and pale blue.
For both these cards, I've used Sizzix textured cardstock for the outer card (the bit with the design) and a lightweight card (generic craft card) for the inner card and envelope - choose a card that's good to write on.
If you'd like to use a dark inner card (or envelope) like I have for the lilac card (dark green inner card), please make sure you have a good pen for writing on dark surfaces. I have a white gel pen ('Gelly Roll' Sakura) and a white paint pen (Uni Posca by the Mitsubishi Pencil Co.) that are both excellent at writing on dark card surfaces (make sure you let your message dry before closing the card).
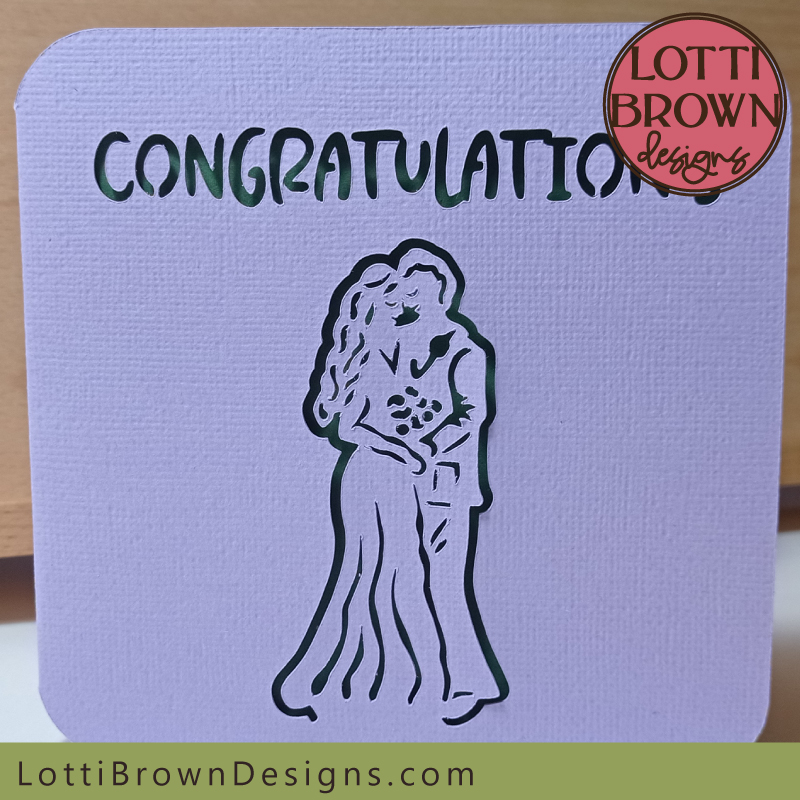 Simple and elegant wedding card design
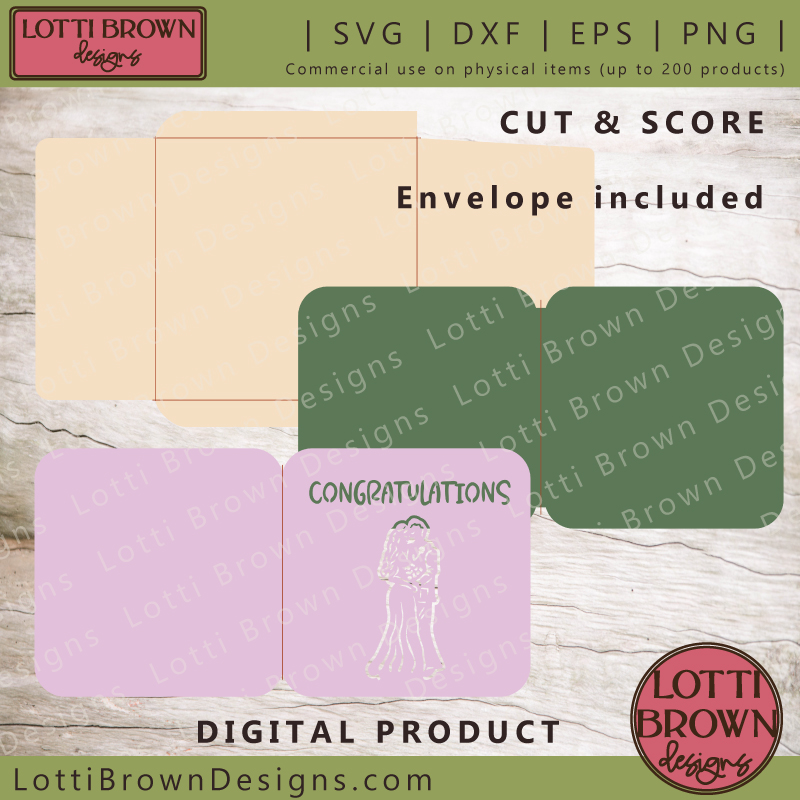 Wedding card SVG template
This wedding card SVG template is super-easy to make:
- You will need to use the cut-and-score function on your cutting machine to make the score lines ready to create the folds for the inner and outer card and the envelope (see the fine red lines on the image above). If you are a Cricut-user I have a step-by-step tutorial to help you with that, right here...
- If you don't have a scoring tool on your machine, you can score by hand - the above tutorial (here) also has some help and advice if you prefer to make your card in this way.
- Once you've got your card cut out and ready to make, I have a craft tutorial that guides you through how to fold and assemble the card and envelope - it's a birthday card project, but the basic design and process is identical. You can find the tutorial here...
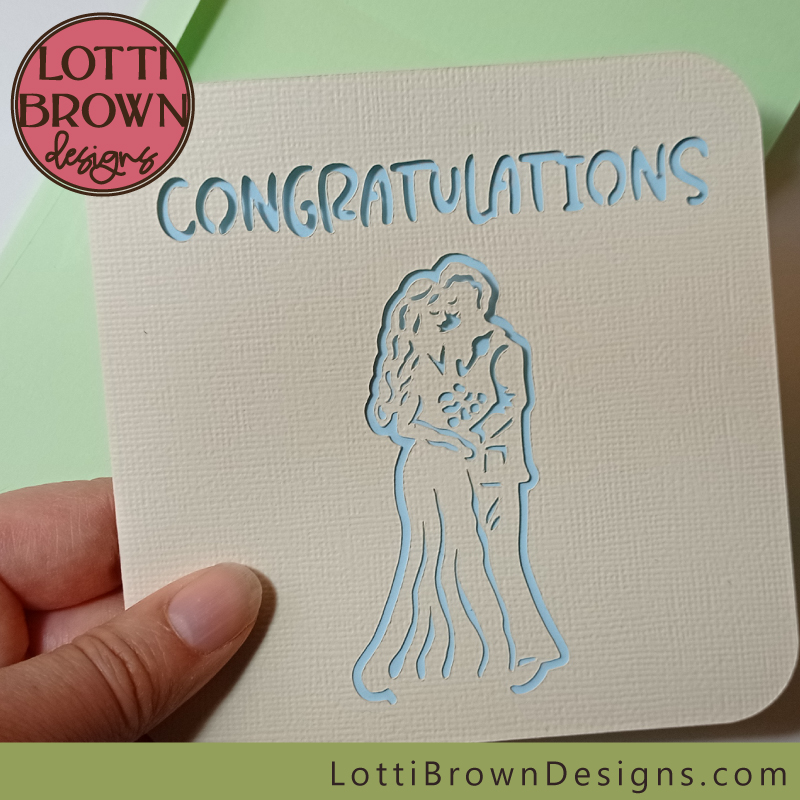 Congratulations wedding card design - pretty in cream and blue!
If you're ready to get crafting with the simple 'Congratulations' wedding card SVG template, you can find it in my store at the link right below...
Get the 'Congratulations' wedding card SVG cut file here
SVG/DXF/EPS & PNG formats
For personal and small-business commercial use
Physical (craft) products only - no digital products or sharing
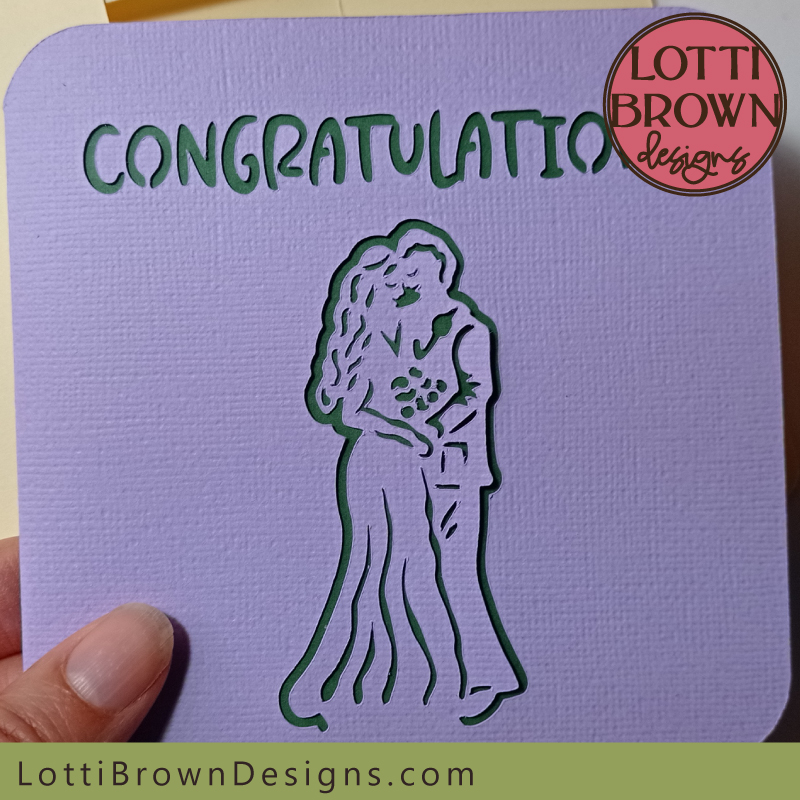 Cut-out wedding card design - lilac and green
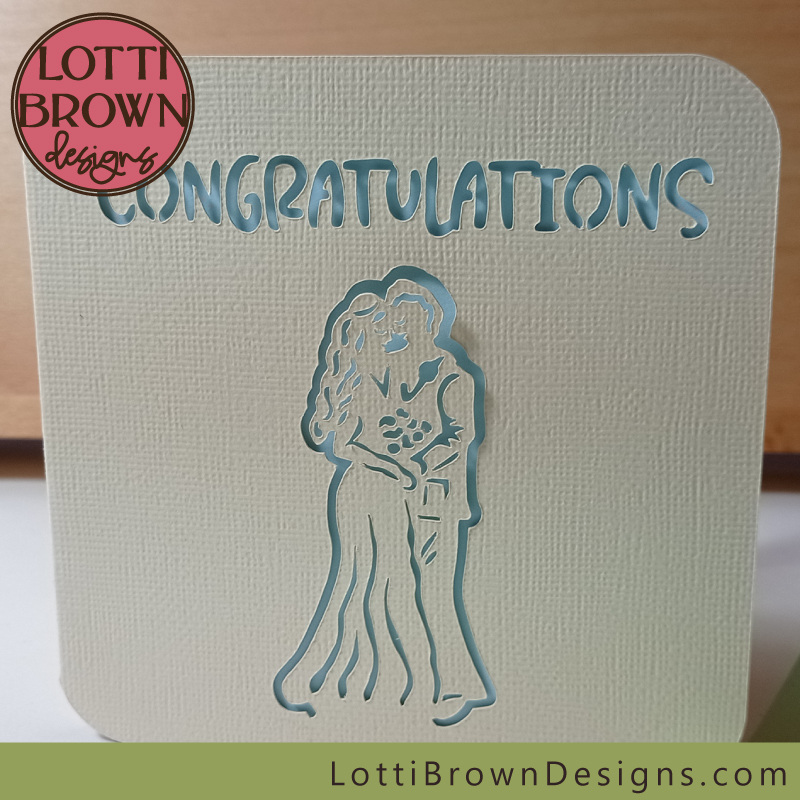 Papercut 'Congratulations' wedding card design - cream and blue
Or stick around a few minutes longer and check out my next wedding card SVG design with me - this next one is a layered design, created as a topper to stick onto the top of the basic card and I'll share the full craft tutorial to make it...
Shall we check it out..?
You can also see this design in the 'two brides' or 'two grooms' versions, here...
Layered Wedding Card SVG Design
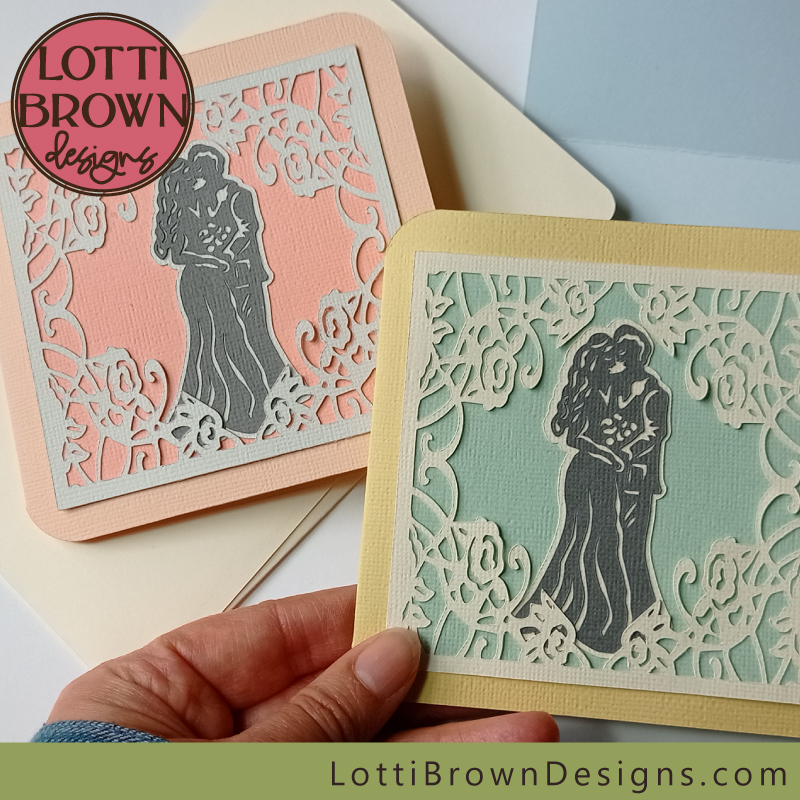 Layered wedding card design to make with your Cricut or other cutting machine
I adore the modern simplicity of the 'Congratulations' cut-out wedding card SVG template, but I also wanted to make something with the lacy design I created for the wedding shadow box project as well as the rainbow wedding shadow box project - and this card is it!
It's made as a 'topper' which goes on top of the standard card template - and it's created in layers. It's still easy to make, but it might take a little longer to make than the 'Congratulations' card as there's more to position and stick. I'm going to show you all the stages a little further down the page...
I think all the layers and the intricate cut-out gives a really luxurious feel to the card design - it's one for the happy couple to cherish and keep!
The wedding card SVG template includes:
- All the layers for the topper design
- Outer card template
- Inner card template
- Envelope template
The instructions are also good for the 'bride & bride' or 'groom & groom' versions of this layered-style card, which I designed a little after the 'bride & groom' version you can see here, so didn't include in this page - just follow along and substitute the appropriate figures when you reach that part. You can see more colour ideas for the cards on that page!
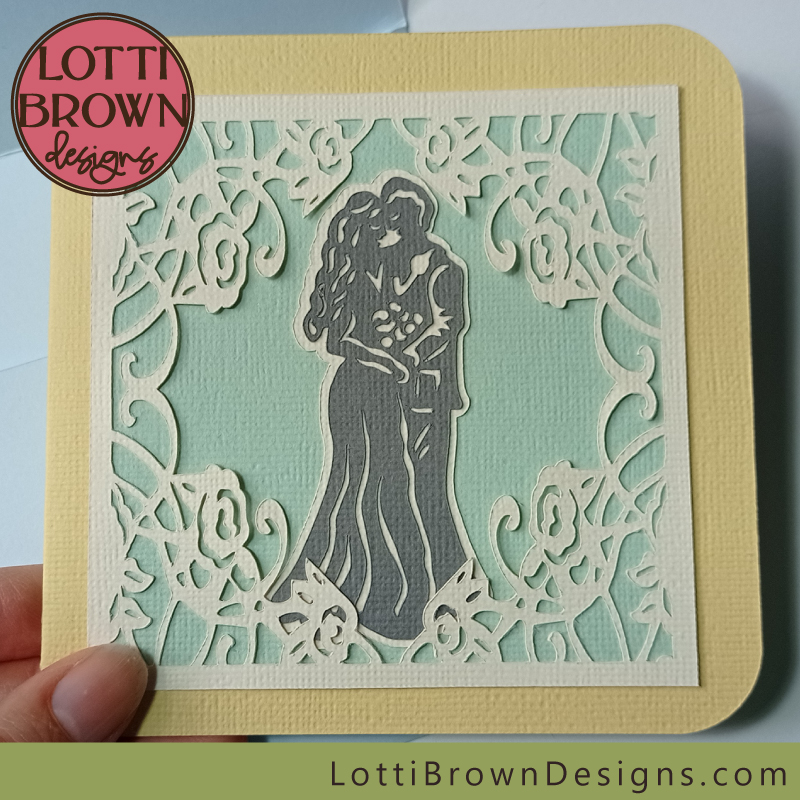 Pretty layered wedding card to make
I've made the wedding card SVG in two different colourways - the soft lemon and green above is my favourite, I think - it's very much a classic wedding card look...
But I do also have a bit of a soft spot for the pretty peach design (below) which I think gives a slightly more contemporary feel.
Please note that I've used a cream card for the lacy design to co-ordinate with the yellow and green - whilst I picked a very pale grey to go with the peach - I think it looked better and to say that it's worth just holding your selected colours together and just seeing if they look well together or if another colour choice would look better...
I do hope that you get creative with your own wedding card making and try out different colour combinations. If you wanted to make it to match the romantic wedding shadow box design, you might want to substitute a lilac cardstock for the yellow, and a cream lightweight card for the inner card and envelope.
I also, since, made the rainbow wedding shadow box design, which this card-style also co-ordinates with - so if you're making that design, think about which colours go with that - - are you making the lemon yellow version? Do you want it to match? Or not?
Also think about your inner card - do you want a co-ordinating colour? A simple white or cream? Something colourful and a bit surprising?
The same for the envelope - I chose for mine to be the same colour as the inner card (which is a very pale blue for the yellow card and a rich peachy-cream for the peach card), which I think always works well and keeps the project feeling cohesive and co-ordinated - but you could choose to co-ordinate the envelope with a different part of the card instead. It's up to you! Have some fun with it!
For this card (both colourways) I've used Sizzix textured cardstock for the outer card and all elements of the layered topper - and a generic lightweight craft card for both the inner card and envelope.
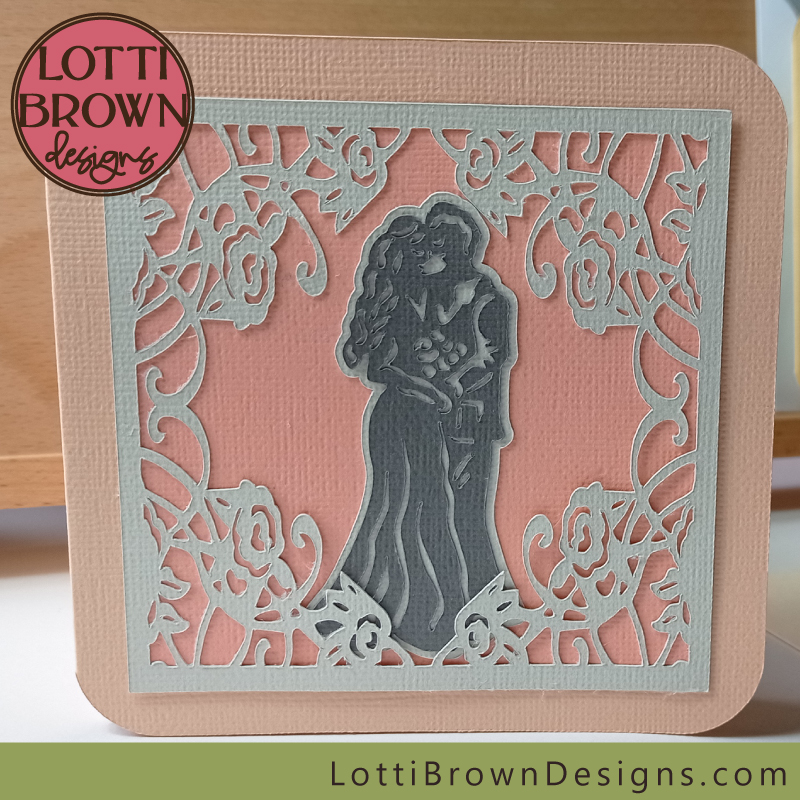 Pretty in peach! Intricate lacy cut-out wedding card SVG design
How to make the layered wedding card
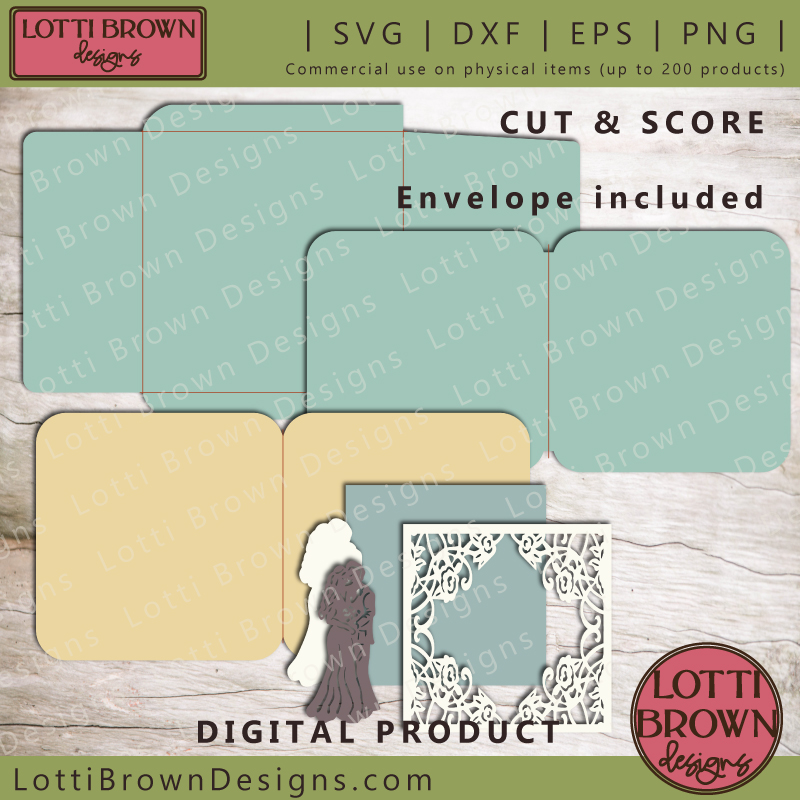 Showing all the layers you'll get with the layered wedding card cut file
To make the layered wedding card SVG template you will need:
- Cardstock of five different colours - see the section right above for a brief discussion about colours and cardstock choices. If you'd like to read more about choosing cardstock, check out this page.
- Glue - I used a stick glue. I initially tried glue dots or mini 3D sticky tabs but I didn't get them to work well on the details, so went back to the glue-stick which gave good results. You might also like double-sided sticky tape which is great for sealing the envelope.
- Metal ruler for folding.
- A way of cutting your template - I used my Cricut Maker but you can also use other cutting machines or use the PNG to cut by hand, if you prefer.
- A way of scoring the fold lines - I use the Cricut scoring stylus. Cricut also have a scoring wheel. Other cutting machines have their own ways of scoring, or you can score manually. I have some help with choosing a scoring tool and setting the lines to score in Cricut here - but please, first read the section below on this page as there are some extra layers to contend with on this card compared to the tutorial. Don't worry, it's easy, but you just need to be able to identify which layers are which!
- My layered wedding card SVG template (comes in SVG/DXF/EPS & PNG formats) if you don't already have it - available for download from my store. (For the 'two brides' or 'two grooms' versions, please see this page.)
 Layered wedding card project to make with your Cricut or other cutting machine
First, you will need to cut out all the pieces for your wedding card SVG template - use your cutting machine for this (or cut by hand if you prefer).
If you're using another file type or cutting machine programme, or if you need to resize PNG files, you can get the dimensions for the files here...
IMPORTANT - you will need to use the cut and score function on your machine to score the fold lines to make the inner and outer cards and the envelope. These are the thin red lines in the image above showing all the layers (the image at the top of this section that says 'Cut and Score') - you can see one score line each on the inner card (soft blue-green) and outer card (yellow) and four in a square on the envelope.
If you are a Cricut user, I have some help with how to score with your Cricut, using one of my basic card templates. You will be able to use the tutorial with this card template, but will just need to add in a couple of (very easy) extra stages...
- Go to the how to score tutorial here (I set it to open in a new window on this particular link).
- At step 2 - look at your layers - you will have more layers than in the tutorial. The top four layers are all to create the topper that sits on top of your card. These don't need to be scored, just cut, so you can effectively ignore them while you're setting up your score lines. Everything underneath these top four layers is exactly the same as the tutorial with the score lines, inner and outer cards and envelope.
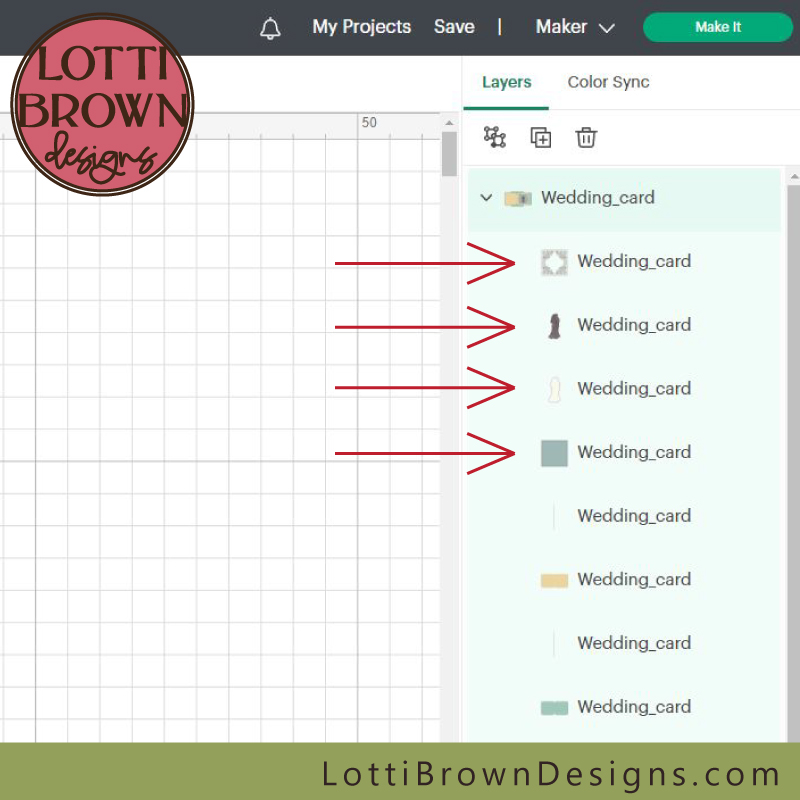 You will have four extra layers, shown here - these are specific to this wedding card design. Just continue with the 'how to score' tutorial ignoring these until it comes to the cut
- If you'd like to work around the extra layers, just mentally ignore them and carry on with the scoring tutorial.
- If you'd prefer to 'hide' them (just while we're setting up the score lines), first go to step 3 and 'ungroup' all the elements of the card - then use the little 'eye' icon to the right of each layer to hide the layer (just the top four!) - the eye icon will have a diagonal line through it and the relevant element will disappear from the main design area. You can then continue with the rest of the scoring tutorial - but please do remember to come back and 'unhide' them (click on the eye icon again) before you send your project to cut - do this just before step 7.
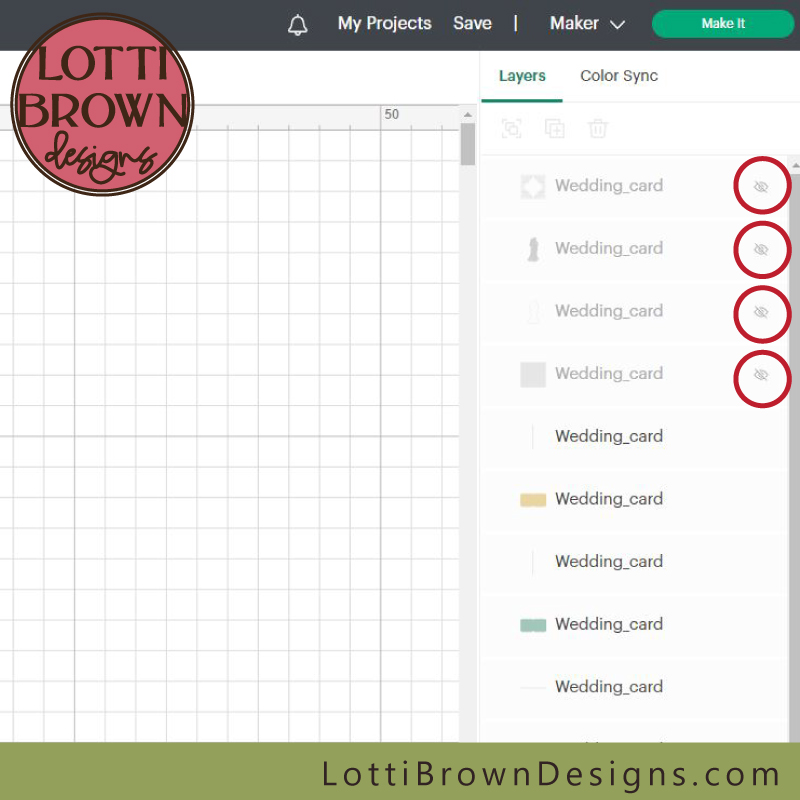 If you prefer, you can click on the eye icon on the right of each layer to 'hide' this layer from the main design space, while you're working on the scoring layers. Make sure you remember to 'unhide' (switch them back on) before you send the project to cut, though!
If you want to manually score your lines, the tutorial can also help you with that.
Once everything is cut and scored, please come back here and we can continue to make the wedding card...
Assembling your layered wedding card
Here, we start with everything cut and ready to assemble - it's really easy to do but I wanted to share my tips and ideas from making the wedding card SVG to help you make it great first time!
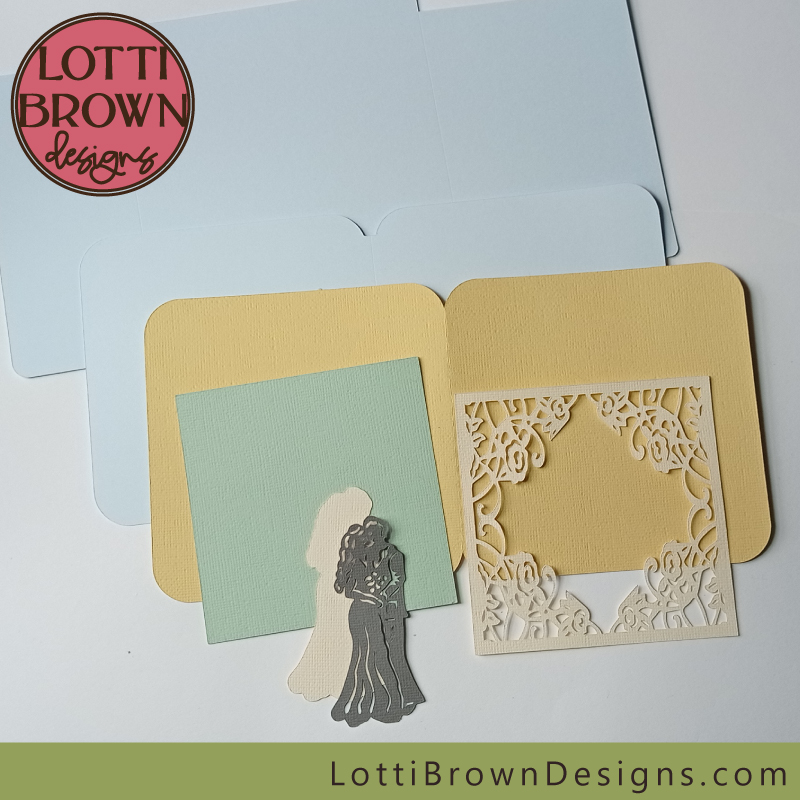 The cardstock is all cut out, scored, and ready to go... Let's make!
The first bit is a really easy bit to start with - but it's kind of nice, too, as it's putting together the happy couple with their background...
Apply glue to the back of the dark grey figures and stick them (fairly centrally) on their cream background. I've used a glue stick. You might just need to wipe away any excess glue seeping through the cuts, very carefully.
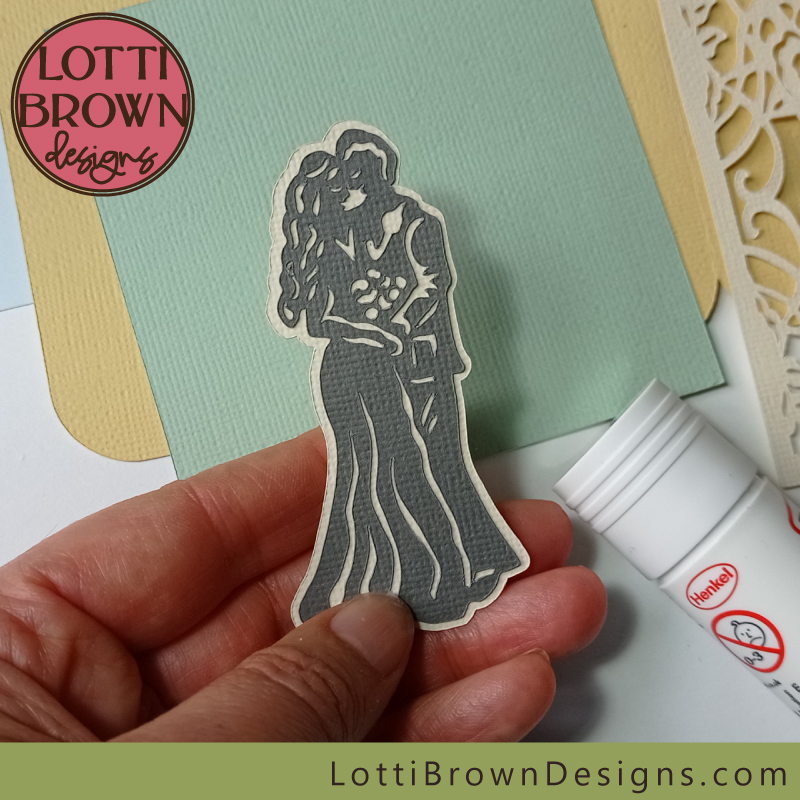 Glue the happy couple (dark grey) to their cream background
This next bit is quite tricky - you just need to glue the blue-green square down onto the front of the yellow card (the right hand side as you look at it) - the tricky bit is getting it straight and in the middle, which I always find surprisingly difficult. Just position it very lightly to start with so that you can wiggle it round a bit and improve its position, if you need to.
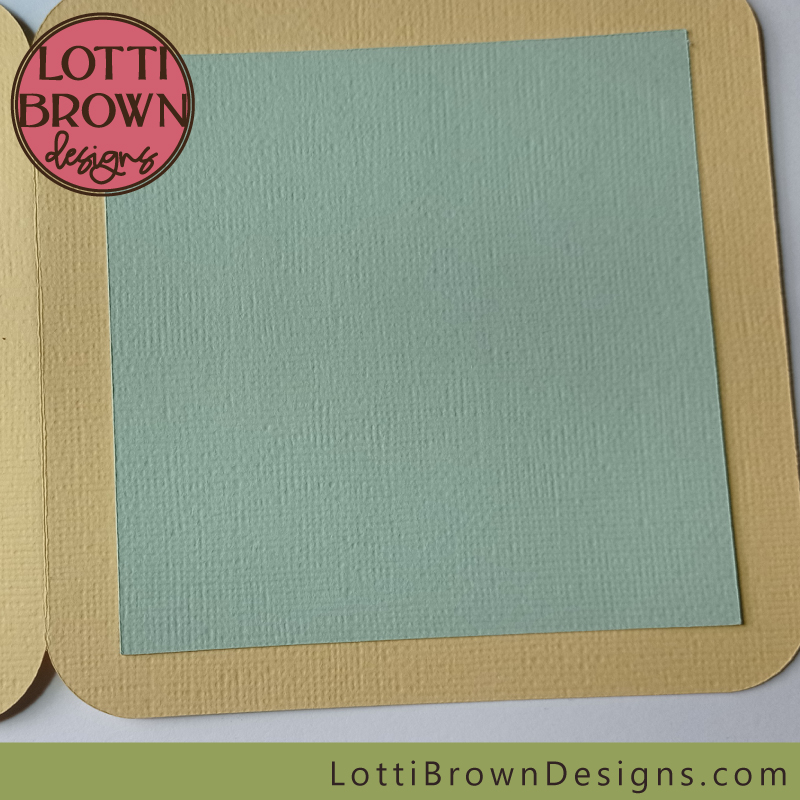 Glue the square onto the front of the card - try and get it in the middle and straight, if you can!
Now, we're going to get the happy couple in position - and we're going to use the lacy frame to help us with this...
Pop down the happy couple (don't stick them yet) and also pop the lacy frame over the top (again, no glue yet) - this is so that you can see how the happy couple look against the frame. There's no absolute correct position for them to be in, so just see that they're fairly central and their heads won't be obscured by the pattern.
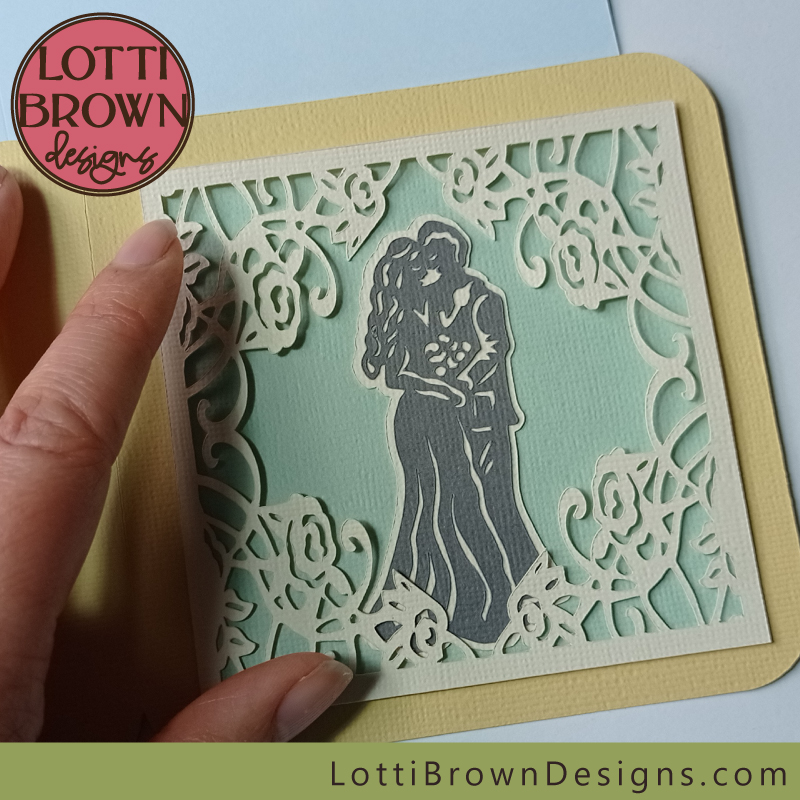 Use the lacy frame to help you try to position the figures before gluing anything down
Then, take away the lacy frame - and eyeball the position the couple are in - we're going to try to put them back in this spot once we've added glue to the back.
So - add glue to the back of the figures and pop them back down where you think they should be - put them down lightly and you can pop the frame back over to check and wiggle them around until they're in the right place - only then press hard to stick them down.
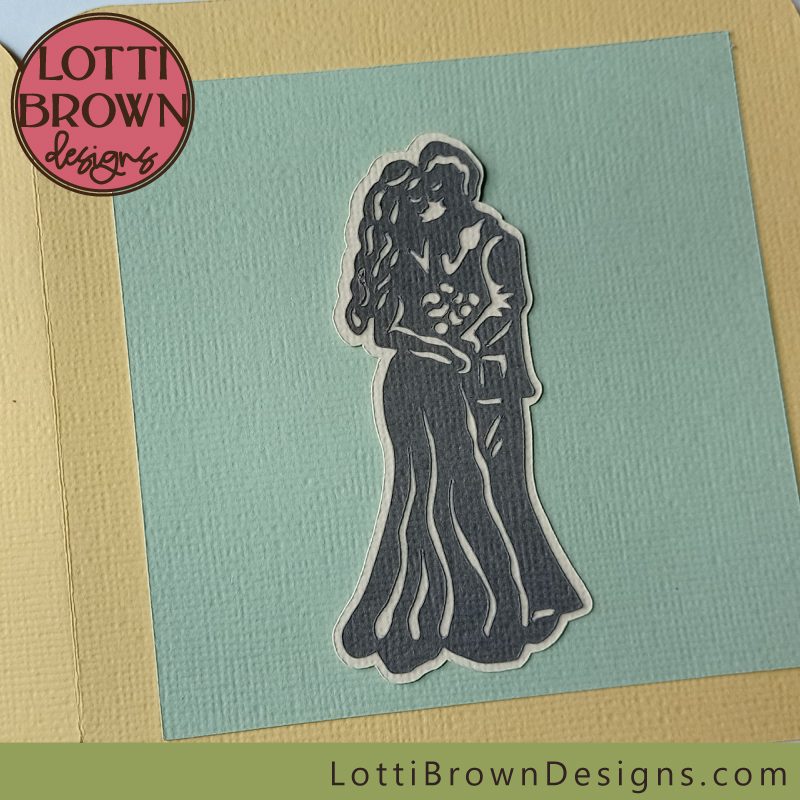 The happy couple are now glued in place on the card
Next, we stick the frame in place - add glue to the back of the lacy frame. I found it best to just add the glue around the outer edges. The frame should still stick well and you get a nice 3D effect with the design slightly loose around the figures.
On the peach card, I ended up sticking the inner edges (with the swirls) down too, as I'd bent one slightly while I was manoeuvring it and it wouldn't stay flat. So you can stick it down if you need to, and it still looks great! Check it out at the end!
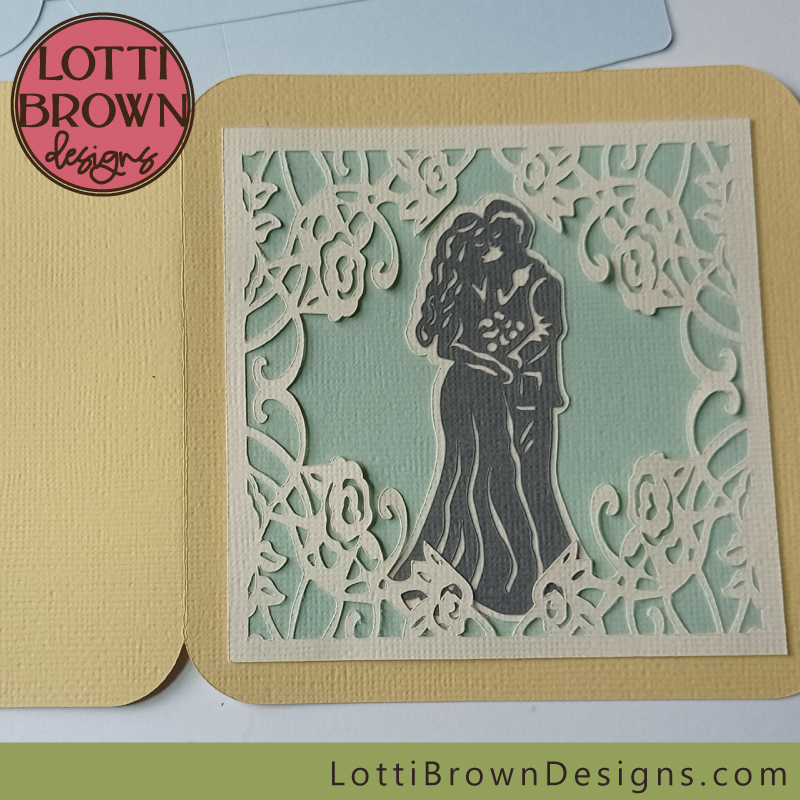 The wedding card topper is all glued down and ready to go!
Now, we just need to fold the yellow outer card - we do this with the metal rule. Lay the metal rule on the score line, with the ruler on the design side of the card, as below. Fold the other side up towards you, running your fingers along the underside of the fold to keep the fold straight and firm...
Then take away the ruler, and fold the fold back on itself again, so that the card looks the way it should!
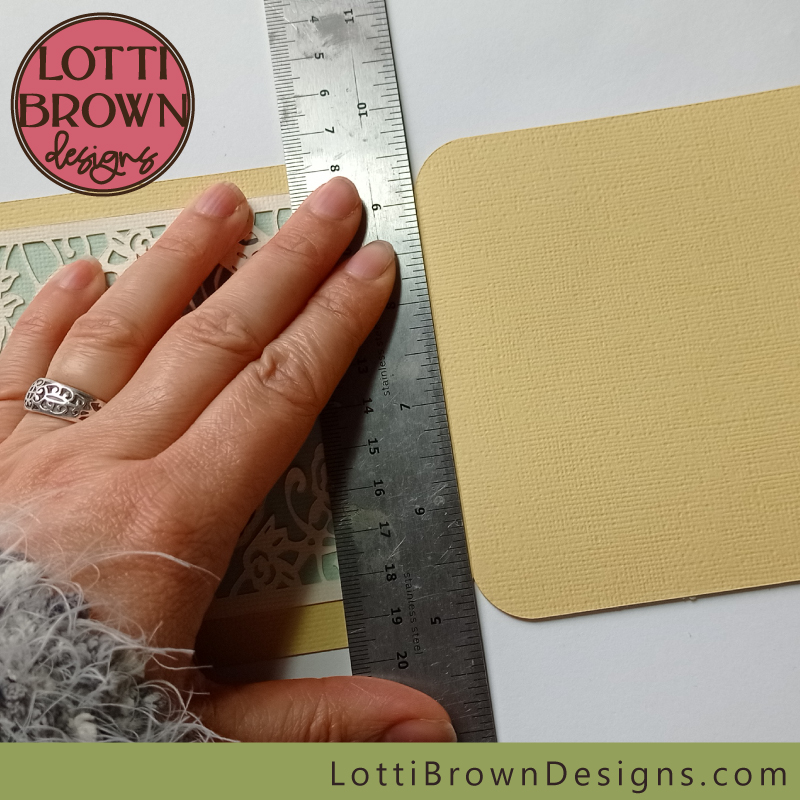 Use a metal ruler to help you create a nice straight and sharp fold in the outer card - fold up towards you, then fold back the other way again
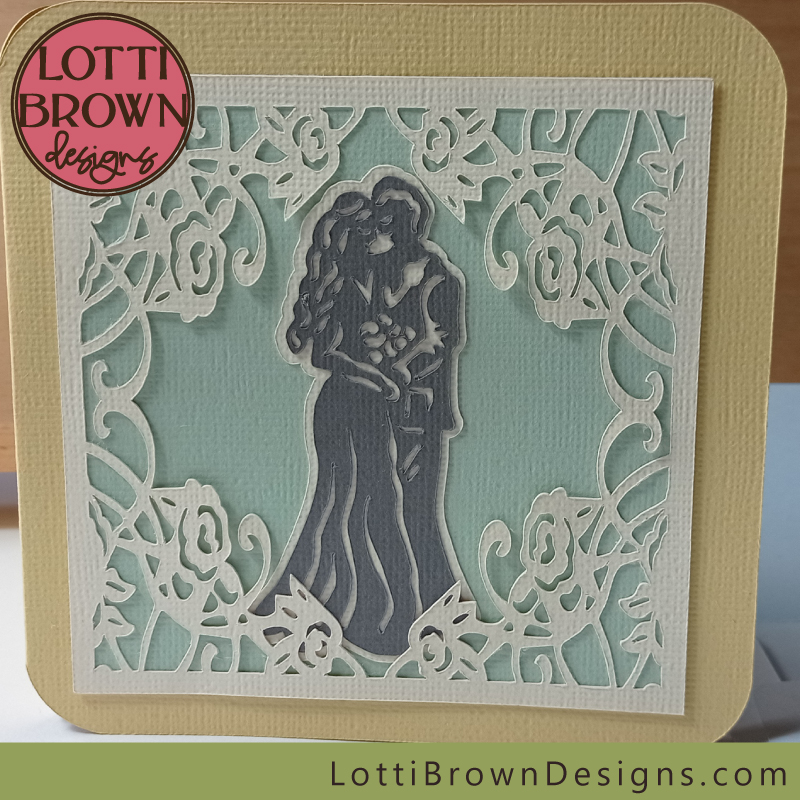 The main part of the card is now complete
Next, we should add in the inner card...
First, use your metal rule to fold along the central score line in the same way as you did for the main outer card - folding once up towards you, pressing your fingers on the underside of the fold to make the fold sharp and straight, then folding back in on itself again. The score line should end up on the outside edge of the fold. I give you more detail on making this fold in this basic card tutorial here.
When you've made your fold in the inner card - just add some glue to one of the sides of the card (on the outer edge of the fold) - the card will insert into the outer card and glue inside it, so make sure your folds match for this! Again, there's more about this in the tutorial here, if you need it.
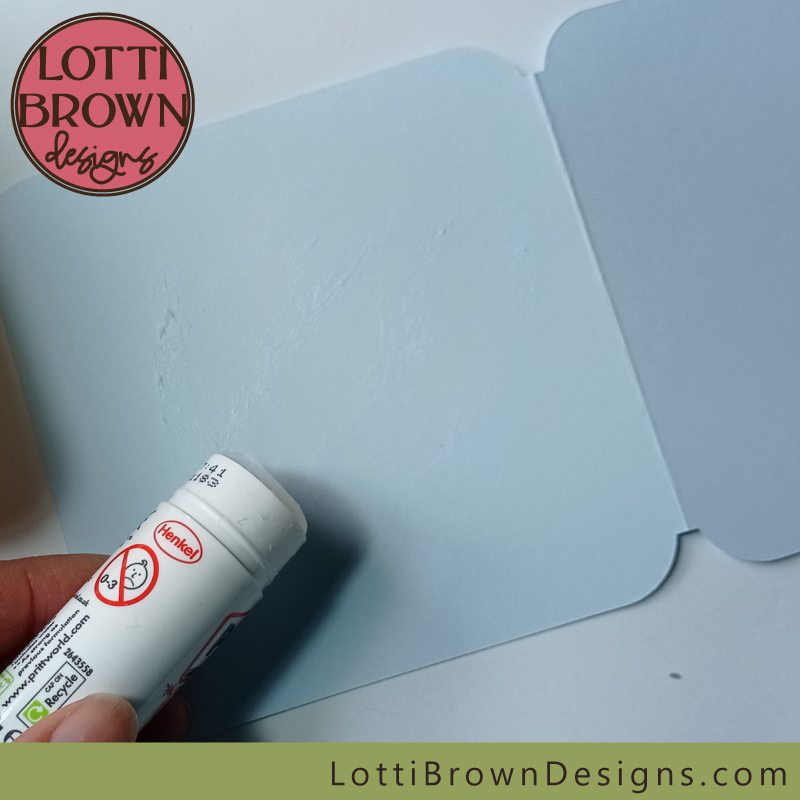 Add glue to one of the outer sides of the inner card, ready to glue it inside the main outer card.
Glue the inner card inside the outer card - don't go too close to the central fold - give everything room to fold!
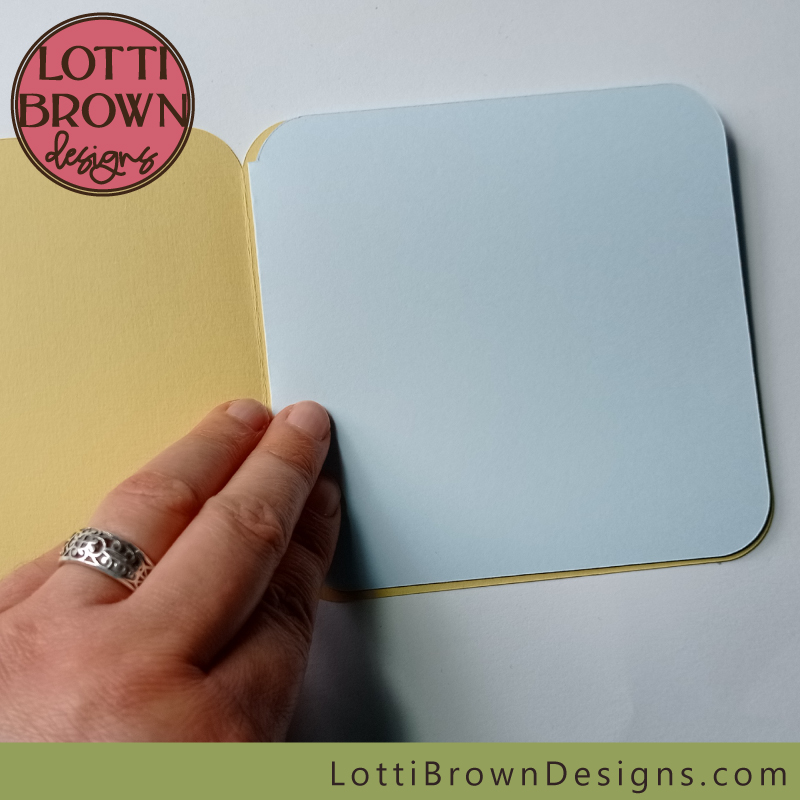 Glue the inner card in place, inside the outer card
We're only gluing one side of the inner card - leave the left hand side of the inner card loose, like in the image below...
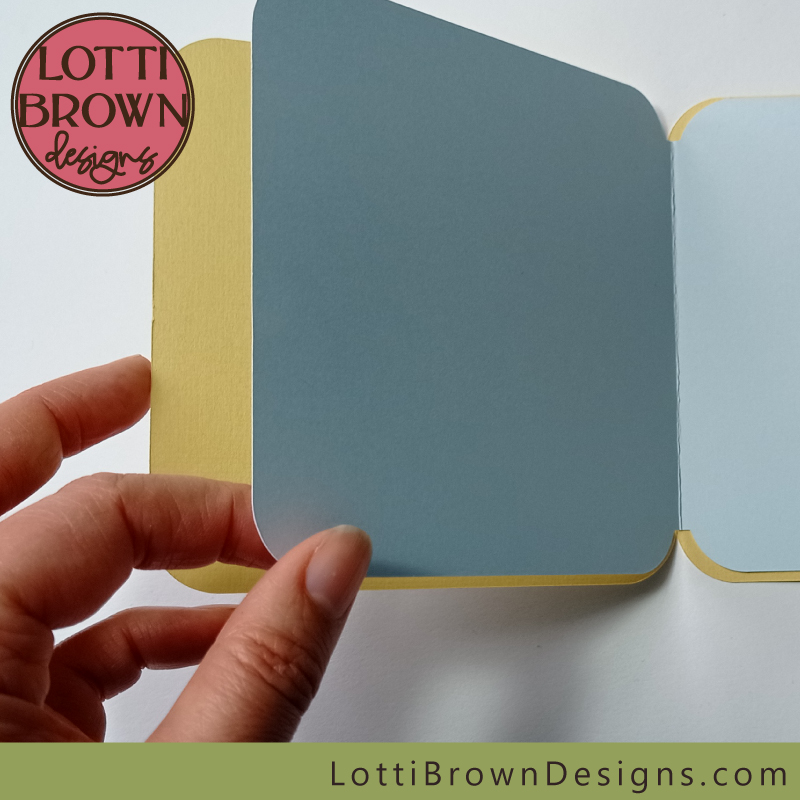 Do not glue the left-hand side of the inner card
Finally, let's make the envelope - use your metal rule in exactly the same way on these score lines.
- Hold your ruler against the score line.
- Fold up once against the ruler, using your fingers to run along the underside of the fold to firm it.
- Then remove the ruler and fold back again the other way.
- The score lines should all end up on the outside edge of the folds.
Then, glue down the edges of the long flap and leave the short flap unglued. There's some more help with folding and gluing your envelope in my basic card tutorial here.
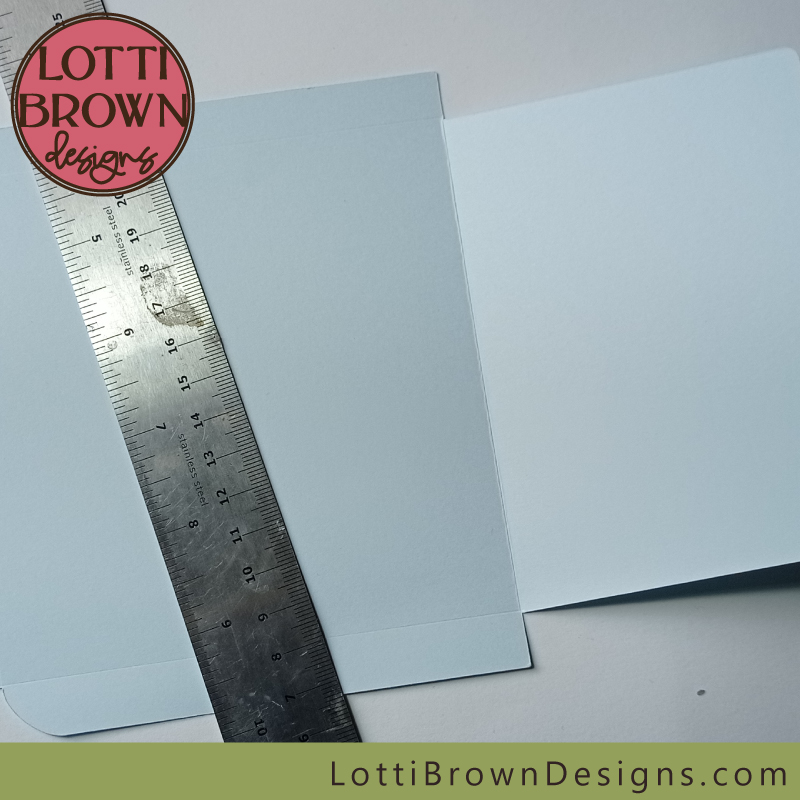 Use the metal ruler to create the folds for the envelope
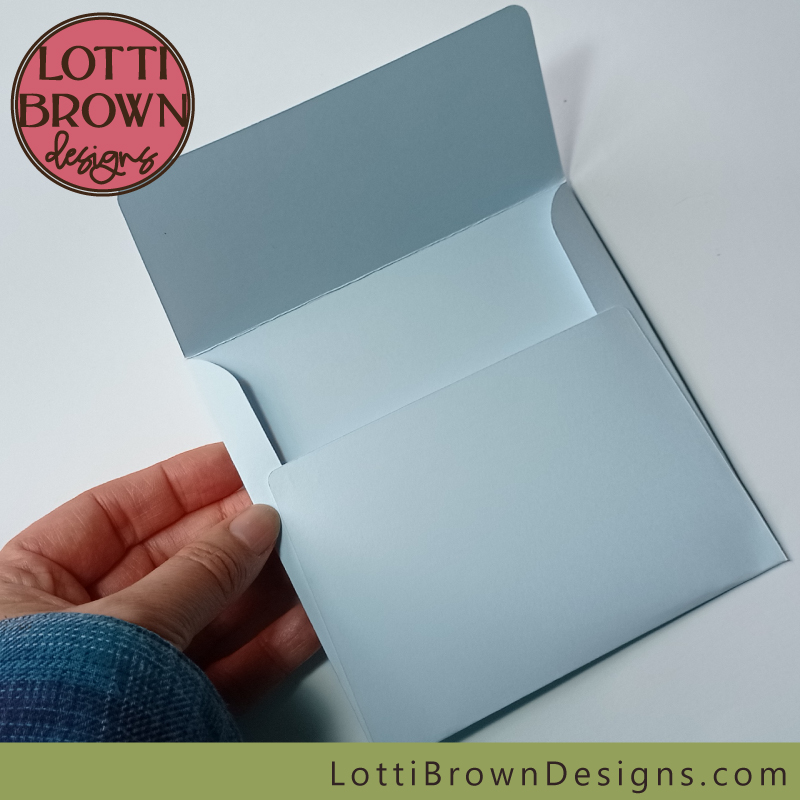 Your envelope is ready
You can add some double-sided sticky tape along the envelope closure flap, ready to seal when you're ready to send the card... This is great if you're making cards to sell! Otherwise, you can just seal it up with glue when you're ready to post, if you like.
 The finished wedding card SVG template - made in cardstock with my Cricut Maker
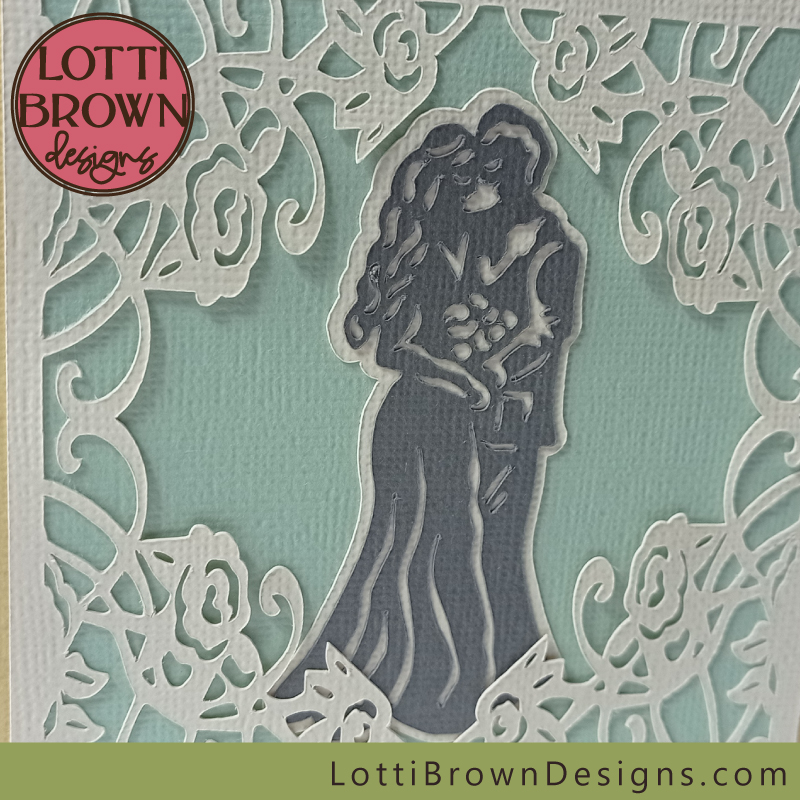 Wedding card design detail - a closer look!
And here it is in peach, as I promised to show you it again...
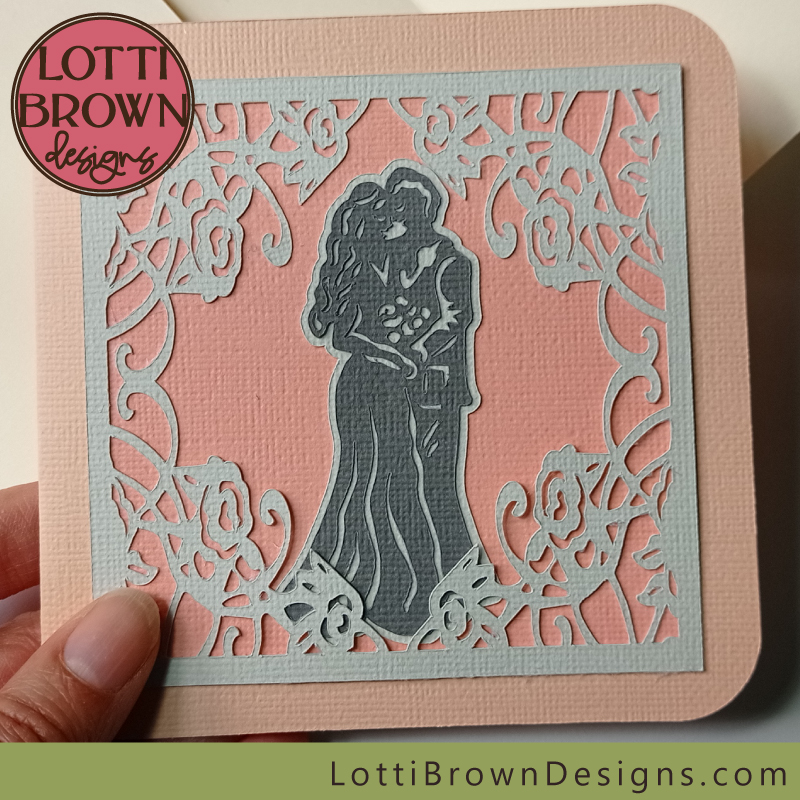 The same wedding card design in peach and grey
This one has the top swirls of the lacy frame glued down, but not the bottom swirls - you can see the slight difference in effect!
I hope you get creative and have fun making up your own wedding card SVG template - will you go with the lemon and green? Try the peach? Match the happy couple's wedding colours? Or favourite colours? Or put your own unique creative spin on it?
If you're ready to get the download for the layered wedding card SVG file from my store, you can find it at the link right below...
Get the layered topper wedding card SVG file here
SVG/DXF/EPS & PNG formats
For personal and small-business commercial use
Physical (craft) products only - no digital products or sharing
If you're looking for the 'two grooms' or 'two brides' versions of this card, you can find them both here...
Which card did you like best?
Did you nearly forget about my simple cut-out wedding card SVG from the start of the page? Which one do you like best?
You can see them both in my store - links below...
If you're looking for the 'bride & bride' or 'groom & groom' version of either of these card styles, you can find those here...
You can see more of my greeting card SVG templates for making a card with your Cricut here...
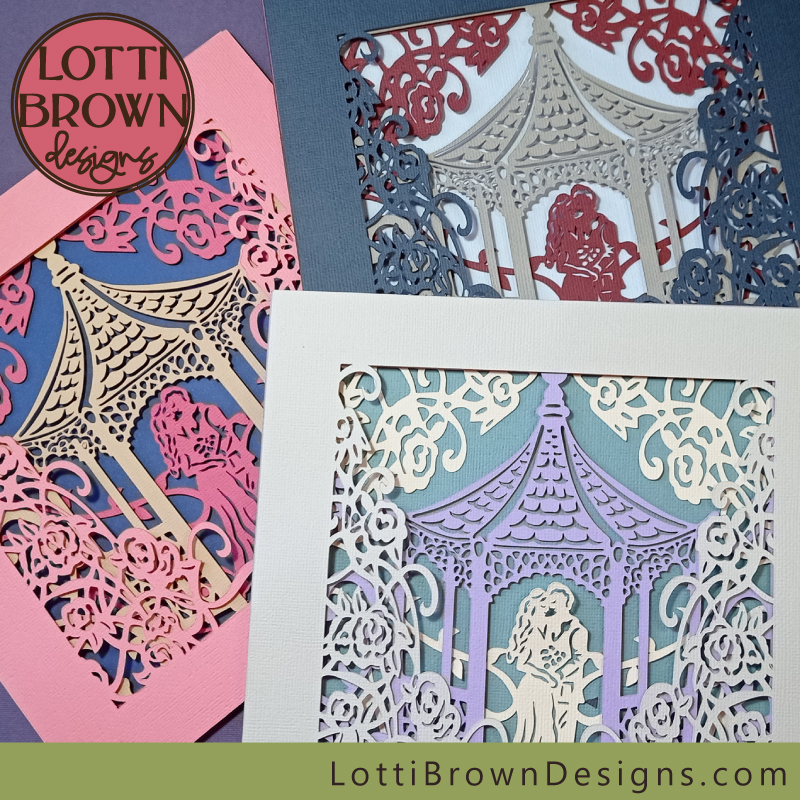
The wedding cards use the design from my wedding shadow box (see it below in three different colourways), so if you need to gift for a wedding, you might also want to make the shadow box - find it here... (it looks fantastic framed up in a nice box frame!)
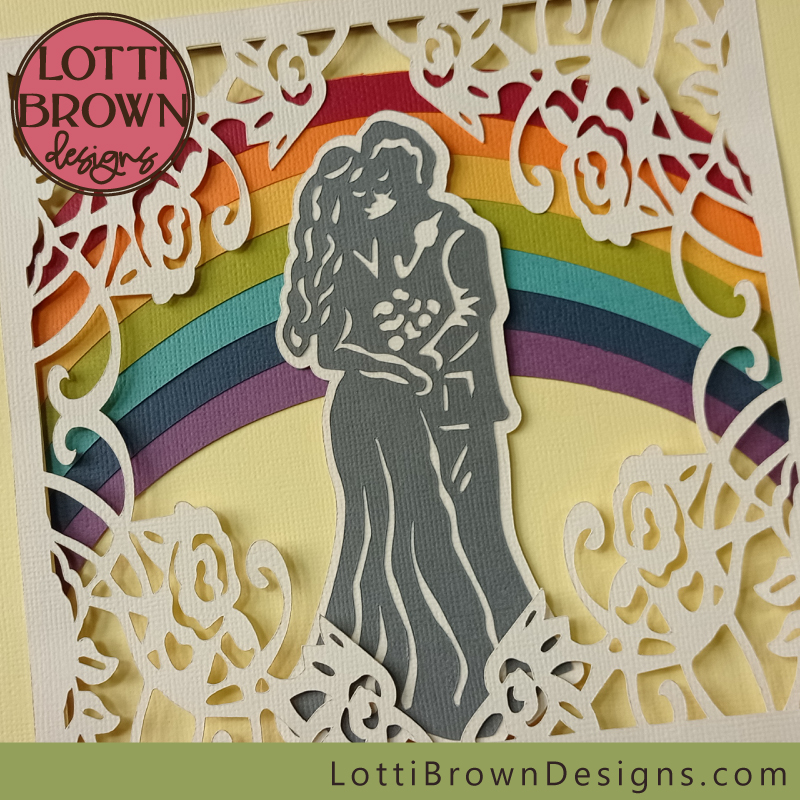
The card designs also match my colourful & contemporary rainbow wedding shadow box project (see image below) - this comes in different versions for 'bride & groom', 'two grooms', or 'two brides' - you can take a closer look at the project here...
You Might Also Like:
Lotti Brown's Designs & Templates
How-tos...
- How to use SVG cut files for Cricut (also other cut file formats & machines)
Want to keep in touch?
Sign up below for my free email newsletter...
My newsletter is usually sent out once a month (at the end of one month or the start of the following month) and you can unsubscribe any time...
Sign up below...!
Recent Articles
-
Willow Tree Symbolism and Celtic Willow Art
Apr 11, 25 05:43 AM
Explore willow tree symbolism and meaning - Celtic willow art and printed products... -
Wild Dog Rose Pattern & Products
Apr 07, 25 06:12 AM
Pretty dog rose pattern and products in a nostalgic heritage style recalling pretty hedgerows of flowers... -
British Robin Book Recommendations
Apr 04, 25 06:26 AM
My British Robin book reviews and recommendations - learn about Britain's favourite bird...
Follow me:
Share this page:

